A clean humidifier can make your home feel more comfortable, support easier breathing, and help protect furniture and musical instruments from overly dry air. But when a humidifier is not cleaned regularly, it can quickly turn into a source of musty odors, white dust, and even germs that are pushed into the air you breathe. The good news is that keeping your unit clean does not need to be complicated or time-consuming. With a simple weekly routine and a deeper monthly clean, you can keep your humidifier running safely and efficiently all season long.
On this page(click to collapse)
- Why Cleaning Your Humidifier Matters
- Safety First: Before You Start Cleaning
- Weekly Humidifier Cleaning Routine
- Monthly Deep Clean: Step-by-Step Checklist
- Daily Habits to Keep Your Humidifier Cleaner
- How Often Should You Clean Your Humidifier?
- Common Mistakes to Avoid When Cleaning a Humidifier
- How to Store Your Humidifier Between Seasons
- When to Replace Your Humidifier Instead of Cleaning
- Keeping Your Home Comfortable and Air Clean
- Related guides
This guide walks you through exactly how to clean a humidifier safely, including what to do every week, when to go beyond the basics, and how to avoid common mistakes that can damage the unit or spread contaminants. Use the checklists below as a quick reference so you can confidently maintain your humidifier without guesswork.
Why Cleaning Your Humidifier Matters
Humidifiers add moisture to the air, which can ease dry skin, scratchy throats, and static electricity. However, that same moisture also creates a perfect environment for mineral buildup and microbial growth if the unit is not cleaned regularly.
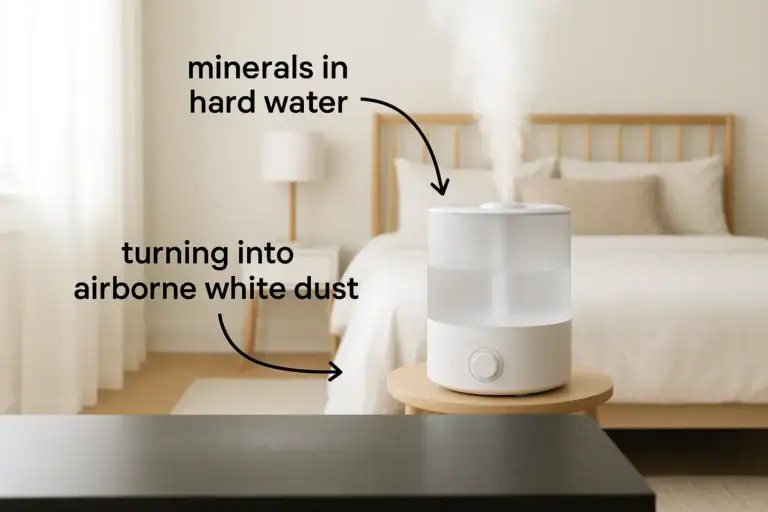
What Happens When You Skip Cleaning
- Mineral deposits: Hard water leaves behind a chalky or crusty residue that can clog parts and reduce mist output.
- Film and slime: Standing water in the tank and base can develop a slimy film over time.
- Odors: Stale water and residue can create a musty or sour smell when the humidifier runs.
- Reduced performance: Dirty filters and parts make the unit work harder and can shorten its lifespan.
Regular cleaning helps your humidifier work as intended while reducing the chance that unwanted particles are released into your indoor air.
Safety First: Before You Start Cleaning
Before you reach for any cleaning supplies, take a moment to prepare. A few simple safety steps protect both you and your humidifier.
Safety Checklist
- Unplug the humidifier from the wall outlet.
- Carry the unit to a sink, bathtub, or utility sink to avoid spills on flooring.
- Empty all remaining water from the tank and base.
- Review the user manual for any model-specific instructions or warnings.
- Open a window or turn on a fan if you are sensitive to cleaning solution odors.
- Wear gloves if you have sensitive skin or small cuts on your hands.
Once the unit is unplugged and emptied, you are ready to move on to your weekly cleaning routine.
Weekly Humidifier Cleaning Routine
A quick weekly clean keeps buildup under control and helps prevent odors. This routine works well for most portable cool mist and warm mist units used daily during the dry season.
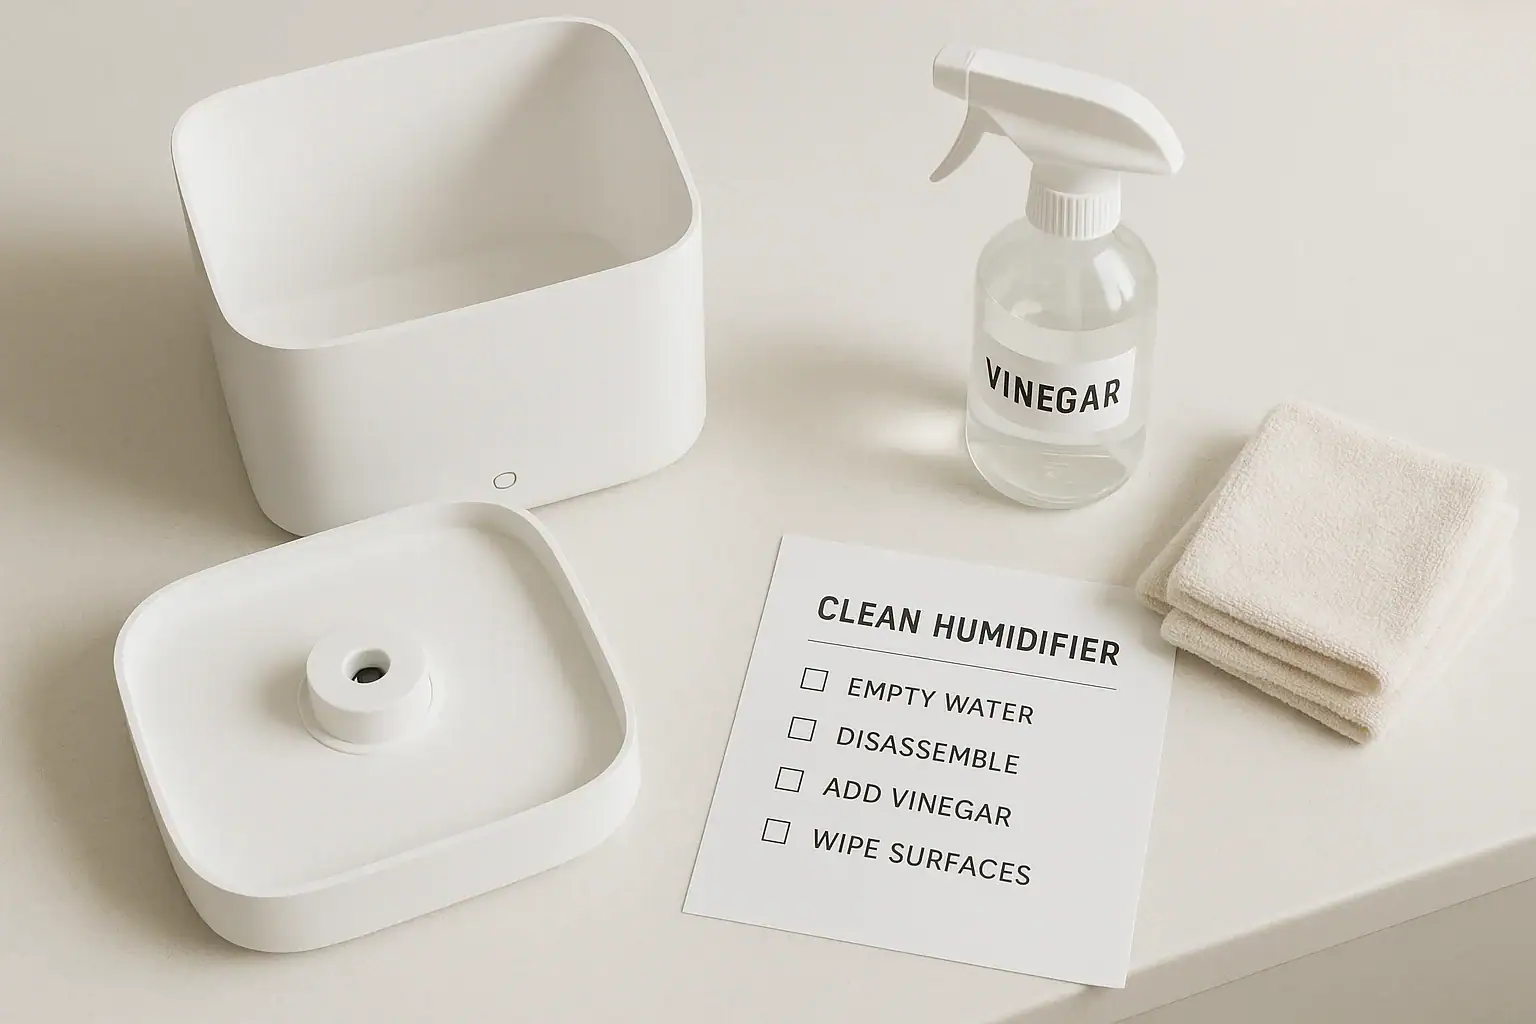
Supplies for Weekly Cleaning
- White distilled vinegar
- Mild unscented dish soap
- Soft sponge or cloth
- Soft-bristle brush or old toothbrush
- Clean towel or paper towels
- Fresh water (preferably distilled or filtered)
Weekly Cleaning Checklist
-
Turn off and unplug.
Always shut off the humidifier and unplug it before handling water or internal parts.
-
Disassemble removable parts.
Remove the water tank, lid, mist nozzle, and any detachable parts. Set electrical components aside so they do not get submerged.
-
Empty and rinse the tank.
Pour out any remaining water. Rinse the tank with warm water, swishing it around to loosen loose debris.
-
Clean the tank with mild soap.
Add a few drops of mild dish soap and fill partway with warm water. Use a soft brush or cloth to gently scrub the inside surfaces, especially corners and seams.
-
Rinse thoroughly.
Rinse the tank several times until there are no soap bubbles left. Soap residue can cause foam and interfere with mist output.
-
Wipe the base and exterior.
Use a damp cloth with a small amount of mild soap to wipe the base and exterior. Avoid getting water into any vents or electrical openings.
-
Quick vinegar soak for mineral spots.
If you see light white or chalky spots, apply a small amount of white vinegar to a cloth or brush and gently scrub the area. Rinse or wipe with clean water afterward.
-
Dry all parts.
Use a clean towel or paper towels to dry the tank, lid, and accessories. Let parts air-dry for a few minutes if possible.
-
Refill with clean water.
Refill the tank with fresh water. Distilled or filtered water can reduce mineral buildup and white dust.
-
Reassemble and restart.
Put all parts back together, place the tank on the base, plug in the unit, and turn it on.
Following this weekly checklist keeps everyday buildup from turning into a bigger cleaning project later.
Monthly Deep Clean: Step-by-Step Checklist
Even with a regular weekly routine, your humidifier benefits from a deeper clean about once a month during heavy use. The goal of a deep clean is to dissolve tougher mineral deposits and refresh areas that are harder to reach during quick cleanings.
Supplies for Deep Cleaning
- White distilled vinegar (enough to fill at least half the tank)
- Hydrogen peroxide or a humidifier-safe disinfecting solution (if recommended in your manual)
- Mild unscented dish soap
- Soft cloths and sponges
- Soft-bristle brush or bottle brush
- Cotton swabs for tight spots
- Clean water for rinsing
Deep Clean Checklist
-
Unplug and fully disassemble.
Turn off, unplug, and remove the tank, lid, mist nozzle, and any removable internal parts. Take off filters or cartridges if your model uses them.
-
Empty all water.
Pour out water from the tank and base. Tilt the base gently to remove any trapped water, being careful not to spill on electrical components.
-
Vinegar soak for the tank.
Fill the tank halfway with white vinegar and the rest with warm water. Swirl gently and let it sit for 20 to 30 minutes to dissolve mineral deposits.
-
Vinegar soak for the base (if allowed).
If your manual allows it, pour enough vinegar into the water reservoir area of the base to cover mineral deposits. Let it sit for 20 to 30 minutes. Do not submerge the entire base in liquid.
-
Scrub away residue.
After soaking, use a soft brush or cloth to scrub the inside of the tank and the reservoir area of the base. Focus on any white, chalky, or slimy areas.
-
Rinse thoroughly with clean water.
Rinse the tank and base several times with clean water to remove all vinegar. Pay attention to corners and seams where liquid can collect.
-
Disinfect if recommended.
If your manual allows disinfecting, fill the tank with a solution of clean water and a small amount of hydrogen peroxide or a humidifier-safe disinfectant. Let it sit for 15 to 20 minutes, then pour it out and rinse thoroughly.
-
Clean small parts and nozzles.
Soak removable nozzles, caps, and small parts in a bowl of warm water mixed with a little vinegar. Scrub with a soft brush or cotton swabs, then rinse well.
-
Check and replace filters or cartridges.
Inspect any filters, wicks, or cartridges. Rinse or replace them based on the manufacturer’s schedule. Disposable filters should be replaced, not scrubbed.
-
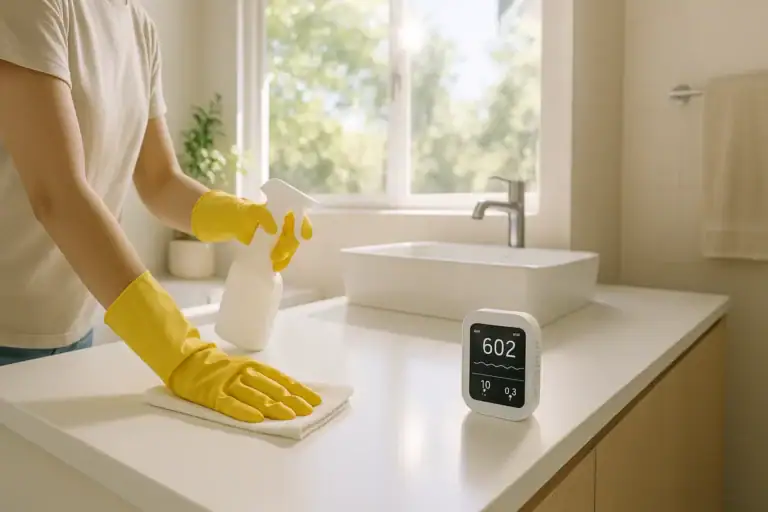
Wipe the exterior and control panel.
Use a slightly damp cloth to wipe the outside of the unit and the control panel. Avoid excess moisture around buttons and dials.
-
Dry completely.
Let all parts air-dry fully on a clean towel. This helps prevent new growth from forming in damp areas.
-
Reassemble and refill.
Once dry, reassemble the humidifier, fill with fresh water, and plug it back in.
Repeating this deep clean every four weeks during heavy use keeps your humidifier in better condition and supports cleaner indoor air.
Daily Habits to Keep Your Humidifier Cleaner
Small daily steps can greatly reduce how much scrubbing you need to do later. These habits only take a minute or two but make a noticeable difference.
Daily Maintenance Checklist
- Empty and refill the tank with fresh water before each use or at least once per day.
- Use distilled or filtered water when possible to limit mineral deposits and white dust.
- Wipe up any spills around the base to prevent moisture damage to nearby surfaces.
- Check for unusual noises, reduced mist, or odors that may signal the need for an extra cleaning.
- Turn off the humidifier if nearby surfaces feel damp or condensation forms on windows.
How Often Should You Clean Your Humidifier?
The right cleaning schedule depends on how often you use your humidifier, the type of water you use, and your home’s air quality. Use these general guidelines and adjust as needed.
Suggested Cleaning Schedule
- Daily: Empty, rinse, and refill the tank with fresh water.
- Weekly: Complete the full weekly cleaning checklist with mild soap and spot vinegar cleaning.
- Monthly: Perform the deep clean with vinegar soaking and disinfecting (if recommended).
- Seasonally: Before storing and before first use each season, complete a full deep clean.
If you notice visible buildup, slime, or odors, move up your cleaning schedule instead of waiting for the next planned date.
Common Mistakes to Avoid When Cleaning a Humidifier
A few well-intentioned cleaning habits can actually damage your humidifier or leave behind residue you do not want in your air. Avoid these common pitfalls.
Humidifier Cleaning Mistakes
- Using harsh chemicals: Strong cleaners, bleach, or scented products can damage plastic parts and leave fumes or residue. Only use solutions approved in your manual.
- Submerging the base: The base usually contains electrical components that should never be fully submerged in water or any liquid.
- Scrubbing with abrasive tools: Steel wool or rough scrub pads can scratch surfaces, making them harder to clean and more likely to hold residue.
- Skipping rinsing: Failing to rinse out vinegar, soap, or disinfectant completely can lead to odors or irritation when the humidifier runs.
- Leaving water in the tank for days: Standing water encourages film and microbial growth. Empty the tank when you are not using the unit.
- Ignoring the manual: Each model is a little different. Always follow the manufacturer’s instructions for cleaning and filter replacement.
How to Store Your Humidifier Between Seasons
Proper storage is the final step in keeping your humidifier clean and ready for the next dry season. Putting it away wet or dirty can lead to stubborn buildup and odors that are hard to remove later.
Off-Season Storage Checklist
- Perform a full deep clean. Complete the monthly deep clean steps before you store the unit.
- Dry completely. Allow all parts, including the tank and base, to air-dry for at least 24 hours.
- Remove and discard disposable filters. Replace them with fresh ones when you set up the humidifier again.
- Store with the tank open. Leave tank caps or lids off so any remaining moisture can evaporate.
- Use a clean, dry storage area. Choose a cool, dry closet or shelf away from direct sunlight and dust.
- Keep the manual nearby. Store the user guide with the humidifier so you can easily review cleaning instructions next season.
When to Replace Your Humidifier Instead of Cleaning
Regular cleaning can extend the life of your humidifier, but no appliance lasts forever. In some cases, replacement is safer and more practical than continued cleaning.
Signs It May Be Time for a New Unit
- Cracks in the tank or base that cause leaks
- Persistent odors that remain even after deep cleaning
- Heavy mineral buildup that will not dissolve with soaking
- Electrical issues, flickering lights, or unusual noises
- Parts or filters that are no longer available from the manufacturer
If you are unsure whether your humidifier is still safe to use, consider contacting the manufacturer or a qualified appliance professional for guidance.
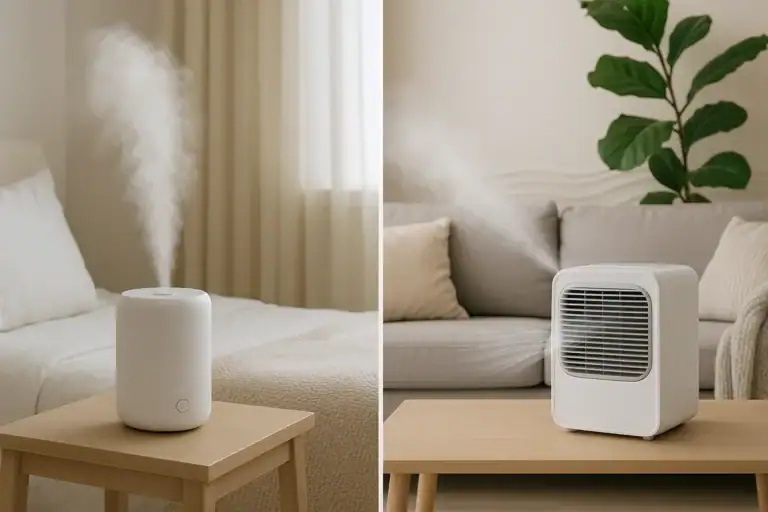
Keeping Your Home Comfortable and Air Clean
Humidifiers can be a helpful tool for improving indoor comfort, especially during dry winter months or in air-conditioned homes. The key is to balance added moisture with regular maintenance so that the air you breathe stays as clean as possible.
By following the weekly routine and deep clean checklist in this guide, you can maintain your humidifier safely and confidently. Adjust the schedule to match how often you use your unit and the type of water in your area, and keep an eye out for any signs that it needs extra attention. With a little consistency, your humidifier can support a more comfortable home environment season after season.
For more tips on maintaining a comfortable indoor atmosphere, including air quality and climate control, explore additional guides in the air and comfort section at Signature Home Guide.
Related posts
Browse this topic →
Smoke and Wildfire Season: Sealing, Filtration, and Safe Ventilation at Home
Why VOC Readings Spike After Cleaning (And What To Do About It)

Air Quality Monitor Basics: PM2.5, VOC, CO2—What Numbers To Trust

CO2 Levels at Home: What’s Normal and How to Improve Ventilation

How to Use Exhaust Fans Correctly for Better Bathroom and Kitchen Airflow

Mold in the Bathroom: A Practical Humidity Control Checklist
Keep reading
About this site
Signature Home Guide publishes practical, independent home guides. We aim to be clear, helpful, and transparent.
Affiliate disclosure
As an Amazon Associate, we earn from qualifying purchases. Some links on this site may be affiliate links. If you buy through these links, we may earn a small commission at no extra cost to you. This helps support our content. Learn more.