Organizing cleaning supplies is about more than a tidy cabinet. A smart system helps you clean faster, avoid duplicate purchases, and protect your family from spills, fumes, and accidental exposure. With a little planning, you can set up cleaning stations that make daily chores easier while keeping hazardous products out of reach of children and pets. This guide walks you through how to organize cleaning supplies for speed and safety, from decluttering and sorting to safe storage, labeling, and creating grab-and-go kits. You do not need special equipment or a huge space; you just need a clear plan and a few simple containers used thoughtfully.
On this page(click to collapse)
- Step 1: Declutter and Take Inventory
- Step 2: Group Supplies by Task and Area
- Step 3: Prioritize Safety in Every Storage Decision
- Step 4: Choose the Right Storage Solutions
- Step 5: Label Clearly for Faster Cleaning
- Step 6: Create Quick-Grab Cleaning Kits
- Step 7: Organize Cleaning Tools for Easy Access
- Step 8: Make Your System Family-Friendly
- Step 9: Maintain and Review Your System
- Bringing It All Together
- Related guides
Step 1: Declutter and Take Inventory
Before you organize anything, you need to know what you have. Many homes accumulate half-used bottles, dried-up wipes, and multiple products that all do the same job. This clutter slows you down and can create safety risks if products leak or mix.
Gather All Cleaning Supplies in One Place
Start by collecting every cleaning product and tool from around your home:
- Under-sink cabinets in the kitchen and bathrooms
- Laundry room shelves and closets
- Utility closets, basements, and garages
- Random spots like the pantry, mudroom, or linen closet
Spread everything out on a table or the floor so you can see it clearly. This step alone often reveals duplicates and long-forgotten products.
Sort Into Keep, Use Up, and Discard
Make three categories as you go through each item:
- Keep: Products you use regularly, that are still in good condition, and that fit your current cleaning routine.
- Use up: Items you want to finish but will not repurchase, or partial bottles of products that can be combined safely if they are the exact same formula.
- Discard: Expired, leaking, damaged, or unknown products with missing labels.
Never mix different types of cleaners to save space, especially anything with bleach or ammonia. Mixing the wrong chemicals can create dangerous fumes. If you are unsure, keep them separate.
Dispose of Unwanted Products Safely
Follow local guidelines for disposing of household chemicals. Many communities have hazardous waste collection days or drop-off centers. Avoid pouring harsh chemicals down the drain unless the label clearly states it is safe to do so. Wipe off any residue on bottles before recycling or discarding them.
Step 2: Group Supplies by Task and Area
Once you have decluttered, the next step is to group products in ways that support faster cleaning. Instead of storing by size or container type, organize by how and where you use each item.
Create Task-Based Categories
Sort your supplies into logical task groups such as:
- Kitchen cleaning: Degreasers, dish soap, surface sprays, stove and oven cleaners, microfiber cloths, scrub brushes, and sponges.
- Bathroom cleaning: Toilet bowl cleaner, tub and tile products, glass cleaner, grout tools, and disinfecting sprays or wipes.
- Floor care: Floor cleaner, mop solution, dusting spray, dustpan, and extra mop heads or pads.
- Laundry and fabric care: Detergent, stain removers, fabric fresheners, dryer balls, and mesh bags.
- Dusting and general surfaces: All-purpose cleaner, dusting cloths, polishing cloths, and extendable dusters.
- Specialty items: Stainless steel cleaner, wood conditioner, stone-safe cleaners, and seasonal products.
Grouping by task makes it easy to grab everything you need for one job without hunting through multiple cabinets.
Set Up Area-Based Zones
Next, think about where you actually use these products. For speed, keep most supplies as close as safely possible to the area they serve:
- Kitchen zone: Under the sink or in a nearby pantry cabinet for dish, counter, and appliance cleaners.
- Bathroom zones: A small caddy or bin in each bathroom, or a central bathroom cleaning caddy stored in a hallway closet.
- Floor zone: A utility closet or corner of the laundry room for mops, brooms, vacuum attachments, and floor cleaners.
- Laundry zone: Shelving or cabinets above or beside the washer and dryer.
By combining task-based categories with area-based zones, you reduce walking back and forth and make it easier for other household members to help.
Step 3: Prioritize Safety in Every Storage Decision
Speed is important, but safety should always come first. Many cleaning products contain ingredients that can irritate skin, eyes, and lungs or cause harm if swallowed. A safe storage plan protects children, pets, and adults alike.
Keep Hazardous Products Out of Reach
Identify which products need extra caution. These often include:
- Drain openers and heavy-duty degreasers
- Oven and grill cleaners
- Concentrated disinfectants
- Toilet bowl cleaners and descalers
- Bleach and bleach-based products
Store these items:
- In high cabinets that children cannot reach
- Behind child-safety latches on lower cabinets
- In a locked utility closet if possible
Separate Incompatible Products
To reduce the risk of dangerous chemical reactions, keep certain products apart:
- Store bleach products on a different shelf from ammonia-based cleaners.
- Keep strong acids and strong bases in separate bins.
- Avoid stacking heavy bottles above eye level where they could fall.
Always keep original labels intact so you can see warnings, directions, and first-aid information.
Protect Indoor Air and Surfaces
Some products release strong fumes or can damage surfaces if they leak. For added safety:
- Place bottles upright in shallow bins or trays to catch drips.
- Avoid storing harsh chemicals directly above food, dishes, or linens.
- Keep the most volatile products in a well-ventilated area away from heat sources.
Step 4: Choose the Right Storage Solutions
You do not need expensive organizers to set up an efficient system. Focus on containers and tools that make it easy to see, reach, and safely move your supplies.
Use Bins, Baskets, and Trays
Group items in sturdy containers that are easy to pull out and return:
- Open bins: Ideal for everyday sprays and cloths you reach for often.
- Handled caddies: Perfect for bathroom or whole-house cleaning kits you carry from room to room.
- Shallow trays: Great for under-sink areas to catch leaks and keep bottles upright.
- Small baskets: Useful for grouping sponges, brushes, gloves, and small tools.
Make Use of Vertical Space
Maximize tight areas by going up, not just out:
- Install small shelves or stackable risers in under-sink cabinets.
- Use over-the-door organizers for spray bottles, cloths, and gloves.
- Hang hooks for brooms, mops, and dusters to keep floors clear.
Keep Frequently Used Items Front and Center
For speed, your most-used products should be the easiest to access:
- Place daily-use sprays and cloths at the front of cabinets or on the lowest shelves.
- Reserve high or deep shelves for backup supplies and rarely used specialty products.
- Avoid stacking items in front of each other whenever possible; use narrow bins instead of deep piles.
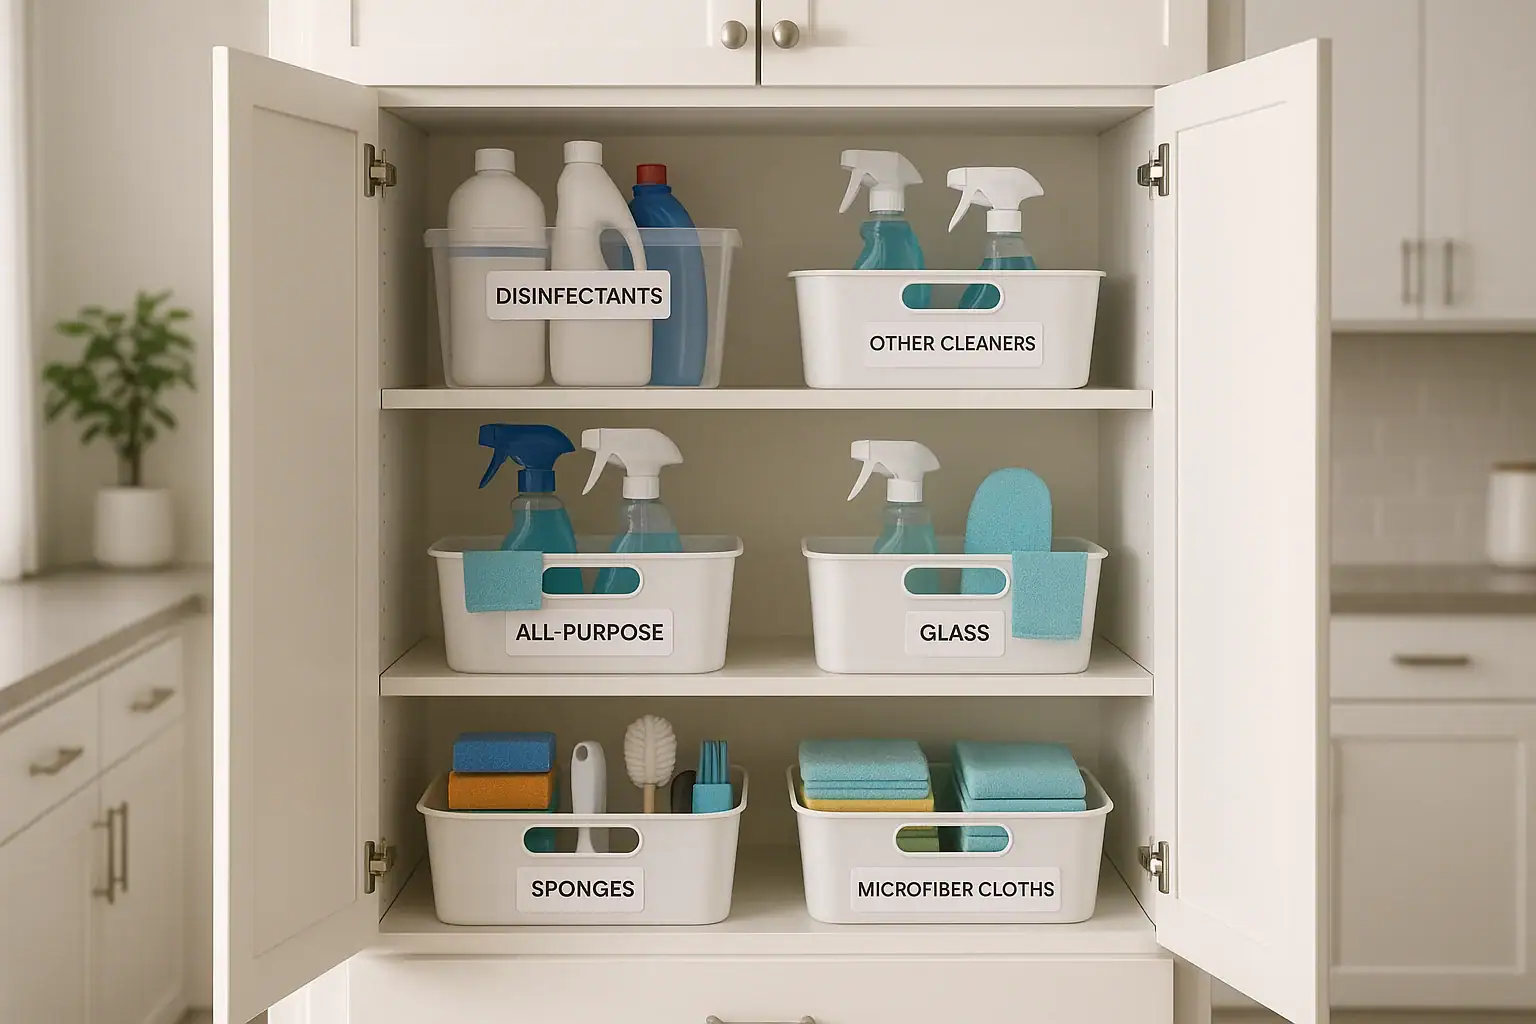
Step 5: Label Clearly for Faster Cleaning
Labels are a simple way to speed up cleaning and keep your system consistent. Clear labeling also improves safety by reminding everyone in the home what belongs where.
Label Bins, Shelves, and Caddies
Use printed labels, tape, or tags to mark:
- “Kitchen Cleaning” for the bin under the kitchen sink
- “Bathroom Cleaning” for a hallway caddy or bathroom basket
- “Floor Care” for the shelf with mop solutions and floor sprays
- “Laundry” for stain removers and fabric products
- “Hazardous – Adults Only” for high shelves with strong chemicals
Label Refillable Bottles and Sprays
If you transfer products to reusable bottles, always label them with:
- The product name or purpose (for example, “Glass Cleaner” or “Floor Solution”)
- Key warnings such as “Do not mix with bleach”
- The date you filled the bottle, if helpful
Never leave unlabeled bottles in shared spaces. In an emergency, you want to know exactly what substance is involved.
Step 6: Create Quick-Grab Cleaning Kits
Cleaning kits are one of the best ways to combine speed and safety. By pre-packing the tools and products you need, you can start and finish tasks faster without dragging your entire collection around the house.
Bathroom Cleaning Caddy
Assemble a caddy dedicated to bathrooms only. Include:
- All-purpose bathroom cleaner or tub and tile spray
- Glass cleaner for mirrors and shower doors
- Toilet bowl cleaner and a toilet brush (stored separately for hygiene)
- Microfiber cloths and scrub pads
- Disposable gloves if you prefer them
Store this caddy in a high hallway closet or locked cabinet if you have young children.
Kitchen Touch-Up Kit
For quick daily cleanups, keep a small kit in or near the kitchen:
- Countertop spray safe for your surfaces
- Dish soap and a sponge or brush
- Microfiber cloths for wiping and drying
- Small brush for crevices and sink edges
Limit this kit to mild products that are safe to keep within easier reach, especially if it is stored in a lower cabinet.
Whole-House Speed Cleaning Kit
For weekly cleaning sessions, a portable whole-house kit can save time:
- All-purpose cleaner suitable for most hard surfaces
- Glass cleaner
- Dusting cloths and a small duster
- Disinfecting wipes or spray for high-touch areas
- Trash bags and a lint roller
Adjust the contents based on your home’s surfaces and any sensitivities or allergies.
Step 7: Organize Cleaning Tools for Easy Access
Liquids and sprays are only part of the picture. Brooms, mops, vacuums, and brushes also need an organized home to keep your system efficient.
Designate a Cleaning Closet or Corner
If possible, choose one central spot for large tools:
- Hang brooms, mops, and dusters on wall hooks or a rail.
- Store the vacuum and attachments together so hoses and tools do not get lost.
- Keep a small bin for extra mop pads, vacuum bags, and filters.
Separate Wet and Dry Tools
To prevent mildew and odors:
- Allow mops and scrub brushes to dry fully before placing them in closed cabinets.
- Use a ventilated holder or hook for wet tools.
- Wash and dry reusable cloths promptly after heavy use.
Step 8: Make Your System Family-Friendly
An organized system works best when everyone in the household can understand and follow it. Clear rules and simple setups help maintain both speed and safety over time.
Assign Safe Tasks and Supplies
If children or teens help with chores, set clear boundaries:
- Reserve strong chemicals for adults only.
- Provide mild, child-safe cleaners for supervised tasks.
- Store kid-approved supplies on lower shelves and hazardous items up high or locked away.
Post Simple Guidelines
Consider posting a small reminder list inside a closet or cabinet door:
- Which caddy to use for each task
- Where to return items after use
- Basic safety reminders, such as “Never mix cleaners” and “Wear gloves for strong products”
Step 9: Maintain and Review Your System
Even the best organization system needs occasional maintenance. A few minutes each month keeps your cleaning supplies under control and your home safer.
Do a Quick Monthly Check
Once a month, take a brief tour of your cleaning zones:
- Wipe up any leaks or residue in bins and trays.
- Check for nearly empty bottles and decide whether to replace them.
- Remove products you no longer use and plan safe disposal.
- Refresh labels that have peeled or faded.
Adjust as Your Home and Needs Change
Your cleaning routine may change with seasons, renovations, or family size. Revisit your setup when:
- You add new surfaces or rooms that need special care.
- Children grow older and can handle more responsibility.
- You simplify your product choices and no longer need as many categories.
Think of your cleaning organization as a flexible system rather than a one-time project.
Bringing It All Together
Organizing cleaning supplies for speed and safety is about thoughtful placement, clear categories, and simple habits. Start by decluttering and grouping products by task and area. Prioritize safety by storing hazardous items out of reach, separating incompatible chemicals, and protecting your indoor air. Use bins, caddies, and labels to make everything easy to see and grab. Create dedicated cleaning kits to move quickly from room to room, and give your tools a consistent home so they are always ready when you are.
With these steps, you can spend less time searching for supplies and more time getting your home clean and comfortable, all while keeping your household safer and more organized.
Related posts
Browse this topic →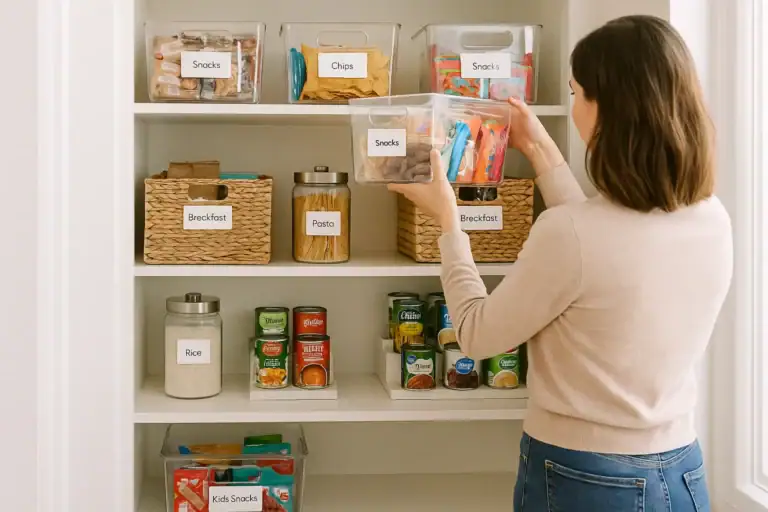
Pantry Organization Basics: Zones, Labels, and a Simple Maintenance Routine
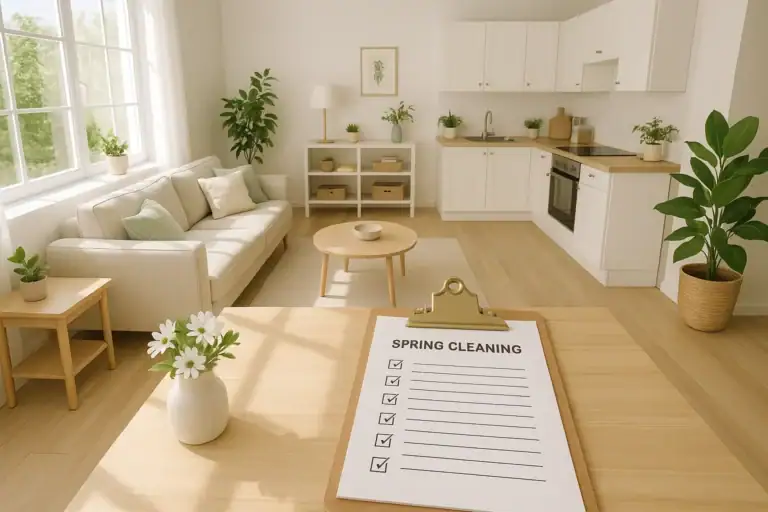
Spring Cleaning Checklist for the Whole Home (Printable Plan)
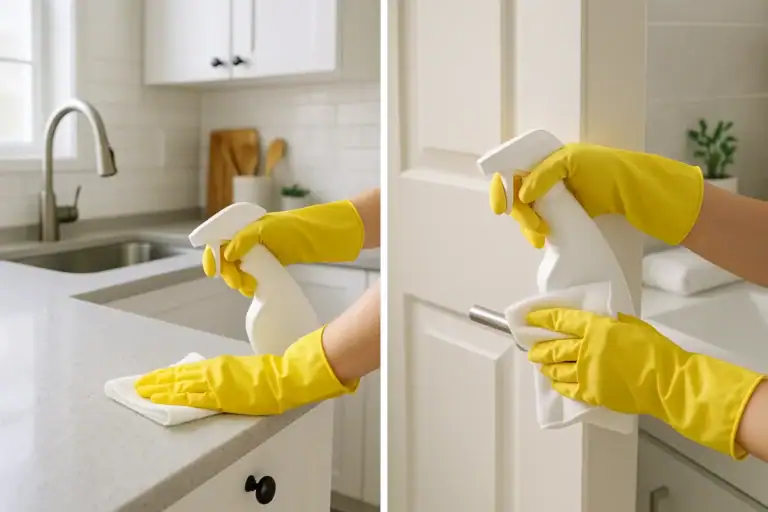
How to Disinfect Surfaces Safely: What Really Needs It and What Does Not
How to Clean Hardwood Floors Without Ruining the Finish
Best Way to Clean Laminate Floors Without Swelling or Haze
Vacuum vs Mop Order: The Most Efficient Floor Cleaning Routine Checklist
Keep reading
About this site
Signature Home Guide publishes practical, independent home guides. We aim to be clear, helpful, and transparent.
Affiliate disclosure
As an Amazon Associate, we earn from qualifying purchases. Some links on this site may be affiliate links. If you buy through these links, we may earn a small commission at no extra cost to you. This helps support our content. Learn more.