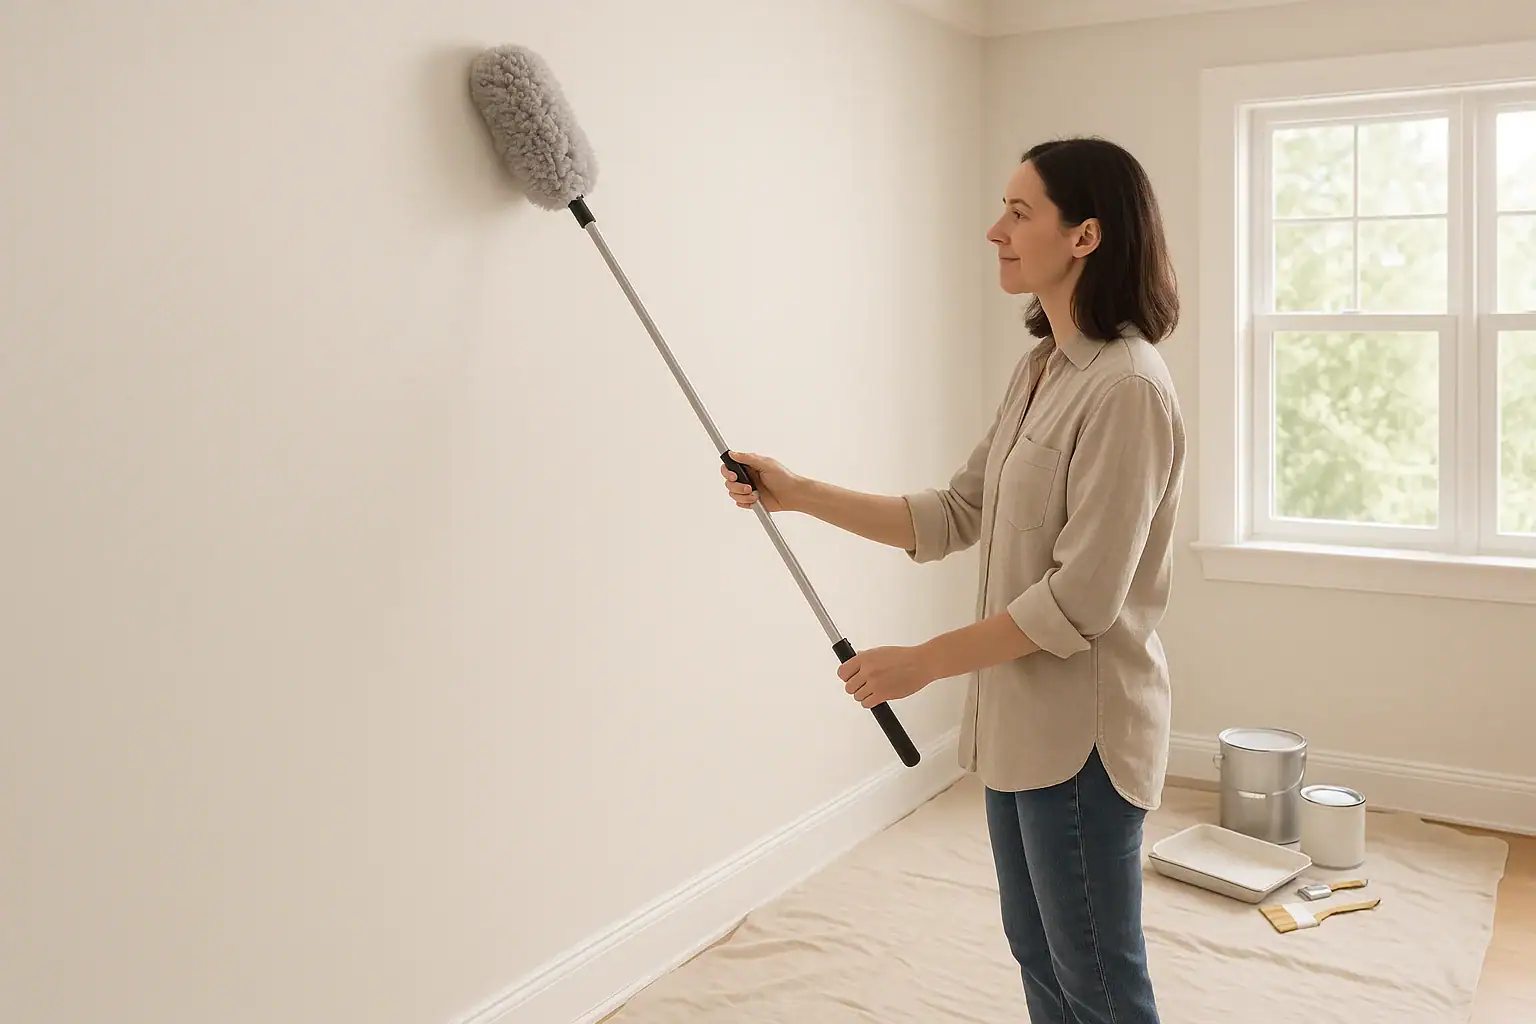
Preparing walls properly before painting is just as important as choosing the right color. One of the most overlooked steps is removing dust from walls. Dust, cobwebs, and fine debris can keep paint from sticking well, leave a rough texture, and even cause peeling or streaks later. With a little planning and the right tools, you can remove dust from walls quickly and safely so your paint job looks smooth, even, and long-lasting.
This guide walks you through how to remove dust from walls before painting, including what to do for different wall types, how to handle greasy or heavily soiled areas, and how to keep dust from coming back during your project. Whether you are painting a single room or your entire home, these steps will help you get clean, paint-ready walls with less mess and frustration.
Why Dust Removal Matters Before Painting
Skipping dust removal might seem like a time-saver, but it usually leads to problems later. Taking 20 to 30 minutes to clean walls can prevent hours of touch-ups and repairs.
Common problems caused by dusty walls
- Poor adhesion: Paint sticks to dust instead of the wall, making it easier to peel or chip.
- Rough texture: Dust particles get trapped in wet paint, leaving bumps and a sandpaper-like finish.
- Visible streaks: Dust can create streaks, spots, and uneven sheen once the paint dries.
- Shorter paint life: When paint does not bond well, it tends to wear out and show damage sooner.
Benefits of cleaning walls first
- Smoother, more professional-looking finish
- Better paint coverage with fewer coats
- Longer-lasting results and less peeling
- Cleaner work area with less airborne dust
Safety First: Protect Yourself and the Room
Before you start cleaning and dusting walls, take a few minutes to protect yourself and your space. Dust and cleaning solutions can irritate eyes, skin, and lungs if you are not prepared.
Personal protective gear
- Dust mask or respirator: Helps keep fine dust and particles out of your lungs.
- Safety glasses or goggles: Protects your eyes from falling dust and splashes.
- Gloves: Keeps your hands cleaner and protects against irritation from cleaning solutions.
- Old clothing: Wear clothes you do not mind getting dusty or splashed.
Protecting floors and furniture
- Move furniture away from the walls or to the center of the room.
- Cover furniture and floors with drop cloths, old sheets, or plastic sheeting.
- Remove wall hangings, shelves, and outlet covers where possible.
- Use painter's tape to protect trim or fixtures you cannot remove.
Tools and Supplies for Dust-Free Walls
You do not need specialized equipment to remove dust from walls before painting. Many basic cleaning tools will work well if used correctly.
Basic dust-removal tools
- Soft-bristle broom or long-handled duster
- Microfiber cloths or microfiber dusting wand
- Vacuum with a brush attachment
- Bucket and warm water
- Mild dish soap or gentle wall cleaner
- Large cellulose sponge or soft sponge mop
- Step stool or ladder for high areas
Optional but helpful items
- Drywall sanding sponge or sanding pole (for patched areas)
- Tack cloth or slightly damp microfiber cloth for final wipe-down
- Shop vacuum for heavy dust or renovation debris
- Fan or dehumidifier to help walls dry faster
Step 1: Dry Dusting Walls From Top to Bottom
Start with dry dusting before you introduce any moisture. This keeps dry dust from turning into muddy streaks on your walls.
How to dry dust walls effectively
- Start at the ceiling line: Use a long-handled duster, soft broom, or vacuum brush attachment to remove cobwebs and loose dust where the wall meets the ceiling.
- Work in sections: Divide each wall into vertical sections about 2 to 3 feet wide. This helps you stay organized and avoid missing spots.
- Use gentle strokes: Move the duster or broom from top to bottom with light pressure. Pressing too hard can push dust into the wall surface instead of lifting it away.
- Overlapping passes: Slightly overlap each pass so you do not leave narrow dusty strips between strokes.
- Pay attention to corners and trim: Dust tends to collect around baseboards, window frames, and door trim. Use a smaller brush or cloth if needed.
If you are using a vacuum, keep the suction at a moderate level and make sure the brush attachment is clean and soft so it does not scratch the wall.
Step 2: Decide Whether Your Walls Need Wet Cleaning
Not every wall needs to be washed with water before painting, but many do. The level of cleaning depends on the room and how dirty the walls are.
When simple dusting is enough
Dry dusting alone may be enough if:
- The room is low-traffic, such as a guest bedroom or home office.
- There are no visible stains, fingerprints, or greasy areas.
- The walls are relatively new and have not been exposed to smoke or heavy cooking.
When you should wash the walls
Plan on wet cleaning if:
- You are painting a kitchen, bathroom, entryway, or child's room.
- You see fingerprints, splatters, or grease marks.
- The walls feel sticky or look dull and grimy.
- There is residue from candles, smoke, or previous projects.
Step 3: Wet Cleaning Walls to Remove Fine Dust and Grime
Once loose dust is gone, a gentle wash will remove remaining fine dust, oils, and light stains. Always test your cleaning solution in a small, hidden area first to make sure it does not damage the surface.
Mixing a gentle cleaning solution
- Fill a bucket with warm, not hot, water.
- Add a small amount of mild dish soap, just enough to create a light suds. Too much soap can leave a film.
- Stir gently to mix. Avoid harsh chemicals unless a specific stain requires them.
How to wash walls without streaks
- Prepare two buckets: One with soapy water and one with clean rinse water. This keeps dirt from spreading back onto the wall.
- Use a soft sponge or cloth: Dip it in the soapy water, wring it out well so it is damp, not dripping.
- Work from bottom to top: To avoid dirty streaks running down over clean areas, start near the bottom and move upward in gentle, overlapping strokes.
- Rinse as you go: After washing a small section, rinse your sponge in the clean water, wring it out, and wipe the section again to remove soap residue.
- Change water often: When the water looks cloudy or dirty, replace it so you are not spreading grime.
- Dry the wall: Use a clean, dry microfiber cloth to lightly dry each section, especially in humid rooms.
Do not soak the walls. Too much water can damage drywall, loosen tape, or cause bubbling in existing paint layers.
Special Considerations for Different Wall Types
Different wall surfaces can handle different levels of moisture and scrubbing. Adjust your method based on what you are working with.
Painted drywall
- Use only light pressure when scrubbing to avoid scuffing the paint.
- Keep the sponge just damp, not wet, especially around seams and corners.
- If the existing paint is flat or matte, be extra gentle, as it can mark more easily.
Textured walls
- Start with a vacuum brush or soft broom to remove dust caught in grooves.
- Use a soft-bristle brush with your cleaning solution to reach into the texture lightly.
- Rinse carefully so dirty water does not settle into low spots.
Paneling or wood surfaces
- Dust thoroughly with a microfiber cloth or vacuum brush.
- Use a very mild soap solution and wring out your cloth well to avoid swelling the wood.
- Wipe in the direction of the grain and dry immediately with a clean towel.
Step 4: Cleaning After Sanding or Patching
If you have patched holes, smoothed rough areas, or sanded glossy paint, there will be fine white dust that needs extra attention. This dust can seriously affect how well your new paint adheres.
How to remove sanding dust
- Vacuum first: Use a vacuum with a brush attachment directly on the patched areas and surrounding wall.
- Wipe with a damp cloth: Follow up with a slightly damp microfiber cloth to pick up remaining fine dust.
- Use a tack cloth if needed: For detailed areas or trim, a tack cloth can help grab stubborn dust particles.
- Inspect in good light: Shine a light across the wall at an angle to spot any leftover dust or rough spots.
Do not skip this step. Dust from sanding is very light and can float onto nearby surfaces, so check nearby walls, baseboards, and window sills as well.
Step 5: Let Walls Dry Completely Before Painting
Even if the walls feel dry to the touch after washing, there may still be moisture in the surface. Painting too soon can trap this moisture and lead to problems.
How long to wait
- In normal conditions, allow at least several hours for walls to dry after washing.
- In humid climates or bathrooms, consider waiting overnight.
- Use fans or open windows to improve air circulation and speed up drying.
How to check for dryness
- Run your hand over the wall. It should feel completely dry and not cool or damp.
- Look for any darker patches that may indicate lingering moisture.
- If in doubt, give it more time. It is better to wait than to risk peeling or bubbling later.
Final Dust Check Before You Start Painting
After the walls are dry, do one more quick check for dust. It is easy for new dust to settle while you are gathering supplies or taping edges.
Quick pre-paint checklist
- Lightly wipe walls with a clean, dry microfiber cloth, especially near baseboards and corners.
- Check the tops of door frames, window sills, and trim for dust that could fall onto fresh paint.
- Vacuum or sweep the floor to reduce dust that might be kicked up while you paint.
- Make sure your paint tools and trays are clean and dust-free.
Taking a few extra minutes for this final pass can make a noticeable difference in the smoothness of your finished walls.
Tips to Keep Dust Down During and After Painting
Once your walls are clean and ready, it helps to keep dust to a minimum while you paint and as the paint cures.
During painting
- Keep windows closed on very windy days to avoid blowing dust inside.
- Avoid sanding or other dusty projects in nearby rooms while paint is drying.
- Walk carefully around the room so you do not kick up dust from the floor.
After painting
- Allow paint to dry fully before heavy cleaning or moving furniture back against the walls.
- Use a soft duster or microfiber cloth for routine dusting to protect the new finish.
- Address any new scuffs or marks gently to avoid damaging fresh paint.
Summary: Key Steps to Remove Dust From Walls Before Painting
Preparing walls properly does not have to be complicated, but it should be thorough. Here is a quick recap of how to remove dust from walls before painting:
- Protect yourself, your floors, and your furniture before you start.
- Dry dust walls from top to bottom using a duster, broom, or vacuum.
- Decide whether your walls need a full wash based on how dirty they are.
- Use a mild cleaning solution and a damp sponge to remove fine dust and grime.
- Give special attention to patched or sanded areas to remove fine drywall dust.
- Let walls dry completely before painting, and do a final dust check.
With these steps, you can create a clean, smooth surface that helps your paint go on evenly and last longer. A little extra time spent on dust removal now will pay off every time you walk into your freshly painted room.
If you are planning more home projects, consider organizing your cleaning supplies and painting tools in one place so you are always ready for the next room on your list.
 How to Clean Grout Without Damaging Your Tile: A Safe Step-by-Step Guide
 How to Clean Blinds Without Removing Them: A Simple Step-by-Step Guide
 How to Clean Baseboards Quickly Without Spreading Dust Everywhere