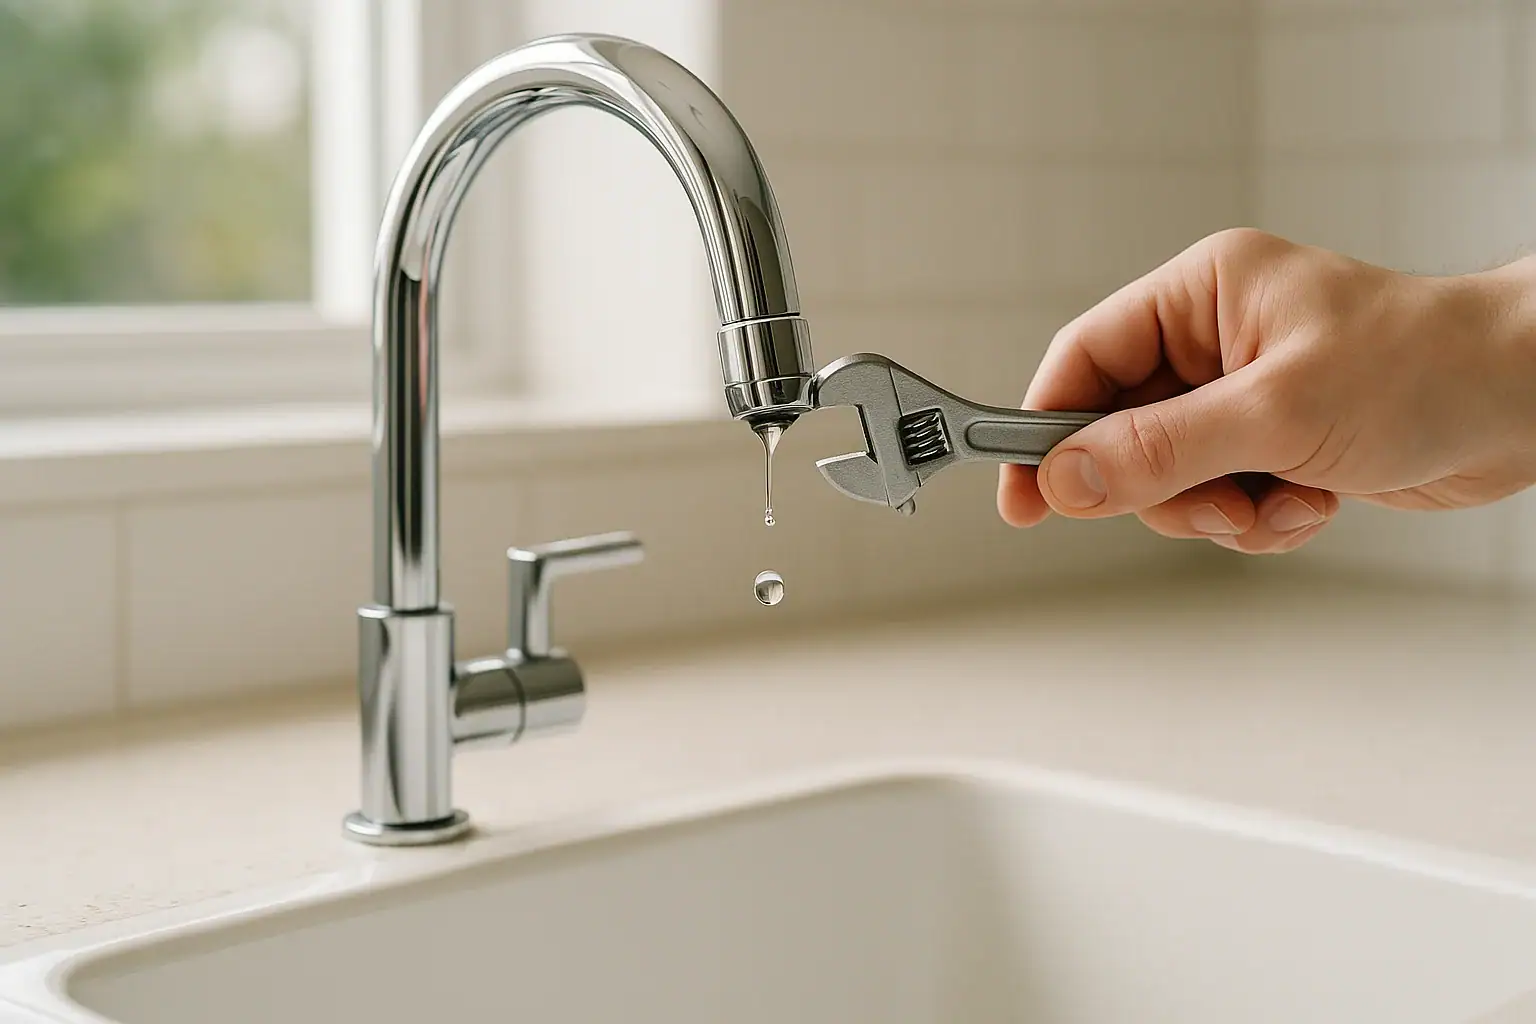
A dripping faucet can be more than a minor annoyance. That steady drip can waste gallons of water each day, raise your utility bills, and stain sinks and fixtures over time. The good news is that many faucet leaks are simple enough for a homeowner to diagnose and fix with basic tools and a little patience. Understanding how your faucet works, what typically goes wrong, and how to approach repairs safely can help you stop the drip before it turns into a bigger problem. This guide walks you through common causes, step-by-step fixes for different faucet types, and tips for preventing future leaks so your kitchen or bathroom can stay quiet, efficient, and dry.
On this page(click to collapse)
- Why Your Faucet Is Dripping
- Know Your Faucet Type Before You Start
- Safety First: Prepare Before You Repair
- How to Fix a Dripping Compression Faucet
- How to Fix a Dripping Cartridge Faucet
- How to Fix a Dripping Ball or Disc Faucet
- When the Faucet Drips from the Base or Handle
- How to Deal with Hard Water and Mineral Buildup
- When to Call a Professional Plumber
- Preventing Future Faucet Drips
- Related guides
Why Your Faucet Is Dripping
Most dripping faucets come down to worn parts, mineral buildup, or installation issues. Before you can fix the problem, it helps to know what might be happening inside the faucet body.
Common Causes of a Dripping Faucet
- Worn washers or seats: Compression faucets use rubber or nylon washers that press against a metal valve seat. Over time, the washer hardens, cracks, or wears down, allowing water to seep through.
- Damaged O-rings: Many faucets use O-rings around the stem or cartridge to create a watertight seal. A cracked or flattened O-ring often causes leaks around the handle or a slow drip from the spout.
- Cartridge wear: Cartridge faucets rely on a plastic or ceramic cartridge to control water flow. Internal wear, debris, or cracks can cause water to leak even when the handle is off.
- Ceramic disc issues: Disc faucets use two ceramic discs that slide over each other. If debris gets between the discs or the seals wear out, the faucet can drip or feel stiff when you turn it.
- Loose parts: Screws, nuts, and mounting hardware can loosen over time from regular use, causing small gaps where water escapes.
- High water pressure: Excessive pressure can force water past seals and washers, especially at night when neighborhood demand is low and pressure spikes.
- Mineral buildup: Hard water deposits can prevent internal parts from sealing properly, leading to drips and reduced water flow.
Identifying which of these issues you are dealing with will guide your repair approach and help you decide whether to attempt a do-it-yourself fix or call a professional.
Know Your Faucet Type Before You Start
Different faucet designs use different internal parts, so the fix for a bathroom sink may not match the fix for a kitchen faucet. Take a moment to identify your faucet type before you take anything apart.
Four Main Faucet Types
- Compression faucet: Has separate hot and cold handles that you turn clockwise to shut off. You will usually feel the handle tighten as you close it. These use rubber washers and are common in older homes or utility sinks.
- Cartridge faucet: Can have one or two handles. The handle moves smoothly up and down or side to side without tightening at the end. Inside is a replaceable cartridge that controls water flow and temperature.
- Ball faucet: Usually a single-handle design, often found in kitchen sinks. The handle moves in multiple directions to control temperature and flow, using a rotating ball and internal springs and seals.
- Disc faucet: Typically a single, wide handle that moves up and down and side to side. Inside are two ceramic discs that align to let water through or block it.
If you are unsure, search for a simple diagram of faucet types and compare it to yours, or look under the sink for any labeling. Knowing the type will help you buy the right replacement parts and follow the correct repair steps.
Safety First: Prepare Before You Repair
A little preparation will make your faucet repair smoother and help you avoid accidental water damage.
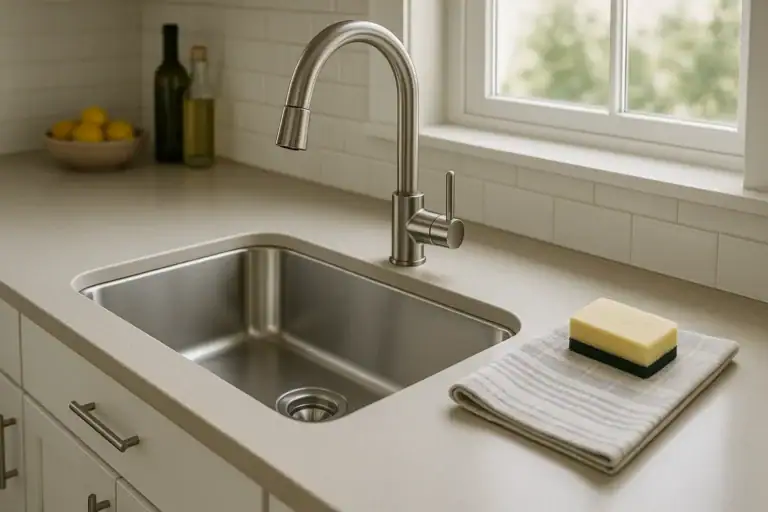
Turn Off the Water Supply
- Look under the sink for two small shutoff valves (one for hot, one for cold).
- Turn each valve clockwise until it stops. Do not force it; if it is stuck, use a cloth and adjustable wrench gently.
- Open the faucet to confirm the water is off. A small amount of water may drain out, but it should stop quickly.
Gather Basic Tools and Supplies
- Adjustable wrench
- Phillips and flathead screwdrivers
- Allen (hex) wrenches for some handles
- Needle-nose pliers
- Replacement washers, O-rings, or cartridge (bring the old part to the store for a match)
- Plumber’s grease (silicone-based)
- White vinegar and a small brush or cloth for cleaning mineral deposits
- Towel or small bucket to catch water
Plug the sink drain with a stopper or cloth so you do not lose small screws or parts while working.
How to Fix a Dripping Compression Faucet
Compression faucets usually drip because of worn washers or valve seats. Fortunately, these parts are inexpensive and relatively easy to replace.
Step-by-Step: Replace the Washer
- Remove the handle cap. Pry off the decorative cap on top of the handle with a flathead screwdriver to reveal the screw underneath.
- Unscrew the handle. Use a screwdriver to remove the screw, then lift the handle off. You may need to wiggle it gently if it is stuck.
- Remove the stem. Use an adjustable wrench to loosen the packing nut under the handle, then pull out the stem assembly.
- Inspect the washer. At the bottom of the stem, you will see a rubber washer held in place by a small screw. If the washer is cracked, hardened, or worn, it needs replacing.
- Replace the washer and O-ring. Unscrew the old washer, install a matching new one, and replace any O-rings on the stem. Apply a thin layer of plumber’s grease to the new parts.
- Check the valve seat. Look inside the faucet body with a flashlight. If the metal seat is pitted or rough, the new washer may wear out quickly. Some seats can be removed with a special tool; others may require a professional to resurface or replace.
- Reassemble the faucet. Insert the stem back into the faucet, tighten the packing nut, reinstall the handle, and replace the decorative cap.
- Turn the water back on. Slowly open the shutoff valves and test the faucet. Turn it off firmly but not excessively tight.
If the faucet still drips after replacing washers and O-rings, the valve seat may be too damaged, or there may be a deeper issue that needs professional attention.
How to Fix a Dripping Cartridge Faucet
Cartridge faucets often leak because the cartridge seals wear out or debris interferes with the internal parts. Replacing the cartridge is usually the best long-term fix.
Step-by-Step: Replace the Cartridge
- Remove the handle. Look for a small set screw behind or under the handle. It may be hidden under a decorative plug. Use the appropriate screwdriver or hex wrench to loosen it, then pull the handle off.
- Take off any trim pieces. Remove decorative collars or retaining clips that cover the cartridge. Keep track of the order in which you remove them.
- Remove the retaining nut or clip. Some cartridges are held in place by a threaded nut; others use a metal clip. Use pliers or a screwdriver to remove this piece carefully.
- Pull out the cartridge. Grasp the top of the cartridge with pliers and pull straight up. Rock it gently if it is stuck, but avoid twisting too hard to prevent damage.
- Match the cartridge. Take the old cartridge to the hardware store to find an exact replacement. Even small differences can prevent proper sealing.
- Clean the faucet body. Before installing the new cartridge, clean inside the faucet with a cloth and white vinegar to remove mineral deposits. Rinse and dry thoroughly.
- Install the new cartridge. Align the new cartridge with the slots in the faucet body and press it firmly into place. Make sure any tabs or alignment marks match the original orientation.
- Reinstall the retaining nut or clip. Tighten the nut or snap the clip back in place, being careful not to overtighten.
- Reassemble the handle. Replace any trim pieces, slide the handle back on, and tighten the set screw.
- Test the faucet. Turn the water supply back on slowly and check for leaks. Move the handle through its full range to ensure smooth operation.
If the faucet still drips, double-check that the cartridge is fully seated and oriented correctly. Persistent leaks may indicate damage to the faucet body or high water pressure in the home.
How to Fix a Dripping Ball or Disc Faucet
Ball and disc faucets are a bit more complex, but many leaks can still be resolved with a repair kit and careful reassembly.
Ball Faucet Quick Fix
Ball faucets use springs and rubber seats that can wear out. A repair kit usually includes new springs, seats, and seals.
- Remove the handle by loosening the set screw and lifting it off.
- Take off the cap and collar to expose the ball and cam assembly.
- Lift out the ball, springs, and rubber seats with pliers.
- Install new springs and seats from the repair kit, using a small amount of plumber’s grease.
- Reinstall the ball, ensuring the alignment matches the original position.
- Reassemble the cap, collar, and handle, then test for leaks.
Disc Faucet Quick Fix
Disc faucets rely on ceramic discs and rubber seals. When they leak, the seals are often the culprit.
- Remove the handle and decorative cover to access the disc cartridge.
- Unscrew and lift out the disc assembly carefully.
- Inspect and replace any rubber seals or gaskets at the bottom of the assembly.
- Clean mineral deposits from the discs and faucet body with vinegar and a soft cloth.
- Reassemble the faucet and test. If it still leaks, you may need a full disc cartridge replacement.
Because ball and disc faucets have more small parts, take photos during disassembly so you can refer to them when putting everything back together.
When the Faucet Drips from the Base or Handle
Not all leaks show up as a drip from the spout. Sometimes water pools around the base of the faucet or drips from under the handle. These leaks usually point to worn O-rings or loose mounting hardware.
Fixing Leaks Around the Handle
- Turn off the water supply and remove the handle.
- Look for O-rings around the stem or cartridge and inspect for cracks or flattening.
- Replace damaged O-rings with matching sizes and apply plumber’s grease.
- Reassemble the faucet and test for leaks.
Fixing Leaks at the Base
- Check under the sink to see if the mounting nuts that hold the faucet to the sink deck are loose.
- Tighten the nuts gently with a basin wrench, being careful not to crack the sink or distort the faucet base.
- If tightening does not help, you may need to remove the faucet, replace base gaskets or apply plumber’s putty, then reinstall.
Leaks at the base can cause hidden water damage to cabinets and countertops, so address them promptly and dry the area thoroughly after repairs.
How to Deal with Hard Water and Mineral Buildup
Even a perfectly installed faucet can start dripping if mineral deposits prevent internal parts from sealing correctly. Hard water is common in many parts of the United States and can shorten the life of washers, cartridges, and seals.
Simple Cleaning Steps
- Soak removable parts such as aerators, cartridges, and discs in white vinegar for 15 to 30 minutes to dissolve deposits.
- Use a soft brush or cloth to scrub away loosened buildup. Avoid abrasive pads that can scratch surfaces.
- Rinse thoroughly with clean water before reassembly.
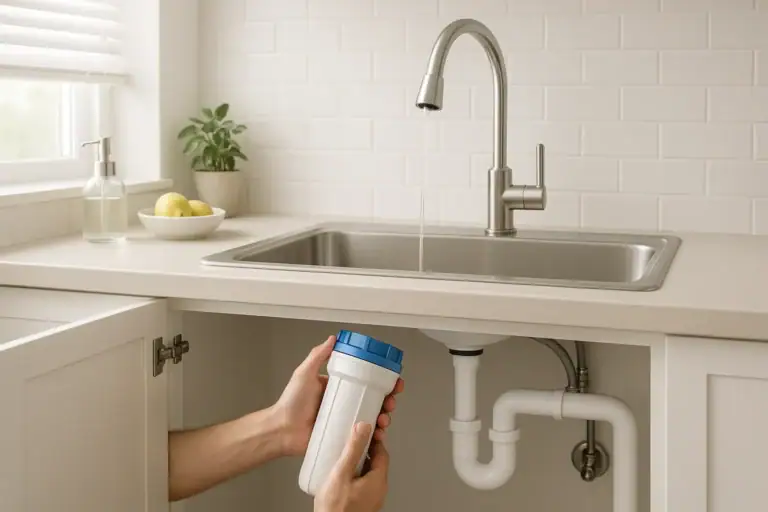
- Consider installing an under-sink filter or whole-house treatment system if mineral buildup is a recurring problem.
Regular cleaning can keep moving parts working smoothly and reduce the likelihood of future drips and clogs.
When to Call a Professional Plumber
Many faucet repairs are manageable for a careful homeowner, but some situations call for professional help to avoid further damage or safety risks.
Signs You Should Get Help
- The shutoff valves under the sink will not turn or are leaking.
- You cannot identify your faucet type or find matching replacement parts.
- The faucet body or sink deck is cracked or corroded.
- The drip continues after you have replaced washers, O-rings, or cartridges.
- You suspect high water pressure, which may require a pressure-reducing valve on the main supply line.
- There is evidence of water damage in cabinets, walls, or flooring around the sink.
If you are uncomfortable turning off water supplies or working with plumbing connections, it is wise to bring in a licensed plumber. A professional can also inspect other fixtures and help you prevent future leaks throughout the home.
Preventing Future Faucet Drips
Once you have fixed a dripping faucet, a few simple habits can help keep it working properly and extend its life.
Smart Maintenance Tips
- Avoid over-tightening: Turning handles too hard can wear out washers and seals faster. Close the faucet firmly but gently.
- Clean aerators regularly: Unscrew the aerator at the tip of the spout every few months and clean out debris and mineral deposits.
- Watch for early signs: Address small drips, stiff handles, or reduced water flow as soon as you notice them.
- Check under sinks: Periodically look for moisture, stains, or musty smells in cabinets under sinks.
- Monitor water pressure: If you hear banging pipes or notice frequent leaks, have your home’s water pressure tested.
- Schedule occasional inspections: A periodic plumbing check can catch worn parts before they fail.
By combining basic maintenance with prompt repairs, you can keep your kitchen and bathroom faucets running smoothly, conserve water, and avoid unexpected plumbing bills.
Related posts
Browse this topic →
How to Clean a Dishwasher Filter (and How Often You Should Do It)
Dishwasher Smells: Why It Happens and How to Fix It for Good
Dishwasher Not Cleaning Well? Spray Arm, Filter, and Loading Fixes
How to Sharpen Kitchen Knives at Home: Simple Method and Safety Tips
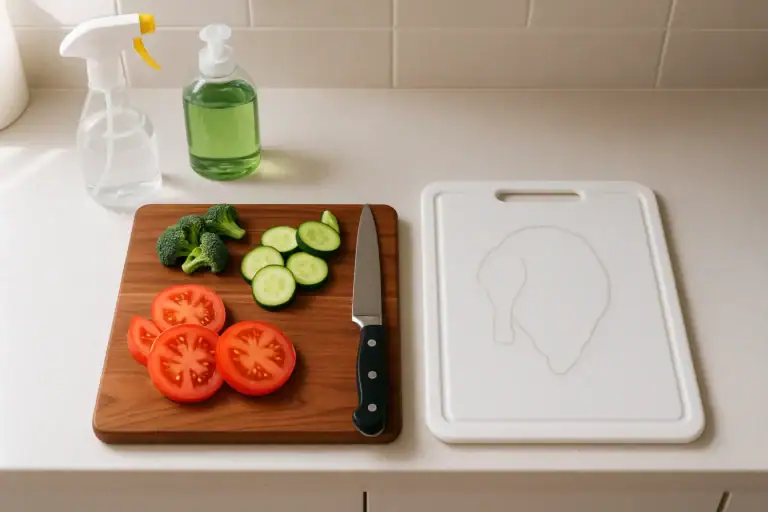
Cutting Board Hygiene: Wood vs Plastic and How to Sanitize Safely

Food Storage Safety: Fridge Zones and How Long Food Really Lasts
Keep reading
About this site
Signature Home Guide publishes practical, independent home guides. We aim to be clear, helpful, and transparent.
Affiliate disclosure
As an Amazon Associate, we earn from qualifying purchases. Some links on this site may be affiliate links. If you buy through these links, we may earn a small commission at no extra cost to you. This helps support our content. Learn more.