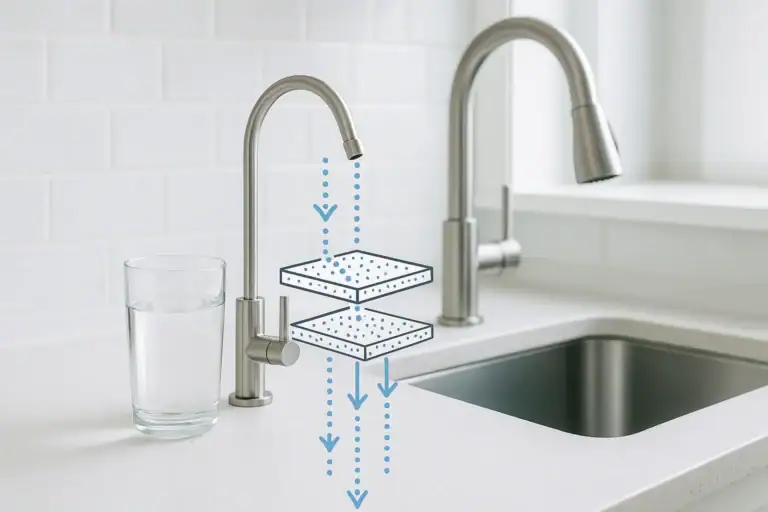
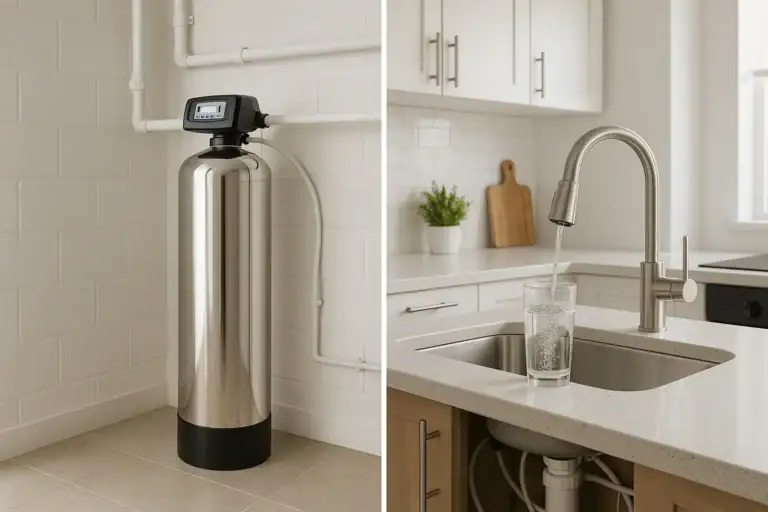
Installing an under-sink water filter is one of the most practical upgrades you can make in your kitchen. It can improve the taste and clarity of your drinking water, reduce certain contaminants, and save money compared to bottled water. The project is within reach for many homeowners, but a smooth installation depends on preparation. Having the right tools, understanding your plumbing connections, and following a careful leak-check routine will help you avoid frustration, water damage, and repeat trips to the hardware store.
On this page(click to collapse)
- 1. Pre-Installation Planning Checklist
- 2. Under-Sink Filter Tools and Materials Checklist
- 3. Water Shutoff Checklist: Staying Safe and Dry
- 4. Installing the Under-Sink Filter: Step-by-Step Checklist
- 5. Leak Prevention Checklist Before Turning the Water On
- 6. Turning the Water Back On and Checking for Leaks
- 7. Fixing Common Under-Sink Filter Leaks
- 8. Final Setup and Maintenance Checklist
- Related guides
This checklist-style guide walks you through every major step of under-sink filter installation: what to do before you start, the tools and supplies you need, how to shut off the water safely, and how to test for and fix leaks. Use it as a planning guide before you buy a filter and as a step-by-step reference on installation day.
1. Pre-Installation Planning Checklist
Before you pick up a wrench, take a few minutes to plan. A short inspection under your sink will help you avoid surprises once everything is disassembled.
1.1 Confirm You Have Space Under the Sink
Under-sink filters come in different sizes and configurations. Some use a single cartridge, while others use multiple stages. Make sure you have enough room for the filter housing and any dedicated faucet the system requires.
- Measure the height from the cabinet floor to the bottom of the sink basin.
- Measure the width and depth of the open area after accounting for garbage disposals, pull-out trash cans, and cleaning supplies.
- Look for a clear, flat section of cabinet wall to mount the filter bracket.
- Check that you can still reach shutoff valves after the filter is installed.
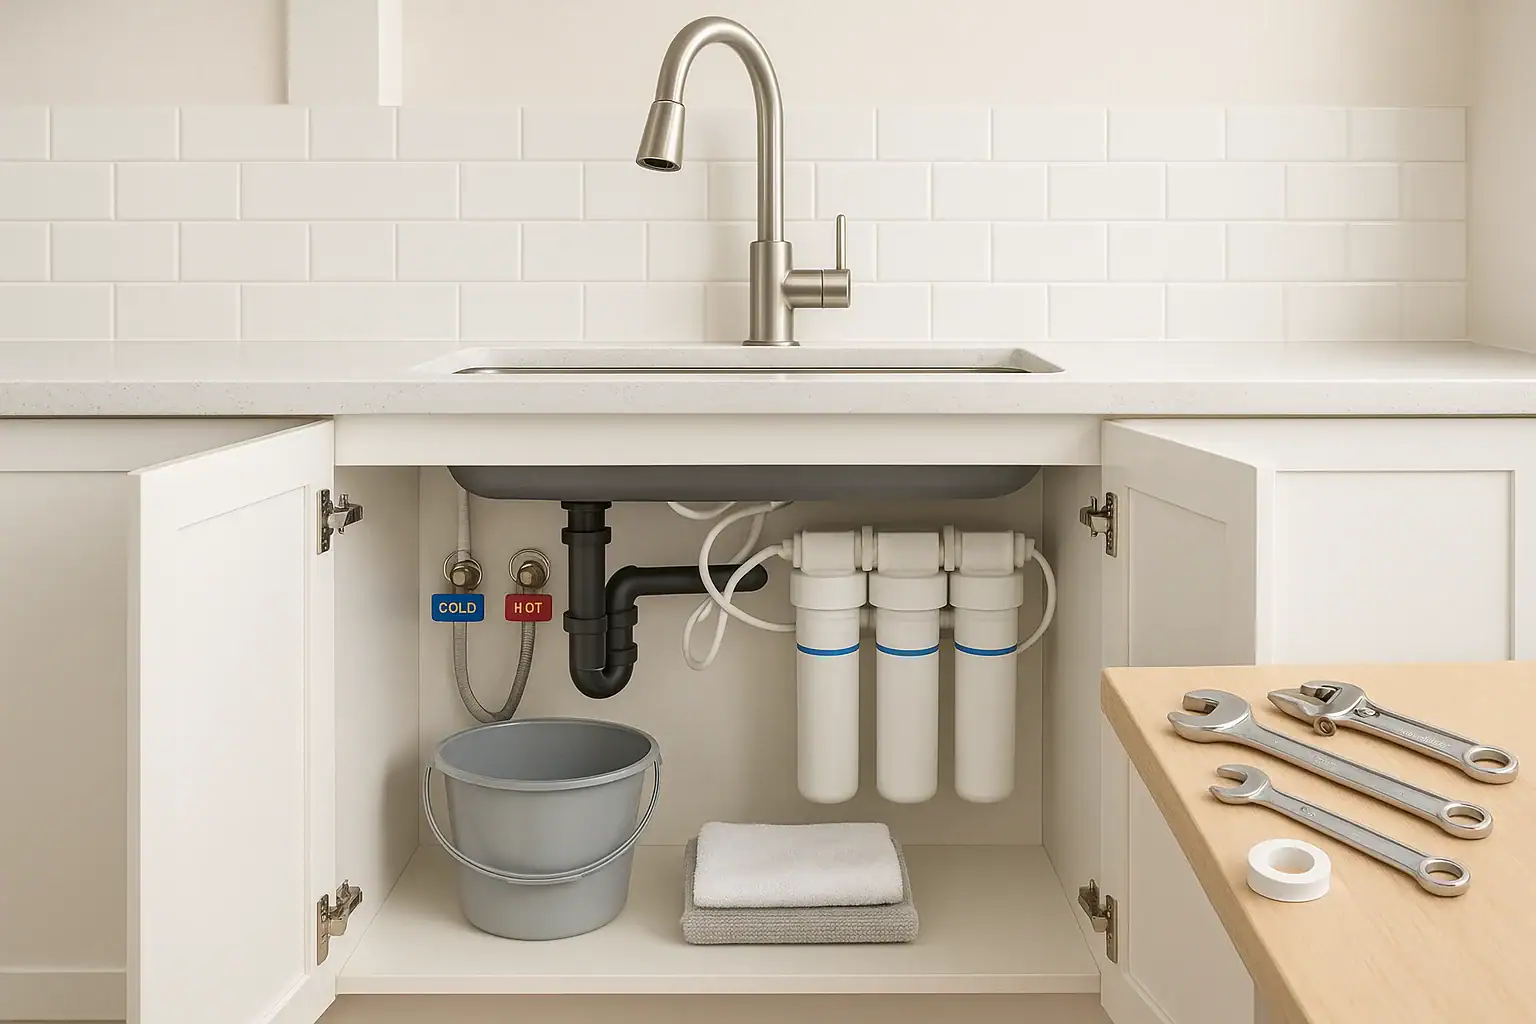
1.2 Identify Your Cold-Water Line and Shutoff Valve
Most under-sink filters connect to the cold-water supply. Under your sink, you should see two shutoff valves: one for hot water and one for cold water.
- Cold-water valves are usually on the right when facing the sink, but not always. Turn on the faucet and feel which side delivers cold water.
- Trace the cold-water supply line from the shutoff valve to the faucet.
- Confirm the valve is accessible and can be fully closed by hand.
1.3 Check Your Sink and Countertop for a Faucet Hole
Many under-sink systems use a dedicated drinking-water faucet. Some sinks have an extra pre-drilled hole with a plug or an existing accessory like a soap dispenser.
- Look for an unused or removable accessory on the sink deck or countertop.
- If you do not have an extra hole, decide whether you will drill one or choose a filter that connects directly to the existing faucet.
- Verify that your countertop material (stainless steel, composite, laminate, or stone) can be safely drilled with the right tools.
2. Under-Sink Filter Tools and Materials Checklist
Having the right tools ready before you start makes the installation faster and less stressful. Many systems include basic fittings and tubing, but you will usually need your own hand tools and sealants.
2.1 Essential Hand Tools
- Adjustable wrench (one or two, depending on your fittings)
- Channel-lock pliers or slip-joint pliers
- Phillips and flathead screwdrivers
- Drill and bits (if installing a dedicated faucet)
- Tube cutter or sharp utility knife (for plastic tubing)
- Measuring tape and pencil or marker
- Flashlight or work light for cabinet interiors
2.2 Plumbing Supplies and Safety Items
- Teflon tape (plumber’s tape) for threaded metal connections
- Plumber’s putty or silicone sealant for faucet bases, if required
- Mounting screws and anchors suitable for your cabinet wall
- Bucket or shallow pan to catch water from disconnected lines
- Old towels or rags for drips and spills
- Safety glasses, especially if drilling or cutting
- Work gloves, if you are handling sharp metal edges
2.3 Filter-Specific Components
Your filter kit should include most of the system-specific parts, but it is worth confirming everything is in the box before you begin.
- Filter housing and cartridges
- Mounting bracket and hardware
- Plastic or flexible tubing (inlet and outlet lines)
- Fittings or adapters for your cold-water line
- Dedicated drinking-water faucet and hardware, if applicable
- Installation manual and any flow-direction labels
3. Water Shutoff Checklist: Staying Safe and Dry
Properly shutting off the water is critical. This step prevents unexpected sprays, flooding, and damage to cabinets and flooring. Take your time and confirm that the water is fully off before disconnecting any lines.
3.1 Shut Off the Cold-Water Supply Under the Sink
- Clear the cabinet so you have full access to the plumbing and shutoff valves.
- Place a towel or small pan under the cold-water valve and supply line.
- Turn the cold-water shutoff valve clockwise until it stops. Do not force it if it feels stuck; apply gentle pressure and consider using pliers carefully if needed.
- Turn on the kitchen faucet to the cold setting and let it run until the flow stops. This relieves pressure in the line.
- Leave the faucet handle in the open position while you work, so any remaining pressure can escape slowly.
3.2 If the Under-Sink Valve Does Not Work
In older homes, shutoff valves may be corroded or may not fully close. If you cannot stop the flow of water at the sink, you will need to shut off water at the main valve.
- Locate your home’s main water shutoff valve. Common locations include a basement, crawl space, utility room, or an exterior wall near where the water line enters the house.
- Turn the main valve clockwise to close it. For lever-style valves, the handle should be perpendicular to the pipe when closed.
- Open a faucet on the lowest level of the house to relieve pressure and confirm that water flow stops.
- Return to the kitchen and verify that the faucet no longer runs when turned on.
3.3 Confirm Zero Pressure Before Disconnecting Lines
Even after shutoff, a small amount of water will remain in the lines. Expect minor drips when you loosen fittings.
- Gently loosen the nut on the cold-water supply line at the faucet or valve.
- If water sprays or continues to flow, the valve is not fully closed. Tighten the valve more or go to the main shutoff.
- Once you see only a brief trickle, you are ready to proceed with installation.
4. Installing the Under-Sink Filter: Step-by-Step Checklist
With water safely shut off and tools ready, you can install the filter. Always follow the specific instructions that come with your system, but use this checklist as a general guide.
4.1 Plan the Layout
- Hold the filter housing under the sink to visualize where it will sit.
- Ensure you can remove and replace cartridges without hitting the cabinet floor or plumbing.
- Plan tubing routes so they are smooth, without tight bends, kinks, or sharp turns.
- Keep tubing away from sharp edges and moving parts like trash can slides.
4.2 Mount the Filter Bracket
- Use the bracket as a template to mark screw locations on the cabinet wall.
- Drill pilot holes if needed, taking care not to drill through the cabinet exterior.
- Install screws or anchors according to the bracket design.
- Hang the filter housing on the bracket, ensuring it is level and secure.
4.3 Install the Dedicated Faucet (If Included)
If your system uses a separate faucet for filtered water, install it before connecting tubing.
- Remove any existing accessory from the extra sink hole, or drill a new hole if required and safe for your sink or countertop material.
- Slide the faucet base gasket or apply plumber’s putty or sealant if recommended.
- Insert the faucet stem through the hole from above.
- From under the sink, install washers and mounting nuts in the order shown in the faucet instructions.
- Align the faucet on the sink deck and tighten the mounting nut securely, but do not overtighten.
4.4 Connect the Filter Inlet to the Cold-Water Line
Most under-sink filters use a tee fitting or adapter to tap into the cold-water supply.
- Disconnect the existing cold-water supply line from the faucet or shutoff valve, catching any water in a pan.
- Install the supplied tee or adapter, following the direction of flow indicated by arrows or labels.
- Use Teflon tape on threaded metal connections if recommended, wrapping clockwise around the threads.
- Reconnect the faucet supply line to the new adapter.
- Attach the filter inlet tubing to the adapter, pushing it fully into quick-connect fittings until it seats firmly.
4.5 Connect the Filter Outlet to the Faucet
- Measure and cut the outlet tubing to reach from the filter outlet port to the dedicated faucet stem, allowing gentle curves.
- Ensure the cut is straight and clean to prevent leaks at quick-connect fittings.
- Push the tubing fully into the filter outlet port until it stops.
- Connect the other end of the tubing to the faucet inlet, again making sure it is fully seated.
- Gently tug on each connection to confirm it is secure.
5. Leak Prevention Checklist Before Turning the Water On
Before you restore water pressure, double-check every connection. A few minutes of inspection can prevent drips and long-term cabinet damage.
5.1 Inspect All Fittings and Tubing
- Verify that every threaded connection is snug but not overtightened.
- Confirm that quick-connect fittings are fully engaged and that tubing is cut cleanly.
- Check that tubing is not kinked, pinched, or rubbing against sharp edges.
- Make sure the filter housing is firmly attached to the bracket and that any locking clips are in place.
5.2 Prepare for Initial Pressurization
- Place a dry paper towel or cloth under each major connection: inlet, outlet, tee fitting, and faucet connections.
- Keep your flashlight ready so you can see small drips clearly.
- Ask someone to watch under the sink while you slowly turn on the valve, if possible.
6. Turning the Water Back On and Checking for Leaks
Restoring water pressure is the moment of truth. Turn the water on gradually and observe every connection carefully.
6.1 Turn On the Water Slowly
- Close the kitchen faucet handles.
- Slowly open the under-sink cold-water shutoff valve, turning it counterclockwise a quarter turn at a time.
- Pause after each small turn and check for drips around the tee fitting, filter inlet, and outlet.
- If you used the main shutoff, open it slowly and then open the under-sink valve.
6.2 Watch for Immediate Leaks
- Look for water beads forming around threaded joints or quick-connect fittings.
- Run your finger along each connection to feel for moisture that might not be visible.
- Check the paper towels you placed under fittings for damp spots.
- If you see any leak, shut off the water and correct it before proceeding.
6.3 Flush the Filter as Recommended
Most under-sink filters require an initial flushing period to clear air and loose carbon fines from the cartridges.
- Open the dedicated drinking-water faucet or the main kitchen faucet, depending on your setup.
- Allow water to run for the time specified in your instructions, often several minutes.
- Expect spurting and cloudy water at first; this usually clears as air is purged from the system.
- While water is running, recheck all connections for slow leaks that may appear under full flow.
7. Fixing Common Under-Sink Filter Leaks
Even with careful installation, small leaks can happen. Addressing them right away protects your cabinets and ensures reliable performance.
7.1 Leaks at Threaded Connections
- Turn off the water at the shutoff valve.
- Loosen the leaking connection and inspect the threads for debris or damage.
- Remove old Teflon tape if present and apply fresh tape in the direction of the threads.
- Re-tighten by hand, then snug with a wrench. Avoid overtightening, which can crack fittings.
- Turn the water back on slowly and recheck for leaks.
7.2 Leaks at Quick-Connect or Push-Fit Fittings
- Shut off the water and relieve pressure by opening the faucet.
- Push the tubing further into the fitting to ensure it is fully seated.
- If leaking continues, remove the tubing: push the fitting collar in while pulling the tube out.
- Inspect the tubing end; if it is scratched or out of round, cut off a small section to create a fresh, square end.
- Reinsert the tubing firmly until it bottoms out and gently tug to confirm it is locked.
7.3 Leaks at the Filter Housing
- Turn off the water and relieve pressure.
- Unscrew the filter housing according to the instructions, usually by turning counterclockwise.
- Check the O-ring or gasket for twists, debris, or damage.
- Clean the groove and O-ring with a damp cloth, then lightly lubricate with a compatible lubricant if recommended.
- Re-seat the O-ring evenly, reinstall the housing, and hand-tighten firmly.
- Restore water slowly and check for leaks around the housing seam.
8. Final Setup and Maintenance Checklist
Once your under-sink filter is leak-free and flushed, take a few final steps to keep it performing well over the long term.
8.1 Label and Document Your Installation
- Write the installation date on the filter housing or a label under the sink.
- Note the recommended cartridge replacement interval from the manual.
- Keep the manual and any spare O-rings or tools in a labeled bag in the cabinet.
8.2 Schedule Filter Cartridge Changes
Cartridges gradually become saturated with contaminants and may also clog with sediment. Timely replacement maintains flow and filtration performance.
- Set a reminder on your calendar or phone for the recommended replacement date.
- If you notice reduced flow or changes in taste or odor, check whether the cartridge is due for replacement.
- Follow the same shutoff and leak-check procedures whenever you change cartridges.
8.3 Keep the Area Under the Sink Dry and Accessible
- Avoid stacking heavy items directly against tubing or the filter housing.
- Place a small tray or mat under the plumbing to catch any future drips.
- Periodically run your hand around fittings to check for moisture, especially after cartridge changes.
With this under-sink filter installation checklist, you can approach the project with confidence. Careful planning, proper shutoff procedures, and thorough leak checks help protect your kitchen and ensure you enjoy clear, filtered water at your sink for years to come.
Related posts
Browse this topic →
How to Clean a Dishwasher Filter (and How Often You Should Do It)
Dishwasher Smells: Why It Happens and How to Fix It for Good
Dishwasher Not Cleaning Well? Spray Arm, Filter, and Loading Fixes
How to Sharpen Kitchen Knives at Home: Simple Method and Safety Tips
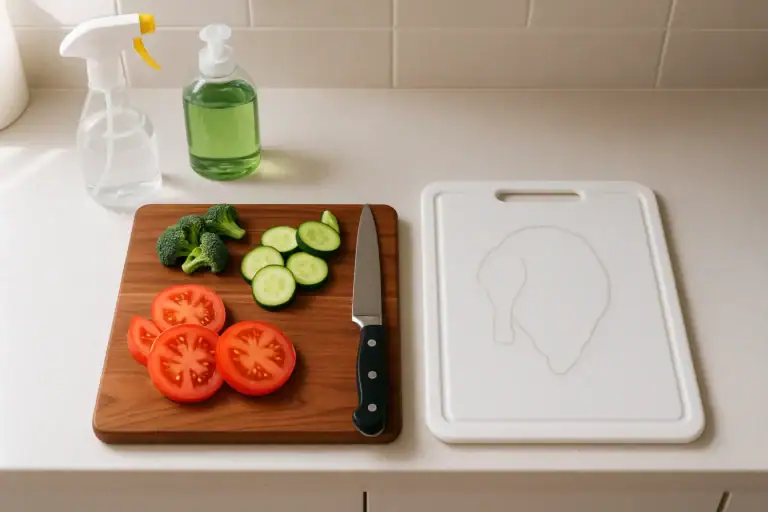
Cutting Board Hygiene: Wood vs Plastic and How to Sanitize Safely
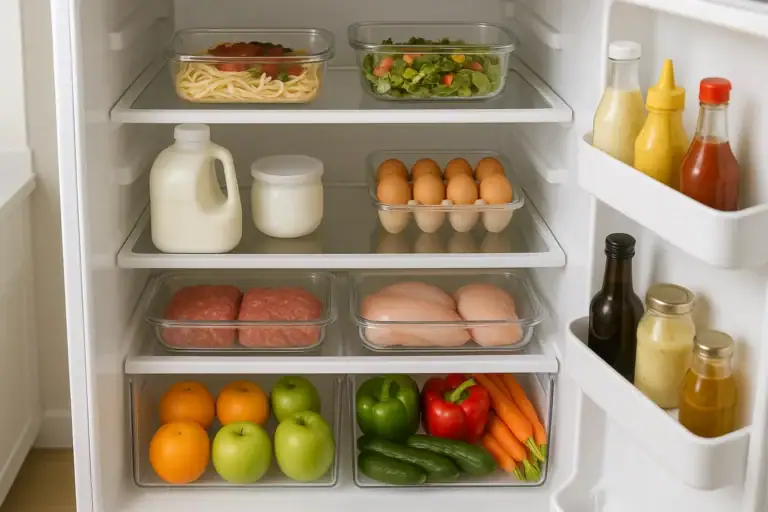
Food Storage Safety: Fridge Zones and How Long Food Really Lasts
Keep reading
About this site
Signature Home Guide publishes practical, independent home guides. We aim to be clear, helpful, and transparent.
Affiliate disclosure
As an Amazon Associate, we earn from qualifying purchases. Some links on this site may be affiliate links. If you buy through these links, we may earn a small commission at no extra cost to you. This helps support our content. Learn more.