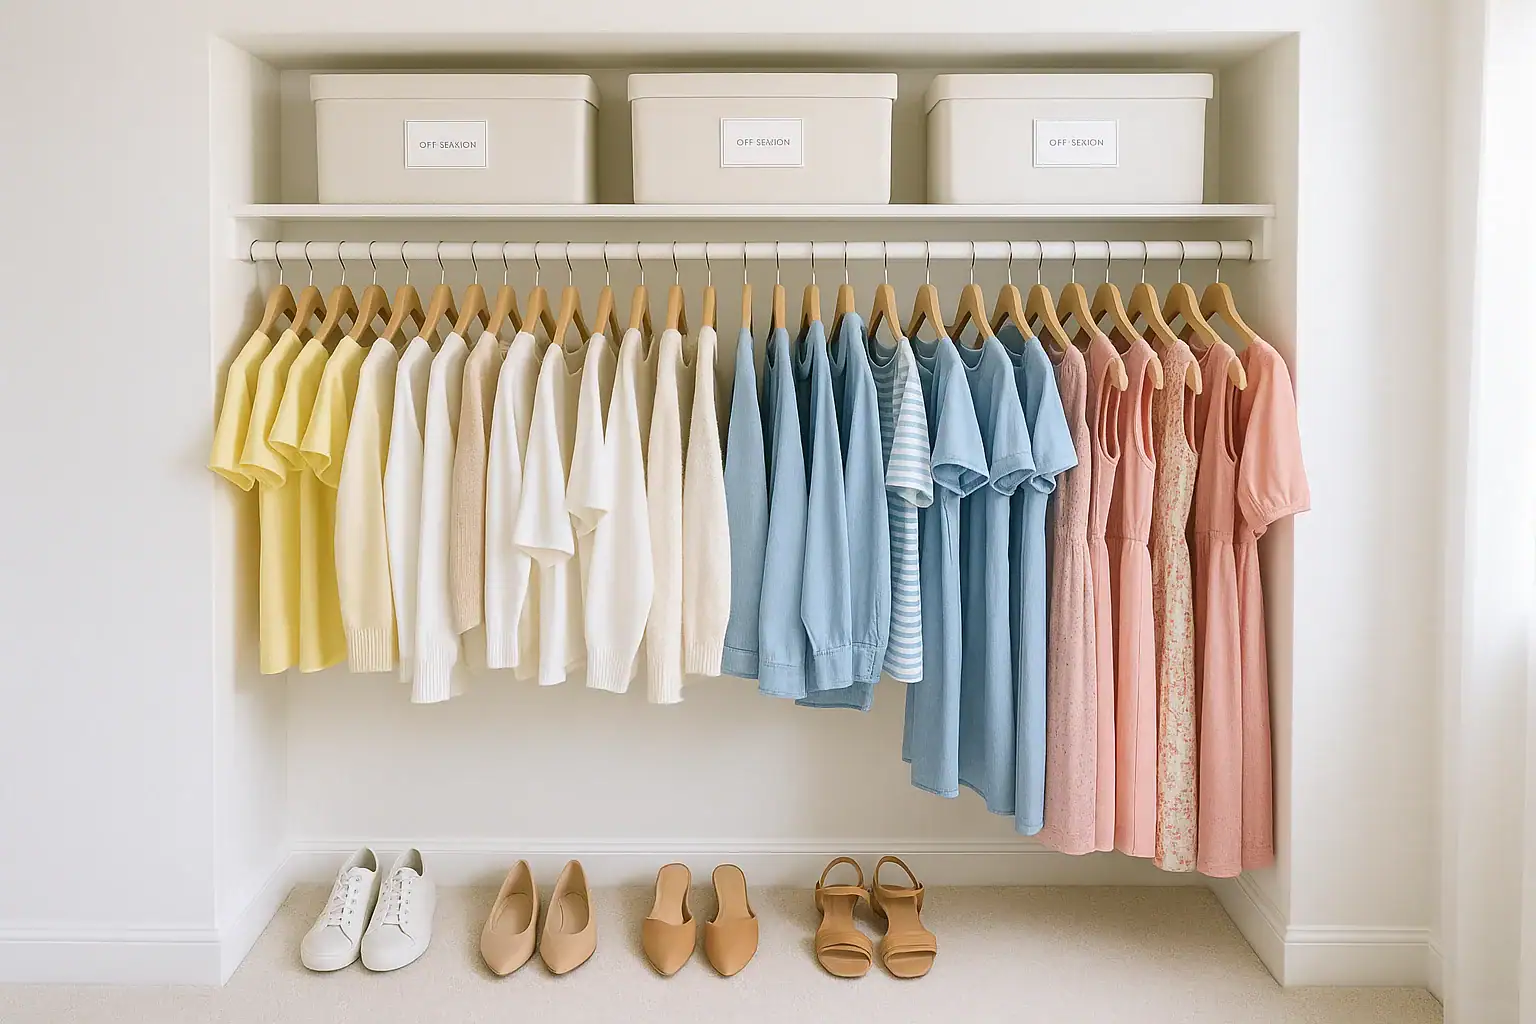
Rotating your wardrobe for a new season does not have to take an entire weekend. With a clear plan and a realistic checklist, you can complete a seasonal closet switch in about an hour. The key is to stay focused, work in small sections, and make simple decisions instead of overthinking every item. This guide walks you through a step‑by‑step one‑hour clothing rotation plan so you can move from heavy layers to warm‑weather pieces (or the other way around) without creating a huge mess. You will learn what to pull out, what to store, and how to keep your closet organized so that getting dressed each day feels faster and calmer.
Use this checklist at the start of each new season, or anytime the weather changes quickly and your closet no longer matches what you actually wear. Over time, this routine will help you keep only what you love and use, reduce clutter, and maintain a tidy, efficient closet that works with your real life.
Before You Start: Set Up Your One-Hour Closet Session
Spending a few minutes preparing your space and tools will make the rest of the hour go smoothly. Think of this as your warm‑up before the main event.
Gather Simple Supplies
You do not need fancy organizers to rotate clothing. A few basic items are enough:
- 2–3 large bags or boxes labeled: Donate, Trash, Repair (optional)
- Seasonal storage containers, bins, or under‑bed bags
- A handful of sturdy hangers
- A small step stool if you have high shelves
- A damp cloth or duster for a quick shelf wipe‑down
Decide Your Time Blocks
To keep this task to about one hour, break it into short blocks. Use a timer if it helps you stay focused.
- 5 minutes: Quick prep and sorting zones
- 20 minutes: Pull out and sort last season’s clothes
- 25 minutes: Bring in and organize the new season’s items
- 10 minutes: Final tidy‑up and quick review
Define Your Closet Zones
Even a small closet works better when you think in zones. Before you touch any clothes, quickly decide:
- Where your everyday clothing will live (eye‑level hanging rod or main shelf)
- Where your special occasion or less‑used pieces will go (side rod or back of closet)
- Where you will keep shoes and accessories for the current season
- Where your off‑season storage will be (top shelf, under the bed, or another closet)
Step 1: Quick Closet Scan (5 Minutes)
Start with a fast visual scan to clear obvious clutter. This makes the rest of your decisions easier.
- Remove obvious trash: torn bags, broken hangers, tags, and packaging.
- Pull out anything that clearly does not belong in the closet (kitchen items, toys, random tools).
- Set these items outside the closet to put away later, after your hour is done.
Next, grab your damp cloth or duster and give shelves and the main hanging rod a quick wipe. You are not deep cleaning; you are just removing dust before you store clothing for several months.
Step 2: Pull Out Last Season’s Clothing (20 Minutes)
This is the heart of your seasonal closet switch. Focus on removing what you no longer need for the upcoming weather.
Use the Three‑Question Test
As you pull out items from the outgoing season, ask yourself three quick questions. Do not overthink; your first reaction is usually right.
- Did I wear this at least once this season?
- Does it fit comfortably right now?
- Is it in good enough condition to wear next year?
Use your answers to guide what to do with each piece:
- Yes to all three: Keep it and store it for next year.
- No to wearing or fit: Place it in the Donate bag.
- No to condition: Place it in the Trash bag or Repair box.
Checklist: What to Remove for the Season
Use this quick checklist to guide what you pull out depending on the season you are leaving.
If You Are Moving From Cold to Warm Weather
- Heavy sweaters and thick cardigans
- Fleece tops and heavy hoodies
- Thick jeans, corduroy pants, and lined leggings
- Heavy coats, puffer jackets, and wool jackets
- Winter scarves, knit hats, and gloves
- Snow boots or lined boots
If You Are Moving From Warm to Cold Weather
- Lightweight tank tops and sleeveless dresses
- Shorts and light skirts
- Thin summer pants and linen pieces
- Sandals and open‑toe shoes
- Sun hats and beach cover‑ups
- Swimwear you will not use for several months
Sort as You Go
To keep your hour on track, do not create big piles on the floor. Place each item directly into one of these categories:
- Store: Fold or place on hangers for off‑season storage.
- Donate: Items in good condition that you did not wear or no longer like.
- Trash: Stained, torn, or worn‑out items that cannot be reused.
- Repair: A small group of pieces worth fixing within the next month.
Once the outgoing season’s clothes are off your main rod and shelves, your closet should look slightly sparse. That is good. You are creating space for what you actually need next.
Step 3: Pack and Store Off‑Season Clothing (10 Minutes)
Now that you have sorted the outgoing season’s items, store them in a way that protects them and makes next season’s switch easier.
How to Pack Clothing for Storage
- Fold, do not cram: Fold sweaters, jeans, and tees neatly so they do not stretch out.
- Hang delicate pieces: Dresses, blouses, and tailored items can stay on hangers in a garment bag or side rod if you have space.
- Use breathable containers: Bins with lids, fabric bags, or under‑bed boxes help keep dust away.
- Group by type: Keep tops together, bottoms together, and accessories in small bags or boxes.
Label for Next Season
Future you will be grateful for clear labels. You can write directly on tape or use sticky labels.
- Label each bin with the season (for example: “Fall/Winter” or “Spring/Summer”).
- Add a short list of key items inside (for example: “Sweaters, jeans, boots”).
- Note the size if you are storing children’s clothing.
Place your storage containers in the spot you chose earlier: top shelf, under the bed, or another closet. Once they are out of the way, you are ready to bring in the new season’s wardrobe.
Step 4: Bring In the New Season’s Clothing (25 Minutes)
This is the fun part. You get to “shop your own closet” by unpacking the items that fit the upcoming weather and your current lifestyle.
Unpack With Intention
As you unpack the new season’s bin, use a quick version of the three‑question test again:
- Would I choose to wear this next week?
- Does it fit and feel comfortable?
- Does it match at least two other pieces I own?
If something fails these questions, consider donating it instead of putting it back into rotation. You will save space for pieces you truly enjoy.
Checklist: What to Add for the Season
For Spring and Summer
- Lightweight tops and breathable tees
- Shorts, skirts, and casual dresses
- Light pants or cropped jeans
- Light layers such as thin cardigans or denim jackets
- Everyday sandals and casual sneakers
- Sun hats, light scarves, and sunglasses storage
For Fall and Winter
- Long‑sleeve tops and layering tees
- Jeans, heavier pants, and leggings
- Sweaters, cardigans, and warm hoodies
- Warm coat or jacket for everyday wear
- Boots and closed‑toe shoes
- Scarves, hats, gloves, and warm socks
Arrange Your Closet for Easy Mornings
Once you know what is staying in your closet for the season, arrange it so that getting dressed is quick and low‑stress.
Use a Simple Order on the Hanging Rod
Place items in a consistent order from left to right. For example:
- Jackets and outer layers
- Work or dressy tops
- Casual tops and tees
- Dresses or jumpsuits
- Pants, skirts, and other bottoms
Keep your most‑worn items at eye level and easy to grab. Less‑used pieces can move toward the sides or higher rods.
Fold and Stack Thoughtfully
For shelves and drawers, keep stacks short enough that you can see everything without digging.
- Use one shelf or drawer for everyday tops.
- Use another for bottoms like jeans, shorts, and leggings.
- Keep workout clothes together in one section or bin.
- Use a small box or divider for accessories like belts and scarves.
Set Up a Shoe Zone
Limit the number of shoes in your main closet to what you realistically wear in this season.
- Pick 3–5 pairs for everyday rotation (work, casual, dressy, and weather‑specific).
- Store off‑season shoes in a separate bin or on a higher shelf.
- Use a tray or mat for shoes that come in wet or dusty.
Step 5: Final Ten‑Minute Tidy and Mini Audit
The last ten minutes of your one‑hour plan are for tying up loose ends and making sure your closet feels calm and usable.
Do a Quick Visual Check
Stand back and look at your closet as a whole. Ask yourself:
- Can I see my main categories of clothing clearly?
- Is there anything obviously out of place or overcrowded?
- Do I have more than I realistically wear in one season?
If one section looks crammed, pull out a few items and place them in the donate bag. A little extra space usually feels better than one more option you never reach for.
Handle the Outgoing Bags
Do not leave donate or trash bags sitting in your bedroom for days. Take two minutes to move them along.
- Place the Donate bag near your front door or in your car so you remember to drop it off.
- Put the Trash bag directly in your household trash or recycling area.
- Set the Repair items in a visible spot and add a reminder to your calendar.
Set a Simple Maintenance Habit
To keep your closet from drifting back into chaos, build in a tiny weekly habit. It can be as simple as:
- Putting empty hangers at one end of the rod each laundry day.
- Doing a two‑minute scan each Sunday night to rehang stray items.
- Choosing your outfit for the next day and placing it on a hook.
These small actions support your one‑hour seasonal reset and make the next rotation even faster.
Printable‑Style One‑Hour Clothing Rotation Checklist
Use this condensed checklist each time you do a seasonal closet switch. Set a timer for one hour and move step by step.
0–5 Minutes: Prep
- Gather bags or boxes for donate, trash, and repair.
- Clear obvious clutter and non‑clothing items from the closet.
- Wipe shelves and rods quickly.
5–25 Minutes: Remove Outgoing Season
- Pull out heavy or light seasonal pieces you will not wear for the next few months.
- Use the three‑question test for each item.
- Sort directly into store, donate, trash, or repair.
25–35 Minutes: Pack and Store
- Fold and pack off‑season clothing into labeled bins or bags.
- Group items by type inside each container.
- Place bins in their storage spot (top shelf, under bed, or other closet).
35–60 Minutes: Bring In and Arrange New Season
- Unpack the new season’s clothing and test each piece quickly.
- Donate items that no longer fit, feel good, or match your style.
- Hang clothing in a simple order: outer layers, dressy tops, casual tops, dresses, bottoms.
- Fold and stack everyday items in drawers or on shelves by category.
- Choose a small set of in‑season shoes and place them in a single zone.
- Do a final visual check and remove anything that feels like clutter.
- Move donate and trash bags out of the bedroom.
Make Seasonal Closet Switches a Simple Routine
When you follow a clear checklist and limit your decisions, rotating your wardrobe for a new season becomes a quick routine instead of a stressful project. Over time, this one‑hour clothing rotation plan will help you keep only what you actually wear, reduce visual clutter, and make your closet a calm, functional part of your home. You do not need a huge space or elaborate organizers to stay on top of seasonal changes. You just need a repeatable process that fits into your real life.
Consider adding your seasonal closet switch to your calendar four times a year, or tying it to natural reminders like the first warm week of spring or the first frost of fall. With a little consistency, you will always have a closet that matches the weather, supports your daily routines, and makes it easier to get dressed and get on with your day.
 How to Organize a Hall Closet for Coats, Tools, and Everyday Items
 How to Create a Toy Rotation System for Small Living Rooms
 Laundry Sorting Systems for Small Households: Simple Ways to Stay Organized