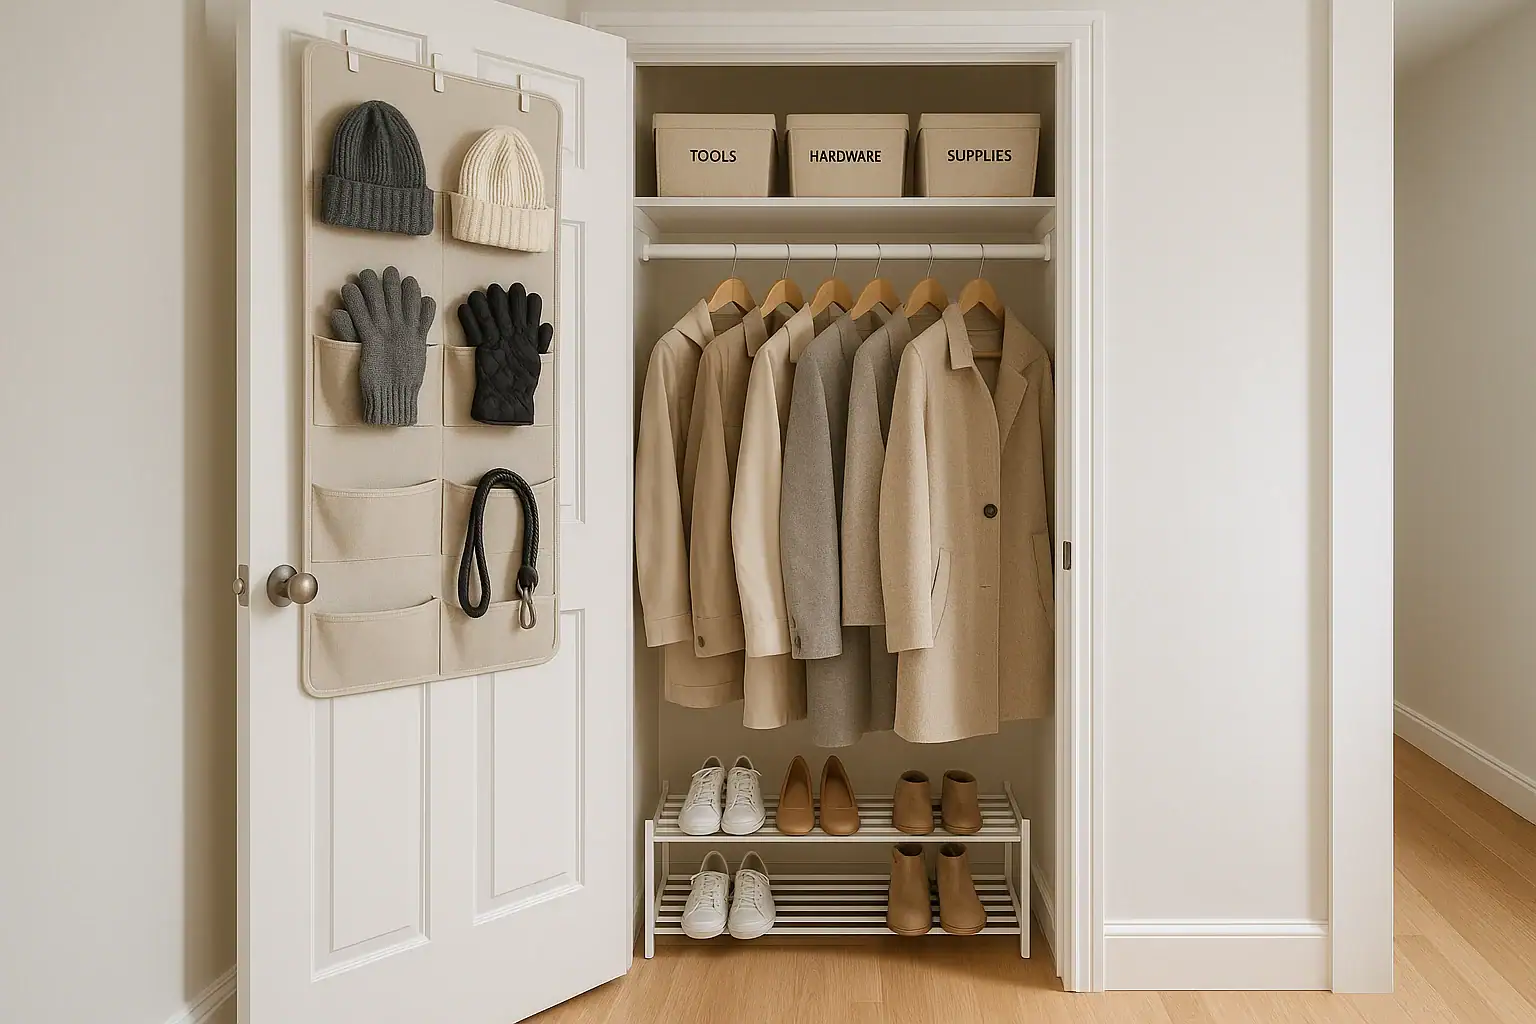
A hall closet often has to do it all: hold coats and shoes, hide tools and household supplies, and catch everyday items on the way in and out of the door. Without a clear plan, it quickly turns into a jumble of jackets, tangled extension cords, and mystery bags. With a few simple organizing strategies, you can turn that overworked space into a calm, efficient hub that actually makes your day easier.
This guide walks you step-by-step through how to organize a hall closet that handles coats, tools, and everyday essentials without feeling crowded. You will learn how to sort and declutter, create zones that make sense for your household, choose storage solutions that fit your space, and set up simple habits so the closet stays organized over time. You do not need a huge budget or a fancy custom system—just a plan, a little time, and a willingness to let go of what you do not use.
Step 1: Empty and Evaluate Your Hall Closet
Before you can organize, you need a blank slate. Completely empty the closet so you can see what you are working with and what is going back in.
Clear everything out
- Remove every item from the closet, including coats, tools, bags, and loose items on the floor or shelves.
- Group similar items together on the floor or a nearby table: outerwear, shoes, small tools, cleaning supplies, pet items, seasonal gear, and random items.
- Vacuum or sweep the closet floor and wipe down shelves, walls, and the inside of the door.
Measure the space
Next, take a few quick measurements. Knowing your dimensions will help you choose storage that actually fits.
- Measure the width, depth, and height of the closet interior.
- Measure the height from the floor to the existing hanging rod.
- Note any fixed shelves, hooks, or obstacles like vents or electrical panels.
- Check how far the door opens and whether it is a swinging door, bifold, or sliding door.
Write these numbers down or save them in your phone so you can reference them when planning zones and choosing bins or organizers.
Step 2: Sort and Declutter Coats, Tools, and Everyday Items
Clutter is usually the main reason a hall closet feels unmanageable. Be honest about what you actually use and what can be stored elsewhere, donated, or tossed.
Create simple sorting categories
Use clear, easy categories so decisions are quick:
- Keep in this closet: Items used at least weekly or that truly belong near the entry.
- Store elsewhere: Rarely used tools, bulk supplies, or seasonal items that can move to a garage, basement, or another closet.
- Donate or give away: Coats that no longer fit, duplicate tools, or items in good condition you no longer use.
- Trash or recycle: Broken items, expired products, or things you cannot identify.
Declutter coats and outerwear
Hall closets often overflow with outerwear. Limit what lives here to what you truly need by the door.
- Keep only current-season coats, jackets, and rain gear in the hall closet.
- Move off-season items to bedroom closets, under-bed storage, or another storage area.
- Donate coats that are worn out, do not fit, or have not been worn in the last year.
- Limit each person to a set number of coats in the hall closet, such as two or three per person.
Declutter tools and household supplies
Many people use the hall closet as a mini utility room. That can work well if you are selective.
- Keep only small tools and supplies you reach for often: a basic tool kit, tape, light bulbs, batteries, and a small step stool.
- Move large or rarely used tools to a garage, shed, or dedicated storage cabinet.
- Group like with like: all light bulbs together, all batteries together, all tapes together.
- Check expiration dates on products like cleaners or polishes and discard anything old or leaking.
Declutter everyday grab-and-go items
Everyday items should support your daily routines, not slow you down.
- Decide what truly needs to live by the door: keys, umbrellas, dog leashes, reusable shopping bags, hats, gloves, or a small bag of on-the-go items.
- Remove anything that belongs in another room, such as toys, paperwork, or kitchen items.
- Limit multiples. You probably do not need ten umbrellas or a dozen scarves in one closet.
Step 3: Plan Zones for Coats, Tools, and Everyday Items
Once you know what is staying, divide the closet into clear zones. Zones make it obvious where things belong and easier for everyone in the household to put items away.
Common hall closet zones
Consider creating these basic areas:
- Hanging zone: Coats, jackets, rain gear, and sometimes long items like dusters.
- Upper shelf zone: Less-used or lightweight items such as hats, extra scarves, or backup supplies.
- Tool and utility zone: Small tools and household supplies stored in bins or caddies.
- Everyday grab-and-go zone: Items you reach for daily, ideally at eye level or on the back of the door.
- Floor or lower zone: Shoes, boots, heavier items, and items children need to reach.
Match zones to how you actually live
Think about your routines and who uses the closet most.
- If you have children, place their coats and shoes on lower hooks or shelves they can reach.
- If you walk a dog daily, keep leashes, waste bags, and a small towel near the door.
- If you frequently tackle small home projects, make a dedicated spot for a basic tool kit and tape measure.
- If you entertain often, reserve a small area for guest coats, umbrellas, or slippers.
Labeling each zone, even with simple tags, helps everyone remember what goes where and keeps the system from falling apart over time.
Step 4: Choose Smart Storage Solutions
You do not need an elaborate system, but a few well-chosen organizers can dramatically increase how much your hall closet can hold without feeling cluttered.
Maximize hanging space for coats
- Use sturdy, slim hangers to keep coats from slipping and to save space.
- Group coats by person or by type (heavy coats together, lighter jackets together).
- If you have high ceilings, consider adding a second, lower rod for shorter jackets or kids’ coats.
- Use hooks on the side walls for frequently used items like a daily jacket or bag.
Use shelves and bins for tools and small items
Shelves can easily turn into messy piles. Bins and containers keep categories separate and easy to grab.
- Place sturdy bins or baskets on shelves for categories like light bulbs, batteries, tapes and glues, and small tools.
- Choose clear bins or label opaque bins on the front so you can see what is inside at a glance.
- Use a handled caddy for basic tools so you can carry them to wherever you are working.
- Store heavier items on lower shelves and lighter items up high.
Take advantage of the back of the door
The back of the closet door is valuable real estate for everyday items.
- Hang an over-the-door organizer with pockets or small shelves for gloves, hats, scarves, flashlights, or small tools.
- Add a row of hooks for keys, dog leashes, or reusable shopping bags.
- Use labeled pockets for each family member’s small items, such as sunglasses or masks.
Contain shoes and floor clutter
The floor of a hall closet fills up quickly and can become a tripping hazard. Give every pair of shoes a defined home.
- Use a low shoe rack, shallow bins, or a boot tray to keep shoes contained.
- Limit the number of shoes each person can store in the hall closet.
- Store off-season or rarely worn shoes elsewhere to free up daily space.
- Use a mat or tray for wet boots to protect the floor and make cleanup easier.
Make space for bulky or seasonal items
If you must store seasonal items in the hall closet, keep them high and out of the way.
- Use labeled bins on the top shelf for seasonal accessories like winter hats and gloves or summer beach gear.
- Store rarely used items in vacuum storage bags to save space.
- Rotate bins seasonally so the current season is easiest to reach.
Step 5: Create a Clear Home for Everyday Items
Everyday items should be easy to grab and just as easy to put away. The more convenient the system, the more likely everyone will use it.
Set up a grab-and-go station
Designate one area near the door as your everyday station.
- Use a small shelf, bin, or basket for items you need as you leave the house, such as reusable shopping bags or a small umbrella.
- Install a key rack or small dish near eye level for keys and key fobs.
- Keep a small notepad and pen for quick reminders, such as items you need to buy or tasks to do when you leave.
Assign spaces to each family member
When each person has a defined spot, there is less confusion and less clutter.
- Give each person a labeled hook for their main coat or backpack.
- Use bins or baskets labeled with names for hats, gloves, or small personal items.
- Teach children to return their items to their labeled spots as part of the daily routine.
Keep tools accessible but contained
You want tools close at hand without turning the closet into a workshop.
- Store a basic tool kit in a bin or caddy on a middle or lower shelf.
- Use a small organizer with compartments for screws, nails, and picture hangers.
- Keep a flashlight and extra batteries in a clearly labeled spot that everyone knows.
Step 6: Label Everything for Easy Maintenance
Labels may feel like a small step, but they make a big difference in keeping your hall closet organized over time. They remove guesswork and make it easier for everyone to help maintain the system.
What to label
- Bins and baskets on shelves (for example, “Light Bulbs,” “Batteries,” “Tools,” “Hats and Gloves”).
- Zones on the shelf edge or wall (for example, “Everyday Items,” “Seasonal Gear”).
- Hooks or cubbies for each family member.
- Back-of-door pockets or small containers.
Keep labels simple and flexible
You do not need anything fancy. Handwritten labels or simple printed tags work well.
- Use removable labels or tags you can update as your needs change.
- Choose clear, general words so you can adjust contents without rewriting everything.
- Involve kids in making labels so they feel ownership and remember where things go.
Step 7: Maintain Your Hall Closet with Simple Habits
An organized hall closet will not stay that way without a few easy habits. The goal is not perfection, but a space that is functional and quick to tidy.
Daily and weekly habits
- Do a quick check when you hang up your coat: return any stray items to their bins or hooks.
- Limit what goes into the closet. If it does not have a clear home, it probably belongs elsewhere.
- Once a week, spend five minutes straightening shoes, pushing hangers to one side, and tossing any trash.
Seasonal refresh
Plan to revisit your hall closet at least twice a year.
- At the change of seasons, swap out coats, hats, and shoes so only current-season items are front and center.
- Donate items that were not used during the last season.
- Check tools and supplies, refill what you use often, and remove duplicates.
Adjust as your needs change
Your hall closet should work for your current lifestyle, not the one you had years ago.
- Reassign zones if you change jobs, add family members, or start new hobbies.
- Move items you rarely use to long-term storage and free up prime space for daily needs.
- Do a quick reset whenever the closet starts to feel crowded again.
Sample Layouts for Different Hall Closet Sizes
Every home is different, but a few sample layouts can help you picture how to organize your own hall closet.
Narrow hall closet
- Top shelf: Two or three labeled bins for seasonal accessories and backup supplies.
- Hanging rod: Current-season coats and jackets only, on slim hangers.
- Back of door: Over-the-door organizer for gloves, hats, dog leash, flashlight, and keys.
- Floor: One low shoe rack or two bins for daily shoes.
Standard reach-in hall closet
- Top shelf: Bins for seasonal gear, extra paper goods, or rarely used tools.
- Middle shelves (if available): Labeled bins for small tools, light bulbs, batteries, and everyday items.
- Hanging rod: Coats grouped by person, with a few open hangers for guests.
- Sides: Hooks for bags, dog leash, or frequently used jackets.
- Floor: Shoe rack plus a tray for wet boots.
Deeper or double-door hall closet
- Top section: Deep bins for bulk items and rarely accessed supplies.
- Left side: Main coat zone with rod and hooks for outerwear.
- Right side: Utility zone with shelves, bins for tools, cleaning supplies, and a small step stool.
- Back wall or door: Hooks and pockets for everyday items and family members’ personal items.
- Floor: Divided area for shoes and a tall spot for brooms or a folding ladder if needed.
Enjoy a Hall Closet That Works Hard Without the Clutter
Organizing a hall closet that holds coats, tools, and everyday items is about more than making it look neat. When every item has a clear home and the space matches your routines, you save time, reduce stress, and cut down on last-minute scrambling as you head out the door.
By emptying the space, decluttering, creating simple zones, and adding a few smart storage solutions, you can turn even a small hall closet into a hardworking organizing hub. Finish with clear labels and a few quick habits, and your closet will stay under control with minimal effort. Start with one shelf or one zone today, and build from there until your hall closet supports your daily life instead of getting in the way.
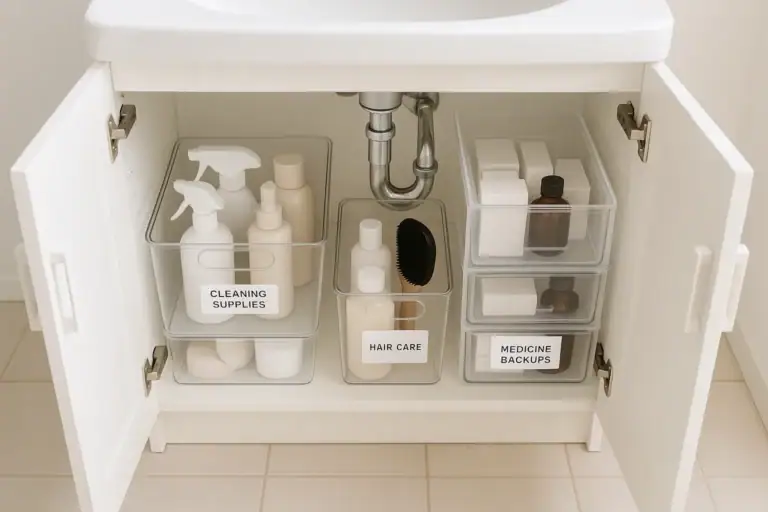 Smart Bathroom Cabinet Organization for Under-Sink Drawers and Medicine Backups
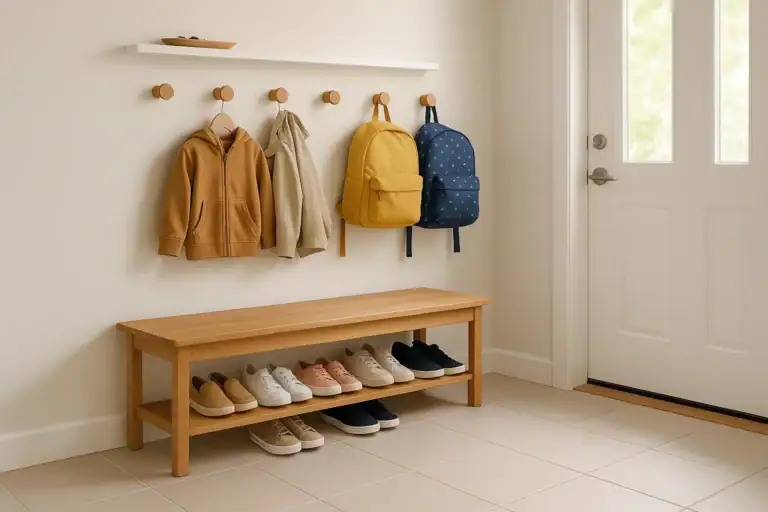 Entryway Shoe Drop Zone Organization for Busy Families
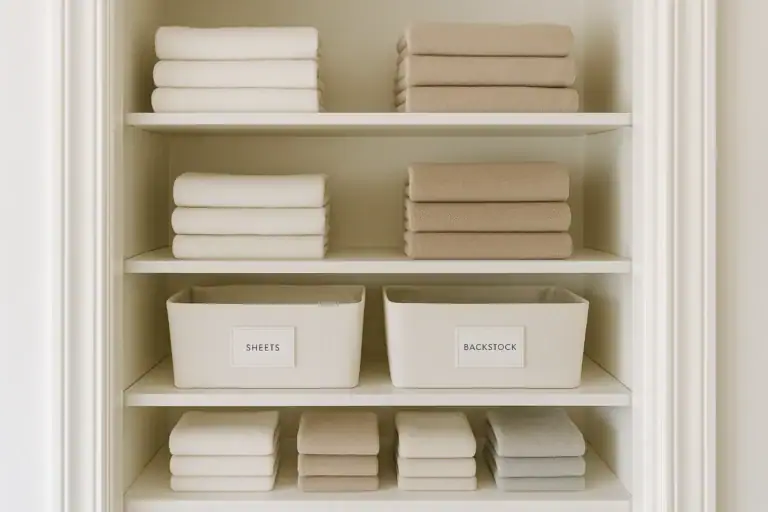 Linen Closet Organization: Simple Zones for Sheets, Towels, and Backstock