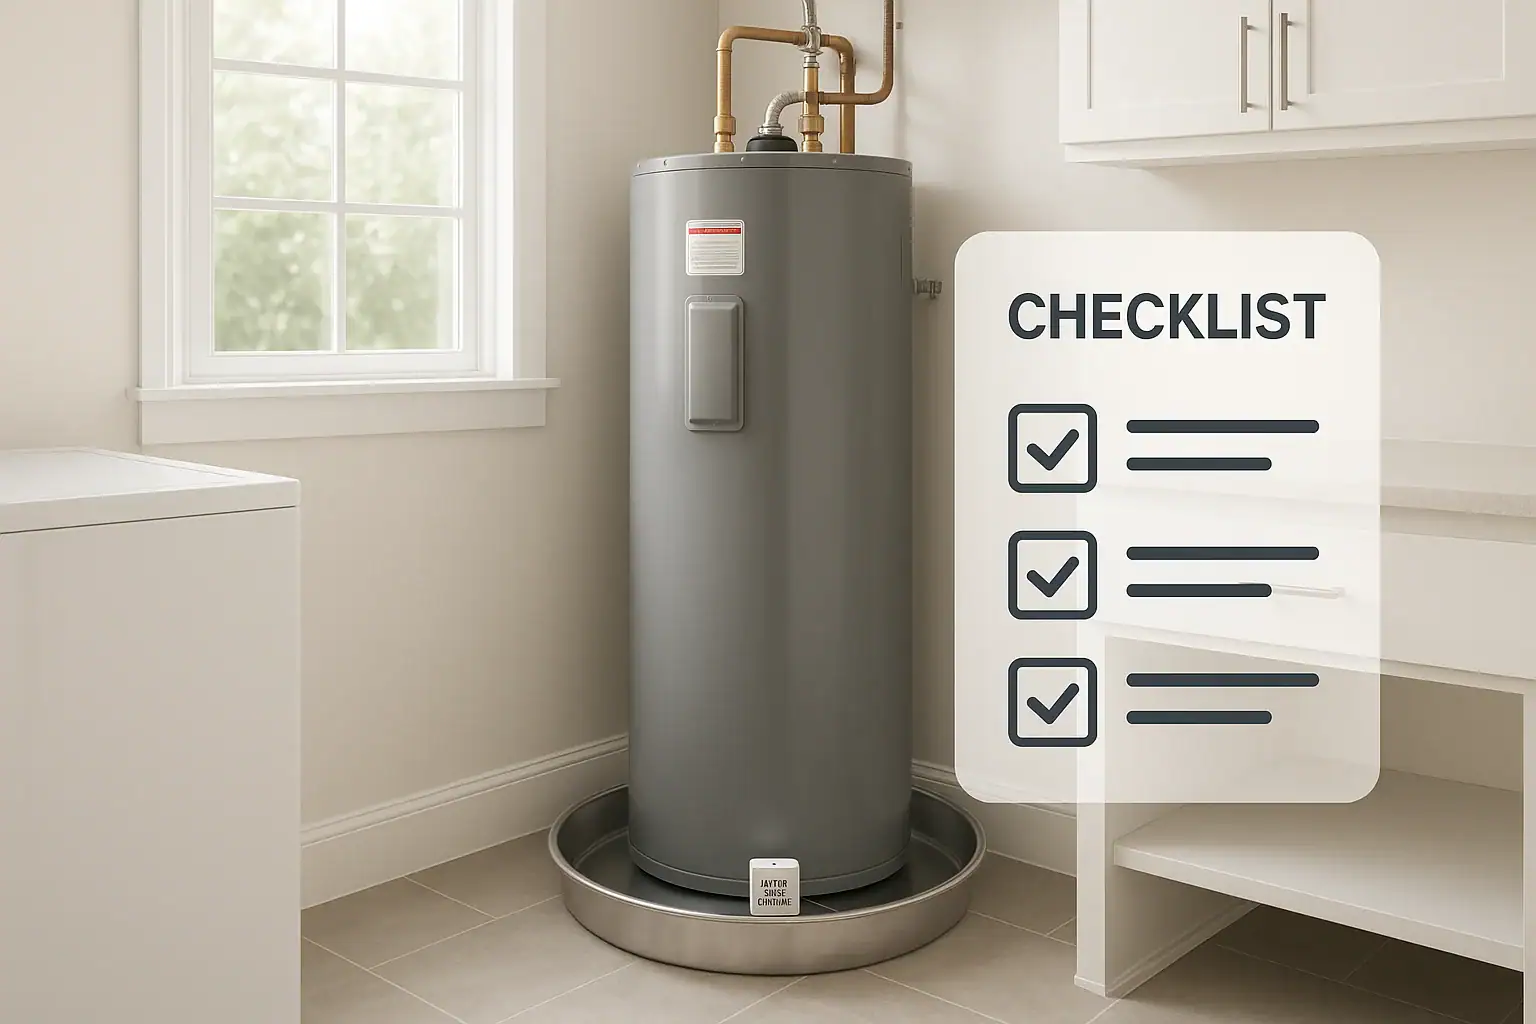
A leaking water heater can quietly cause hundreds or even thousands of dollars in damage before anyone notices. A simple leak pan and alarm setup can dramatically cut that risk. By catching drips early and alerting you right away, you give yourself time to shut off water, protect floors and walls, and schedule repairs before a minor issue turns into a major disaster. This checklist-style guide walks you through everything you need to know to choose, install, and maintain a water heater leak pan and alarm system in a typical US home. You do not need to be an expert to follow these steps, but you should be honest about your comfort level with tools and local plumbing rules. When in doubt, treat this as a planning guide and hire a licensed professional to complete the work safely.
On this page(click to collapse)
- 1. Understand Why You Need a Leak Pan and Alarm
- 2. Pre-Installation Checklist
- 3. Choosing a Water Heater Leak Pan
- 4. Planning the Drain Line
- 5. Installing the Leak Pan: Step-by-Step Checklist
- 6. Selecting a Water Leak Alarm
- 7. Installing and Testing the Leak Alarm
- 8. Integrating the Leak Alarm into Your Smart Home
- 9. Ongoing Maintenance Checklist
- 10. What to Do If the Leak Alarm Sounds
- 11. Make Leak Protection Part of Your Home Safety Plan
- Related guides
1. Understand Why You Need a Leak Pan and Alarm
Before you start shopping or installing anything, it helps to understand how a leak pan and alarm protect your home.
1.1 What a Leak Pan Does
- Catches small leaks and drips from the tank or plumbing connections under the water heater.
- Channels water to a drain line so it can exit the house or a safe location instead of soaking floors and walls.
- Provides a visual warning when you see water collecting in the pan.
1.2 What a Leak Alarm Adds
- Sound alert: A loud audible alarm when water reaches the sensor in the pan.
- Remote alert (optional): Smart alarms can send notifications to your phone or home hub.
- Faster response: You can shut off water or power before the leak spreads.
1.3 When a Pan and Alarm Are Especially Important
- Water heater installed on an upper floor or in an attic.
- Water heater located in a finished basement or near finished living spaces.
- Older water heaters approaching the end of their typical life (8–12 years for many models).
- Homes that are vacant or unoccupied for long periods.
2. Pre-Installation Checklist
Use this checklist before you buy a pan or alarm. It will help you choose the right size and style and avoid surprises on installation day.
2.1 Confirm Local Code Requirements
- Check with your local building department or inspector.
- Ask whether drain pans are required under water heaters in your area.
- Ask if the pan must be connected to a dedicated drain line.
- Verify any rules about discharge locations (for example, not into a crawl space).
If you are not sure how to interpret the rules, plan to consult a licensed plumber.
2.2 Measure Your Water Heater and Space
- Measure the diameter or width and depth of the water heater.
- Measure the floor area where the water heater sits.
- Check for clearance around the heater to slide in a pan.
- Note the location of the drain or floor drain relative to the heater.
Write down these measurements so you can compare them to pan dimensions when shopping.
2.3 Decide Who Will Do the Work
- Moving or lifting a water heater can be heavy and awkward.
- Connecting a drain line may require cutting and gluing pipe.
- Gas and electric connections must be handled safely and correctly.
If any of these steps make you uncomfortable, plan to hire a professional. You can still use this checklist to understand the process and ask better questions.
3. Choosing a Water Heater Leak Pan
Not all leak pans are the same. Use this checklist to choose one that fits your water heater and installation location.
3.1 Pan Size Checklist
- Choose a pan that is larger in diameter or width than the base of the water heater.
- Ensure there is at least 1–2 inches of space between the heater and the pan wall.
- Confirm the pan fits in the available floor area without blocking access panels or doors.
3.2 Pan Material Checklist
- Metal pans: Durable and heat resistant; may be preferred in some codes.
- Plastic pans: Lightweight and corrosion resistant; verify they are rated for water heater use.
- Check product information for temperature and load ratings.
3.3 Drain Outlet Checklist
- Confirm the pan has a pre-formed drain outlet or knockout.
- Check the thread size and type to match your drain fittings.
- Make sure the outlet location works with your planned drain line route.
4. Planning the Drain Line
A leak pan works best when it can drain water away instead of simply holding it. Use this checklist to plan a safe drain route.
4.1 Identify a Safe Discharge Location
- Floor drain in the same room.
- Utility sink (if allowed by local code).
- Approved drain line to the exterior of the home.
Avoid draining into areas where water could damage structural components or create mold, such as crawl spaces or wall cavities.
4.2 Slope and Pipe Checklist
- Plan for a continuous downward slope from the pan to the drain.
- Use pipe material and size that meet local plumbing standards.
- Minimize sharp turns to reduce the chance of clogs.
4.3 Safety and Access
- Keep the drain line visible or accessible where possible for inspection.
- Ensure the line will not be easily stepped on, crushed, or blocked.
5. Installing the Leak Pan: Step-by-Step Checklist
If you are comfortable with basic tools and your local rules allow it, you can use this checklist as a general guide. Always follow the instructions that come with your specific water heater and pan.
5.1 Safety First
- Turn off power to the water heater at the breaker (for electric units).
- Turn off gas supply at the shutoff valve (for gas units).
- Turn off cold water supply to the water heater.
5.2 Prepare the Area
- Clear the space around the water heater.
- Lay down protective material if needed to protect nearby flooring.
- Have a helper available if the heater needs to be lifted.
5.3 Lift and Position the Water Heater
- Disconnect any flexible water lines if necessary, following manufacturer guidance.
- Carefully lift or slide the water heater enough to place the pan underneath.
- Center the heater in the pan with even clearance on all sides.
- Ensure the heater remains level and stable.
If you are not sure how to safely move the heater without damaging gas or electrical connections, stop and contact a professional.
5.4 Connect the Pan Drain
- Install the drain fitting in the pan outlet according to the pan instructions.
- Attach the drain pipe securely to the fitting.
- Route the pipe to the planned discharge location with a continuous downward slope.
- Secure the pipe with clamps or brackets as needed.
5.5 Restore Connections and Test
- Reconnect water lines and verify all fittings are tight.
- Slowly turn on the cold water supply and check for leaks at connections.
- Restore power or gas following the water heater instructions.
- Pour a small amount of water into the pan to confirm it drains properly.
6. Selecting a Water Leak Alarm
Once the pan is in place, the next step is adding an alarm that will alert you when water collects in the pan.
6.1 Alarm Type Checklist
- Standalone battery alarms: Simple, low cost, loud audible alert near the heater.
- Plug-in alarms: Use household power, often with battery backup.
- Smart leak sensors: Connect to Wi-Fi or a smart home hub for phone alerts.
6.2 Features to Consider
- Loudness of the audible alarm (measured in decibels).
- Battery life and low-battery indicators.
- Water detection method (probes, cable sensor, or flat sensor pad).
- Compatibility with your existing smart home system if you want app alerts.
6.3 Placement Checklist
- Place the sensor at the lowest point of the pan where water will collect first.
- Ensure the sensor is not submerged permanently and can be removed for testing.
- Keep the alarm unit accessible for battery changes and testing.
7. Installing and Testing the Leak Alarm
Follow the alarm manufacturer’s instructions first, then use this checklist to confirm your setup.
7.1 Basic Installation Steps
- Install fresh batteries or plug in the alarm as directed.
- Route any sensor cables neatly to avoid tripping or damage.
- Place the sensor in the pan where water will reach it quickly.
7.2 Test the Alarm
- Trigger a test using the built-in test button if provided.
- Place a small amount of water near the sensor to confirm it detects moisture.
- Verify that the audible alarm is loud enough to hear from nearby living spaces.
- If using a smart alarm, confirm you receive phone or hub notifications.
7.3 Label and Document
- Write the installation date on the alarm or nearby.
- Note the battery type and recommended replacement interval.
- Record any app or account details if using a smart device.
8. Integrating the Leak Alarm into Your Smart Home
If you use a smart home system, you can go beyond a simple beep and create a more connected safety setup.
8.1 Smart Integration Ideas
- Receive push notifications on your phone when the alarm triggers.
- Link the alarm to a smart speaker to announce a leak in plain language.
- Log leak events in your smart home app for future reference.
8.2 Advanced Automations to Consider
- Trigger smart lights in the basement or utility room to turn on when a leak is detected.
- Send an automatic alert email or text to household members.
- If you have a compatible smart shutoff valve, consider an automation to shut off water when a leak is detected, after carefully testing and confirming reliability.
Always test automations thoroughly so they do not trigger unexpectedly or interrupt normal water use.
9. Ongoing Maintenance Checklist
A leak pan and alarm only protect your home if they are maintained. Build these simple checks into your seasonal home maintenance routine.
9.1 Monthly or Quarterly Checks
- Visually inspect the pan for standing water or rust.
- Check the drain line for clogs, kinks, or damage.
- Confirm the water heater is still centered and stable in the pan.
9.2 Alarm Maintenance
- Test the alarm using the test button according to the manufacturer’s schedule.
- Replace batteries at least once a year or when the low-battery signal appears.
- Inspect sensor probes or cables for corrosion or buildup and clean gently if needed.
9.3 Annual Water Heater Check
- Check the age of your water heater and compare it to typical service life.
- Inspect for signs of corrosion around fittings and the tank base.
- Consider a professional inspection, especially for older units or gas heaters.
10. What to Do If the Leak Alarm Sounds
Knowing how to respond to a water heater leak alarm can limit damage and keep your family safe.
10.1 Immediate Response Checklist
- Go to the water heater area safely and confirm the source of water.
- If water is actively leaking, shut off the cold water supply to the heater.
- Turn off power or gas to the water heater following safety guidelines.
- Use towels or a wet vacuum to remove standing water from the floor.
10.2 Assess the Severity
- Small drip from a fitting: May be resolved by tightening or replacing a connection, often with professional help.
- Rust or crack in the tank: Usually means the water heater is near the end of its life and may need replacement.
- Frequent alarms without visible leaks: Check for sensor placement issues or condensation.
10.3 When to Call a Professional
- You see significant rust, bulging, or cracks on the tank.
- The leak persists after you tighten or replace simple fittings.
- You are unsure how to safely restore gas or electrical connections.
11. Make Leak Protection Part of Your Home Safety Plan
Adding a water heater leak pan and alarm is a straightforward project that can prevent major water damage and disruption. When combined with smart alerts and regular maintenance, this simple setup acts like a quiet guardian in your utility room or basement, watching for early signs of trouble. Treat this checklist as part of a broader home safety plan that includes smoke alarms, carbon monoxide detectors, and other smart sensors. For more ideas on integrating practical safety upgrades into your connected home, explore additional guides and resources in the smart home and safety section at Signature Home Guide. With a clear plan and a few well-chosen devices, you can reduce the risk of surprise leaks and enjoy a more resilient, comfortable home.
Recommended next:
Related posts
Browse this topic →
Smart Lock Battery Dead? How to Create a Reliable Backup Access Plan

Password Manager Basics for Families at Home: A Simple Guide

How to Set Up a Secure Home WiFi Guest Network for Smart Devices
Garage Door Sensor Safety Testing Checklist for a Safer Home
Motion Sensor Light Placement for Driveway and Side Yard: A Practical Checklist
Outlet Overload Signs and Safe Power Strip Use at Home
Keep reading
About this site
Signature Home Guide publishes practical, independent home guides. We aim to be clear, helpful, and transparent.
Affiliate disclosure
As an Amazon Associate, we earn from qualifying purchases. Some links on this site may be affiliate links. If you buy through these links, we may earn a small commission at no extra cost to you. This helps support our content. Learn more.