Water can cause thousands of dollars in damage in just a few minutes. A burst pipe, overflowing toilet, or failed appliance can quickly soak floors, walls, and wiring. The most powerful tool you have in that moment is knowing exactly how to shut off the water fast. The problem is that many people do not know where their shutoff valves are until a crisis hits. This guide walks you through a clear, practical checklist to help you find, label, and test every important water shutoff in and around your home before you need it.
On this page(click to collapse)
- Why a Water Shutoff Plan Matters
- Step 1: Make a Quick Water Emergency Checklist
- Step 2: Find and Label Your Main Water Shutoff Valve
- Step 3: Locate the Street or Curb Shutoff (If Accessible)
- Step 4: Find and Label Fixture Shutoff Valves
- Step 5: Identify Outdoor and Seasonal Shutoffs
- Step 6: Create a Simple Water Emergency Map
- Step 7: Assign Roles and Practice Your Plan
- Safety Tips When Shutting Off Water in an Emergency
- When to Call a Professional
- Review: Your Water Shutoff Emergency Checklist
- Related guides
Use this article as a weekend project. You will locate your main water shutoff, individual fixture valves, and key outdoor shutoffs. You will also create a simple emergency plan that everyone in your household can follow. With a little preparation now, you can respond calmly and confidently when water starts going where it should not.
Why a Water Shutoff Plan Matters
Water emergencies are common, but they do not have to become disasters. A clear shutoff plan helps you:
- Stop leaks within seconds or minutes instead of waiting for help
- Limit damage to floors, cabinets, drywall, and personal items
- Protect electrical systems and reduce fire or shock risk
- Prevent mold growth that can start within 24–48 hours
- Save money on repairs, insurance deductibles, and higher premiums
Just like a fire escape plan, a water shutoff plan works only if everyone knows it and can follow it quickly. The checklist below will help you build that plan step by step.
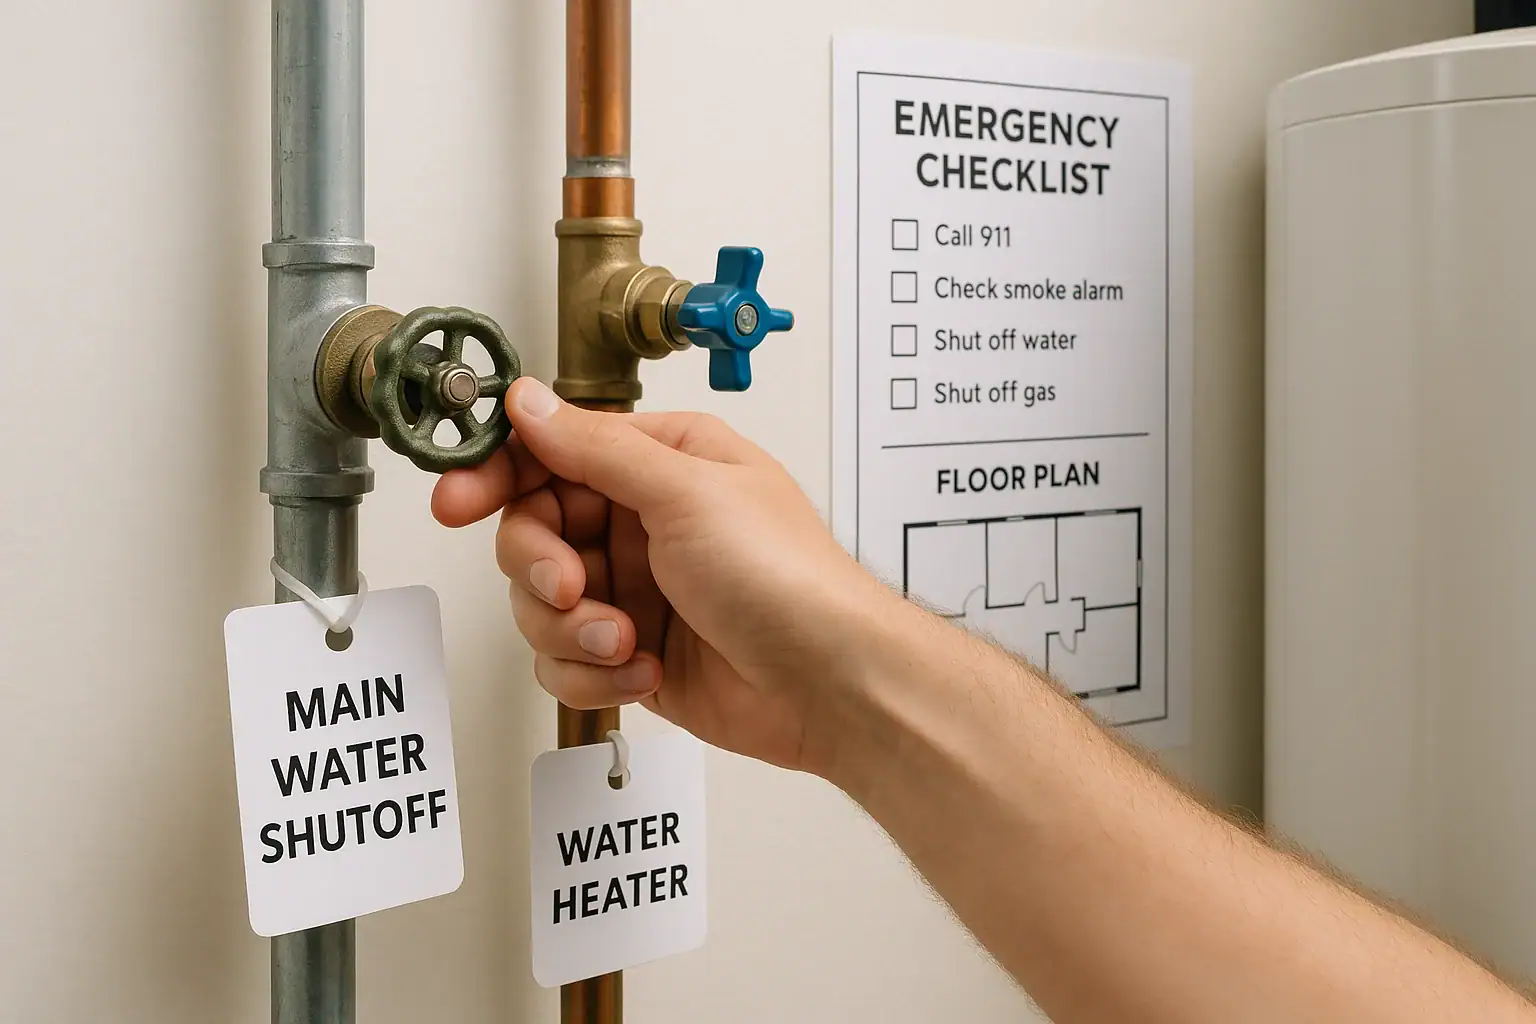
Step 1: Make a Quick Water Emergency Checklist
Before you start hunting for valves, write a simple checklist you can keep on your fridge or in a household binder. Here is a sample you can copy and customize:
Sample Water Emergency Checklist
- Stay calm. If water is near outlets or wiring, avoid standing water and consider shutting off electricity to the affected area.
- Turn off the closest fixture valve (toilet, sink, appliance) if you can see where the water is coming from.
- If you cannot stop it at the fixture, shut off the main water valve to the house.
- Open a faucet in a low part of the home to relieve pressure after turning off the main.
- Clean up standing water with towels, a mop, or a wet vacuum.
- Document damage with photos and notes if repairs or insurance claims may be needed.
As you work through the rest of this guide, fill in the exact locations of your valves and any special instructions right on your checklist.
Step 2: Find and Label Your Main Water Shutoff Valve
The main water shutoff valve is the single most important part of your plan. Turning this valve off stops nearly all water flowing into your home.
Where to Look for the Main Shutoff Valve
Common locations inside the home include:
- Along an exterior wall on the lowest level of the house
- Near the water heater or furnace
- In a basement or crawl space where the main line enters the home
- In a utility room, laundry room, or attached garage
In some homes, especially in warmer climates, the main shutoff may be:
- In a covered box or pit just outside an exterior wall
- Near an outdoor faucet closest to where the main line enters
How to Recognize the Valve
The main valve is usually installed on the largest water pipe entering your home. It may look like:
- A round or oval handle you turn clockwise to close (gate valve)
- A lever handle that turns a quarter turn so it is perpendicular to the pipe when off (ball valve)
Test the Main Shutoff Safely
- Make sure everyone knows you are testing the water.
- Turn the valve slowly to the off position.
- Open a faucet in a sink or tub and wait for the water to slow and stop.
- Turn the valve back on slowly to avoid a sudden pressure surge.
- Check that water flows normally again.
If the valve will not move, leaks, or does not fully shut off the water, note that on your checklist and contact a licensed professional to repair or replace it. A working main shutoff is essential.
Label the Main Valve Clearly
Once you have found and tested the main valve:
- Attach a durable tag that says “Main Water Shutoff – Turn Clockwise to Close” or similar wording.
- Use a permanent marker so the writing does not fade.
- Consider adding an arrow showing the direction to close the valve.
- Take a photo of the valve and print it to keep with your emergency checklist.
Step 3: Locate the Street or Curb Shutoff (If Accessible)
Many properties also have a shutoff at or near the property line, often in a buried box with a lid. In many areas, only the local utility is allowed to operate this valve, but it is still useful to know where it is.
Checklist for the Street Shutoff
- Walk the front yard and sidewalk area to find a small metal or plastic cover labeled for water service.
- Note its location on your emergency checklist and in a simple sketch of your property.
- Do not attempt to open or operate this valve unless your local rules allow it and you know how to do so safely.
- Keep the area around the cover clear of plants, soil, and debris so it is easy for utility workers to access in an emergency.
If you ever need help shutting off water at the street, knowing the exact location lets you guide a utility worker quickly to the right spot.
Step 4: Find and Label Fixture Shutoff Valves
In many emergencies, you can avoid cutting water to the entire house by shutting off only the problem fixture. This is faster and more convenient, especially if you are dealing with a single toilet, sink, or appliance.
Toilets
Every toilet should have a shutoff valve on the wall or floor behind it.
- Look for a small valve where the supply line connects to the wall.
- Turn the handle clockwise to close. Test by flushing; the tank should not refill.
- Label it with a small tag or sticker that says “Toilet Shutoff.”
Bathroom and Kitchen Sinks
Most sinks have two shutoff valves under the cabinet, one for hot water and one for cold.
- Open the cabinet and locate the valves on the pipes leading to the faucet.
- Turn each valve clockwise to close. Test by turning on the faucet.
- Label them “Sink Hot Shutoff” and “Sink Cold Shutoff.”
Dishwashers and Ice Makers
These appliances often share shutoffs with nearby sinks or have separate valves in the cabinet or behind an access panel.
- Trace the small water line from the appliance back to its source.
- Identify and test the shutoff by turning it off and running a short cycle or checking for flow.
- Label it clearly so you can find it quickly if the appliance leaks.
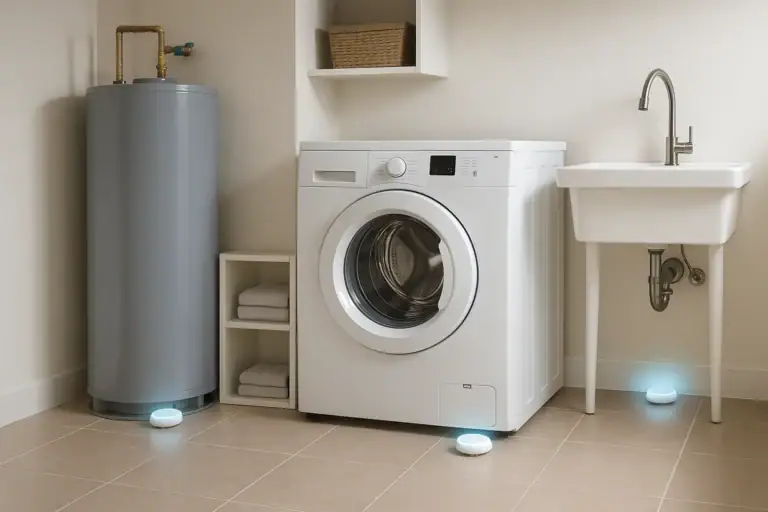
Washing Machines
Washing machines usually have two valves, hot and cold, on the wall behind the machine.
- Pull the machine out slightly if needed, making sure hoses are not strained.
- Locate the valves and turn them clockwise to close.
- Label them and make sure they are easy to reach without tools.
Water Heaters
Water heaters have a cold water shutoff valve on the pipe entering the top or side of the tank.
- Find the cold supply line and the valve that controls it.
- Turn it to the off position and verify that hot water flow at a faucet slows and stops.
- Label this valve “Water Heater Cold Shutoff.”
If you have a leak around the water heater, shutting this valve can limit damage while you arrange repairs.
Step 5: Identify Outdoor and Seasonal Shutoffs
Outdoor water lines are especially vulnerable to freezing, damage, and accidental impact. Knowing how to shut these off protects both your yard and the interior of your home.
Hose Bibs and Exterior Faucets
Many homes have interior shutoff valves that control exterior faucets.
- Look in the basement, crawl space, or utility room near where the outdoor faucet is located.
- Find the valve on the pipe leading to the exterior wall.
- Test by turning the valve off and opening the outdoor faucet to confirm the flow stops.
- Label it with the location it serves, such as “Backyard Faucet Shutoff.”
Sprinkler or Irrigation Systems
Sprinkler systems usually have a dedicated shutoff near where the system branches off from the main supply.
- Locate the main irrigation line, often near the foundation or in a valve box in the yard.
- Identify the shutoff and test it by turning it off and running the system briefly.
- Label the valve and note any winterizing steps on your checklist, such as draining or blowing out the lines.
Step 6: Create a Simple Water Emergency Map
Once you have found and labeled your valves, turn your notes into a simple map that anyone in the household can follow.
How to Draw Your Map
- Start with a basic floor plan sketch of each level of your home.
- Mark the location of the main shutoff with a bold symbol.
- Add symbols for fixture valves: toilets, sinks, appliances, and outdoor lines.
- Write short notes next to each symbol, such as “Turn clockwise to close.”
- Include the location of the street or curb shutoff, even if only the utility can operate it.
Post a copy of this map in a visible spot, such as the inside of a pantry door or near the main entry. Keep a second copy with your home records.
Step 7: Assign Roles and Practice Your Plan
A plan is most effective when everyone knows their role. Even older children can learn basic steps that help protect your home.
Household Roles Checklist
- Primary shutoff person: The adult or teen responsible for turning off the main valve.
- Secondary shutoff person: A backup person in case the primary is not home.
- Communication person: Someone who calls for help if needed and keeps others informed.
- Cleanup helpers: Family members who start moving items out of harm’s way and soaking up water.
Walk through a practice scenario together:
- Pick a “what if” situation, such as an overflowing toilet or a burst washing machine hose.
- Have each person go to the valve they would use in that situation.
- Talk through the steps of shutting off water, staying safe around electricity, and starting cleanup.
- Review your checklist and map to see if anything is unclear or missing.
Safety Tips When Shutting Off Water in an Emergency
Acting quickly is important, but so is staying safe. Keep these guidelines in mind:
- If water is near electrical outlets, cords, or appliances, avoid standing in water and consider switching off power to the affected area at the electrical panel.
- Do not force a valve that is stuck; you could break it and make the situation worse.
- Wear shoes with good traction to avoid slipping on wet floors.
- Use a flashlight instead of open flames if a leak occurs in a dark area.
- If you suspect a major pipe break underground or outside, contact your utility or a licensed professional.
When to Call a Professional
Your job in an emergency is to stop the flow of water and protect your home. After that, many situations require expert help.
Consider calling a licensed professional when:
- The main shutoff will not close or leaks when you operate it
- A pipe has burst or cracked and needs repair or replacement
- You see signs of ongoing leaks inside walls or ceilings
- You are not comfortable operating certain valves or systems
- There is extensive water damage, especially near electrical systems
Document what you did, when you turned off the water, and any visible damage. This information can be helpful for repair professionals and insurance claims.
Review: Your Water Shutoff Emergency Checklist
Use this final checklist to confirm you are ready for a water emergency:
- You have found, tested, and labeled the main water shutoff valve.
- You know the location of the street or curb shutoff and how to guide a utility worker to it.
- Every toilet, sink, and major water-using appliance has a working, labeled shutoff valve.
- Outdoor faucets and irrigation systems have clearly marked shutoffs, and you know how to use them.
- You have created a simple map showing all major shutoff locations.
- Your household members know who will shut off water, who will call for help, and who will begin cleanup.
- You have practiced at least one emergency scenario together.
Taking these steps now means that when a leak or overflow happens, you will not waste time searching for valves or guessing which way to turn them. You will have a clear, tested plan to shut off water quickly in an emergency and protect your home from unnecessary damage.
For more home safety and smart home planning ideas, you can explore additional resources at this home safety hub.
Recommended next:
Related posts
Browse this topic →
Carbon Monoxide Alarm End-of-Life Beeps: Troubleshooting and Safe Replacement
Childproofing Doors, Windows, Locks, Alarms, and Blind Cords: A Complete Checklist
How to Keep Security Camera Footage Private Inside Your Home
Router Placement at Home for Better WiFi Without Extra Devices
Smart Thermostat Vacation Mode Settings: A Complete Homeowner Guide
Emergency Lighting Plan for Power Outages Without Candles: A Practical Checklist
Keep reading
About this site
Signature Home Guide publishes practical, independent home guides. We aim to be clear, helpful, and transparent.
Affiliate disclosure
As an Amazon Associate, we earn from qualifying purchases. Some links on this site may be affiliate links. If you buy through these links, we may earn a small commission at no extra cost to you. This helps support our content. Learn more.