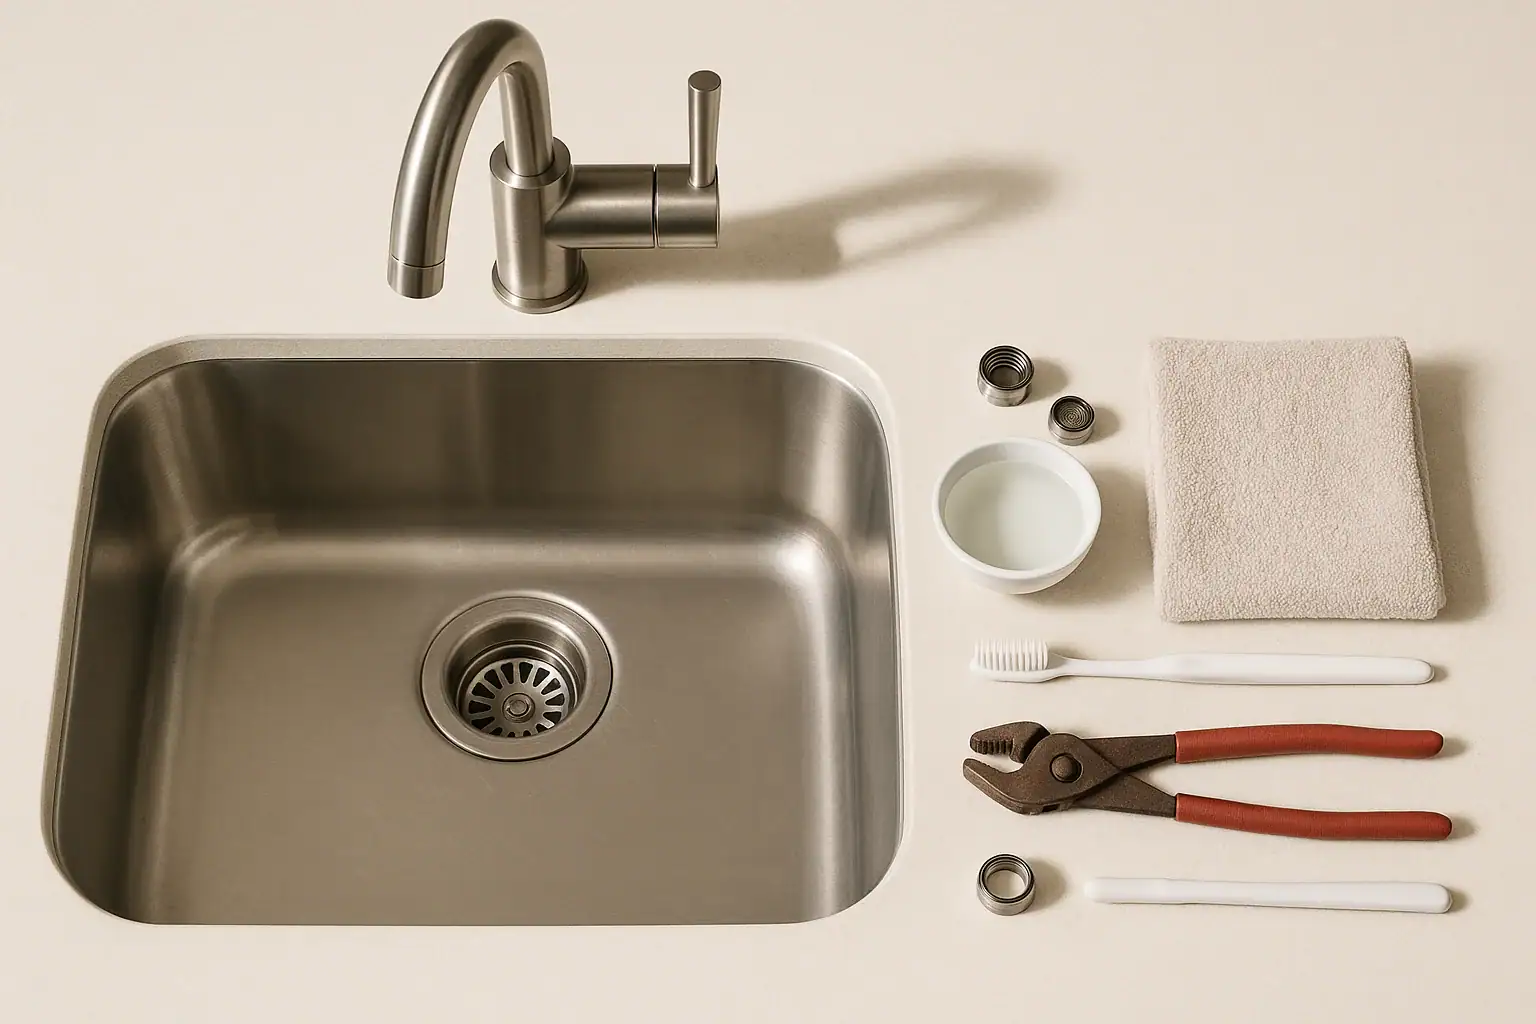
When your kitchen faucet suddenly starts to trickle instead of flow, the problem is often right at the tip of the spout: the aerator. This small, screen-like piece mixes air with water to create a smooth stream, but it also catches mineral deposits, grit, and debris over time. The good news is that cleaning a kitchen sink aerator is one of the easiest DIY fixes you can do, and it can quickly restore normal water flow without calling a plumber. In this guide, you will learn how to safely remove, clean, and reinstall your aerator, how to deal with stubborn mineral buildup, and what to do if your faucet has a hidden aerator. You will also get simple maintenance tips to help keep your kitchen water flowing strong and clear.
How a Kitchen Sink Aerator Affects Water Flow
Understanding what the aerator does makes it easier to diagnose low water flow. The aerator is the small fitting at the end of the faucet spout. Inside, it usually contains several parts:
- A metal or plastic housing that screws onto the faucet
- One or more fine mesh screens
- A small rubber washer or gasket to prevent leaks
- Sometimes a flow restrictor insert
As water passes through the aerator, it is forced through tiny openings and mixed with air. This creates a steady, non-splashing stream and can reduce water use without making the flow feel weak. However, those tiny openings also trap:
- Mineral deposits from hard water
- Sand, grit, or rust from old pipes
- Small bits of debris from plumbing work
When the screens and openings become clogged, the water stream becomes weak, uneven, or sprays in odd directions. Cleaning the aerator clears these blockages and often restores normal flow immediately.
Signs Your Kitchen Sink Aerator Needs Cleaning
Low water flow can have several causes, but the aerator is one of the easiest to check first. Look for these common signs:
- Sudden drop in water pressure at the kitchen faucet while other fixtures seem normal
- Uneven spray pattern with water shooting sideways or in multiple directions
- Fine particles visible on the screen at the end of the faucet
- Good flow on hot but not cold (or the opposite), suggesting debris has shifted in the aerator
- Flow improves temporarily after you tap the faucet or run water at full blast
If one or more of these symptoms match what you are seeing, cleaning the aerator is a smart first step before exploring more complex plumbing issues.
Tools and Supplies You Will Need
You can clean most kitchen sink aerators with basic household items. Gather these before you start:
- Adjustable wrench or small pliers
- Soft cloth or rag
- Masking tape or painter’s tape (to protect the finish)
- Small bowl or cup
- White vinegar
- Toothbrush or small soft brush
- Toothpick, sewing needle, or straight pin
- Towel to cover the sink drain
If your faucet has a hidden or recessed aerator, you may also need a small aerator key or hex tool that fits inside the spout. Many faucets include this tool with the original packaging, but you can also find universal keys that fit common sizes.
Step 1: Prepare the Sink Area
Before you remove anything, take a minute to protect small parts from falling down the drain and to safeguard the finish on your faucet.
Protect the Drain
Place a towel, washcloth, or sink strainer over the drain opening. The aerator contains tiny pieces that are easy to drop, and blocking the drain will save you from having to fish them out of the trap later.
Protect the Faucet Finish
If you plan to use pliers or a wrench, wrap the aerator housing with a layer of masking tape or a soft cloth first. This helps prevent scratches or tool marks on the metal finish.
Step 2: Remove the Kitchen Sink Aerator
The way you remove the aerator depends on whether it is a standard external aerator or a hidden recessed design.
Removing a Standard External Aerator
Most traditional kitchen faucets have an aerator that is clearly visible at the end of the spout. To remove it:
- Look for flat sides on the aerator housing. These are designed for a wrench or pliers.
- Try loosening by hand first. Grip the housing and turn it counterclockwise (left) while facing the faucet.
- If it is stuck, wrap the housing with tape or a cloth, then use an adjustable wrench or pliers to gently turn it counterclockwise.
- Unscrew slowly and be ready to catch any small internal parts that may fall out.
Removing a Hidden or Recessed Aerator
Many modern kitchen faucets use a hidden aerator that sits slightly inside the spout, leaving a smooth outer edge. To remove this style:
- Look inside the spout for small notches or a hex-shaped opening.
- Insert the aerator key or the correct hex tool into the opening.
- Turn counterclockwise until the aerator assembly loosens.
- Carefully pull out the aerator and any attached inserts.
If you do not have the original key, you can often use a universal aerator key set. Match the size that fits snugly into the notches or hex opening.
Step 3: Disassemble the Aerator Components
Once the aerator is off the faucet, you will see that it is made up of several small parts stacked together. Disassembling them makes cleaning more thorough.
- Work over a towel or tray so small pieces do not roll away.
- Gently push out the internal pieces from the housing using your fingers or a blunt object.
- Lay out the parts in order as you remove them. This makes reassembly much easier later.
Typical parts include one or more screens, a plastic flow regulator or mixing insert, and a rubber washer. Some aerators are a single combined cartridge that does not fully come apart; you can still soak and brush this style effectively.
Step 4: Soak the Aerator to Remove Mineral Buildup
Mineral deposits from hard water are a common cause of low water flow. Soaking the aerator in white vinegar helps dissolve this buildup.
- Fill a small bowl with enough white vinegar to fully cover the aerator parts.
- Place the metal housing, screens, and inserts into the bowl.
- Soak for 30 minutes for light buildup. For heavy deposits, soaking for 1 to 2 hours is often helpful.
- Check plastic and rubber parts periodically. If you are concerned about long soaks, you can remove rubber washers earlier and clean them separately with water.
After soaking, you should see some of the white or greenish deposits soften or flake off. This means the vinegar is working and you are ready for scrubbing.
Step 5: Scrub and Clear the Aerator Screens
After soaking, physical cleaning removes remaining debris and restores the small openings that control water flow.
- Use a toothbrush or small brush to gently scrub each screen and insert. Focus on areas where deposits are still visible.
- Rinse under running water to wash away loosened particles.
- Use a toothpick or needle to carefully clear any blocked holes in the screens or flow restrictor. Do not enlarge the holes; just remove debris.
- Inspect the rubber washer for cracks, flattening, or damage. A worn washer can cause leaks around the aerator when reinstalled.
If any screen is badly corroded, torn, or permanently clogged, it may be time to replace the aerator with a new one. However, most units can be restored with careful cleaning.
Step 6: Flush the Faucet Before Reinstalling
Before putting the aerator back on, it is smart to flush any loose debris out of the faucet and supply lines so it does not immediately clog the screen again.
- Remove the towel from the drain temporarily so water can flow freely.
- Turn on the faucet slowly with the aerator still removed.
- Let the water run for 10 to 20 seconds on both hot and cold settings. This helps flush out grit or sediment.
- Turn off the faucet and cover the drain again before handling the aerator parts.
If you see small bits of debris coming out during this flush, that confirms the aerator was likely catching similar material before you cleaned it.
Step 7: Reassemble and Reinstall the Aerator
With everything clean and flushed, you can put the aerator back together and restore normal use of your kitchen sink.
Reassembling the Aerator
- Refer to the layout you created when disassembling the aerator. Place the parts in the same order.
- Insert the screens and flow regulator back into the housing, making sure they sit flat and aligned.
- Position the rubber washer at the top or bottom of the stack, depending on how it was originally installed.
Reinstalling on the Faucet
- Thread the aerator onto the spout by hand, turning clockwise (right) while facing the faucet.
- Hand-tighten firmly so the washer compresses and seals, but do not overtighten.
- If needed, use a wrench for a final small turn, protecting the finish with tape or a cloth.
- Turn on the faucet and check for leaks around the aerator and for improved water flow.
The stream should now be stronger, more even, and free of stray sprays. If flow is still very weak, you may need to repeat the cleaning, check for a damaged insert, or consider other plumbing issues.
Troubleshooting If Low Water Flow Continues
Sometimes cleaning the aerator does not fully solve low water flow. If that happens, use these troubleshooting steps to narrow down the cause.
- Test other fixtures. If multiple faucets in your home have low flow, the issue may be with the main supply, a shutoff valve, or a pressure regulator.
- Check under-sink shutoff valves. Make sure the hot and cold valves are fully open and not partially closed.
- Inspect supply hoses. Kinked or clogged flexible hoses under the sink can limit flow to the faucet.
- Look for leaks. Damp cabinets, dripping connections, or water stains can indicate a more serious plumbing problem.
- Consider pipe buildup. In older homes, internal pipe corrosion or heavy mineral buildup can restrict flow and may require professional attention.
If you are uncomfortable working with plumbing connections or if multiple fixtures are affected, contacting a licensed professional is a safe next step.
How Often to Clean a Kitchen Sink Aerator
Regular aerator maintenance helps prevent sudden drops in water flow and keeps your kitchen faucet working efficiently.
General Guidelines
- Every 3 to 6 months in areas with moderate water hardness
- Every 1 to 3 months if you have hard water or notice frequent buildup
- After any plumbing work that may send debris through the lines, such as pipe repairs or water heater replacement
Cleaning on a schedule takes only a few minutes and can extend the life of your faucet by reducing strain on internal parts.
Tips to Reduce Future Buildup and Keep Flow Strong
Along with regular cleaning, a few simple habits can help keep your kitchen sink aerator clear and your water flow consistent.
- Run water briefly after long periods of non-use, such as vacations, to flush any settled debris.
- Avoid overtightening the aerator when reinstalling, which can damage threads and make future removal harder.
- Wipe the faucet tip occasionally with a cloth dipped in vinegar to remove surface mineral spots.
- Consider water treatment options if you consistently see heavy mineral deposits on fixtures and dishes.
- Keep a small kit with a spare aerator, washer, and cleaning tools in your kitchen for quick fixes.
These small steps support good water flow and help you avoid the frustration of a slow, sputtering kitchen faucet.
When to Replace Instead of Clean
Most of the time, cleaning restores an aerator to near-new performance. However, replacement is a better option in some situations.
- Severe corrosion on the housing or screens that will not come clean
- Cracked or broken plastic inserts that affect the spray pattern
- Damaged threads that prevent the aerator from tightening securely
- Persistent leaks around the aerator even after replacing the washer
Replacement aerators are typically inexpensive and available in different flow rates and spray patterns. When selecting one, match the thread size and style of your existing faucet to ensure a proper fit.
Summary: A Simple Fix for Low Kitchen Water Flow
Low water flow at the kitchen sink is often caused by a clogged aerator, not a major plumbing failure. With a few basic tools and household supplies, you can remove, clean, and reinstall the aerator in less than an hour. Soaking in vinegar, scrubbing the screens, flushing the faucet, and reassembling the parts in the correct order will usually restore a strong, even stream. By adding aerator cleaning to your regular home maintenance routine, you can keep your kitchen faucet working efficiently and avoid unnecessary service calls. If flow remains low after cleaning, then it is time to look at valves, supply lines, or broader plumbing issues, but the aerator is always the best place to start.
If you want to explore more ways to improve water performance and efficiency in your kitchen, you can find additional guides, checklists, and how-to articles in the water and kitchen section of your favorite home resource site.
 How to Clean a Dishwasher Filter Step by Step for Sparkling Dishes
 Fixing Low Hot Water Pressure at One Faucet
 Garbage Disposal Smell Causes and a Simple Cleaning Routine That Works