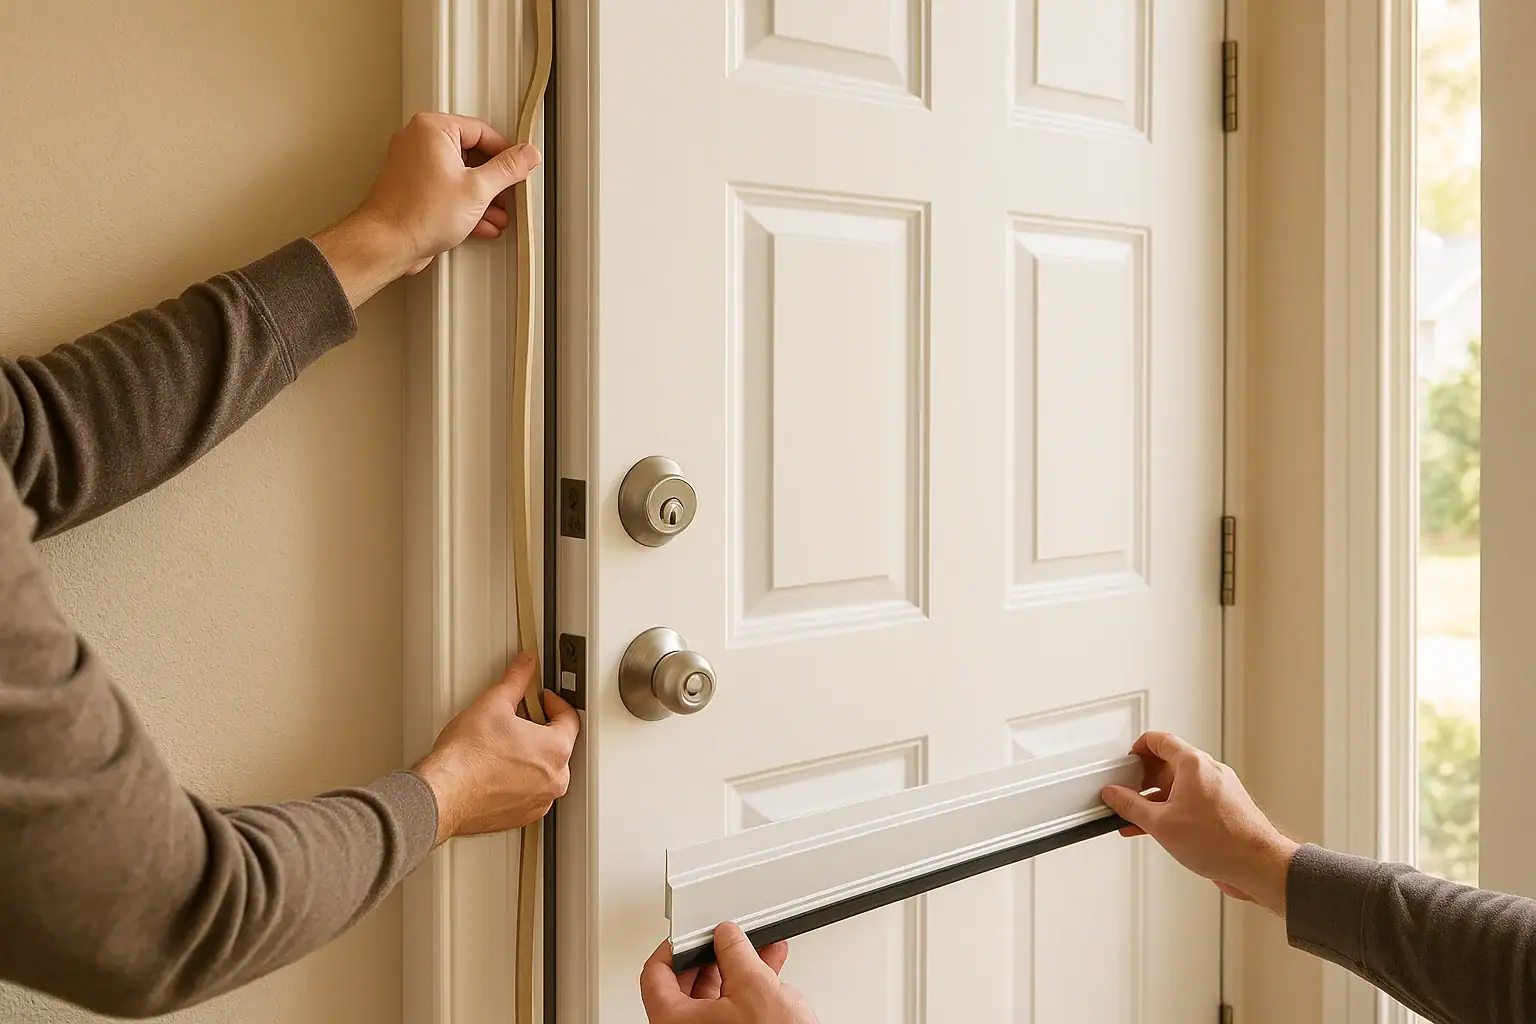
If your home feels drafty, noisy, or harder to keep warm or cool than it should, your doors are a great place to start improving comfort. Small gaps around and under doors can let in cold winter air, hot summer air, dust, pollen, and outside noise. The result is a home that never quite feels right and energy bills that creep higher every season. A simple door sweep and weatherstripping comfort upgrade can make a surprisingly big difference without a major renovation or big budget.
This guide walks you through what door sweeps and weatherstripping do, how to choose the right options for your home, and how to install them step by step. You will also learn how to check for air leaks, maintain your upgrades over time, and avoid common mistakes. Whether you live in a drafty older house or a newer home that just needs a little tuning, these projects are approachable for most homeowners with basic tools.
Why Door Sweeps and Weatherstripping Matter for Comfort
Every exterior door is essentially a big hole in your building envelope. Even a small gap can let conditioned air escape and unconditioned air rush in. Over time, the original seals around the door can compress, crack, or fall off, leaving you with invisible leaks that affect comfort every day.
Key benefits of sealing your doors
- Better temperature control: Fewer drafts mean more consistent temperatures from room to room.
- Lower energy bills: Your heating and cooling system does not have to work as hard to make up for lost air.
- Improved indoor air quality: Sealing gaps helps block dust, pollen, insects, and outdoor odors.
- Less noise: Tight seals reduce street noise and outdoor sounds sneaking in around the door.
- More comfort near doors: Entryways and nearby rooms feel less chilly in winter and less hot in summer.
Because these upgrades are inexpensive and relatively easy to do, they are often recommended as one of the first steps in improving home comfort and energy efficiency.
Understanding the Basics: Door Sweeps vs. Weatherstripping
Door sweeps and weatherstripping work together to seal the entire perimeter of your door. Each has a specific role.
What is a door sweep?
A door sweep is a strip attached to the bottom of the door that seals the gap between the door and the threshold or floor. It usually includes a rigid mounting strip and a flexible sealing material that lightly brushes or presses against the surface below.
Door sweeps are especially important for blocking:
- Cold or hot air flowing under the door
- Dust, insects, and small debris
- Light and noise coming in at floor level
What is weatherstripping?
Weatherstripping is material applied around the sides and top of the door frame to seal the gap between the door slab and the jamb. It compresses when the door closes, forming a tight seal.
Weatherstripping is designed to block:
- Air leaks around the door edges
- Moisture infiltration during storms
- Rattling and vibrations when the wind blows
When both the sweep and weatherstripping are in good shape and properly installed, you get a more complete and durable seal.
How to Check Your Doors for Drafts and Leaks
Before you choose new materials, it helps to understand where your leaks are. A quick inspection can reveal a lot about what your door needs.
Simple tests you can do today
- Light test: At night, turn off indoor lights and shine a flashlight around the edges of a closed door from the outside. If you see light from inside, air can pass through those gaps.
- Paper test: Close a piece of paper in the door at various spots around the frame. If you can pull it out easily without resistance, the seal is weak in that area.
- Hand test: On a windy or very hot or cold day, slowly run your hand around the perimeter of the closed door. Feel for noticeable drafts or temperature changes.
- Smoke or incense test: Carefully hold a stick of incense or a smoke pencil near the door edges. If the smoke stream wavers or is pulled in or out, there is an air leak.
What to look for visually
- Cracked, brittle, or missing weatherstripping along the frame
- A visible gap at the bottom of the door where you can see daylight
- Warped or damaged door bottoms or thresholds
- Loose screws or sagging hinges that prevent the door from closing tightly
Once you know where the problems are, you can choose the right combination of door sweep and weatherstripping to fix them.
Types of Door Sweeps and How to Choose
Door sweeps come in several styles, each suited to different door types and floor conditions. Matching the sweep to your situation is key for good performance and long life.
Common door sweep styles
- Standard surface-mounted sweep: Attaches to the interior or exterior face of the door near the bottom. A flexible strip extends down to meet the threshold or floor. This is one of the easiest options to install.
- Automatic door sweep: Uses an internal mechanism that drops the seal down when the door closes and lifts it when the door opens. Helpful when you need a tight seal but want less friction on certain floor types.
- Brush sweep: Features a row of flexible bristles instead of a solid rubber or vinyl strip. Works well on uneven surfaces, such as slightly rough thresholds or floors.
- U-shaped or wrap-around sweep: Slides onto the bottom edge of the door and wraps both sides. Often used for interior doors between conditioned and unconditioned spaces, such as a door to a garage.
How to choose the right door sweep
Consider these factors before buying:
- Door location: Exterior doors need more durable, weather-resistant sweeps than interior doors.
- Floor surface: Smooth floors can use solid rubber or vinyl seals, while uneven surfaces may benefit from brush-style sweeps.
- Door clearance: Measure the gap between the door and the floor or threshold. The sweep needs to fill the gap without dragging too hard.
- Door material: Wood, metal, and fiberglass doors can all use sweeps, but fasteners and attachment methods may vary.
- Ease of installation: If this is your first project, a simple surface-mounted sweep is usually the most straightforward.
Types of Weatherstripping and Where to Use Them
Weatherstripping materials come in a range of shapes and densities. The goal is to create a compressible seal that is firm enough to block air but soft enough to allow the door to close easily.
Popular weatherstripping materials
- Foam tape: Self-adhesive foam strips that are easy to cut and apply. Best for small gaps and light-duty sealing.
- V-strip or tension seal: Thin, flexible strips that form a V shape. They press against the door edge to create a springy seal and work well for sides and tops.
- Bulb or tubular weatherstripping: Rounded, hollow seals that compress when the door closes. Often used in more permanent installations with a metal or rigid backing.
- Felt weatherstripping: Simple strips of felt used in some older installations. Inexpensive but less durable and less effective than modern materials.
Matching weatherstripping to your door
- For larger gaps: Consider bulb or tubular weatherstripping that can compress more without losing contact.
- For narrow, even gaps: V-strip or tension seals provide a clean, low-profile solution.
- For quick fixes: Foam tape can be a good temporary or budget-friendly option, especially on interior doors.
- For high-traffic doors: Choose more durable materials designed to withstand frequent opening and closing.
Step-by-Step: Installing a Door Sweep
Installing a door sweep is a manageable project for most homeowners. Set aside a little time, gather your tools, and work carefully for the best results.
Tools and materials
- Door sweep sized for your door width
- Measuring tape
- Pencil or marker
- Hacksaw or metal-cutting tool (if trimming is needed)
- Screwdriver or drill with appropriate bit
- Safety glasses and tape measure
Installation steps
- Measure the door width. Open the door and measure the width at the bottom. Many sweeps can be trimmed to fit, but starting with a close match saves time.
- Check the gap height. Measure the space between the bottom of the door and the threshold or floor. This helps you position the sweep so it seals without dragging.
- Mark the sweep for trimming. If the sweep is too long, mark the cut line on the rigid portion. Trim carefully with a hacksaw or appropriate cutting tool.
- Position the sweep. With the door closed, hold the sweep against the interior or exterior face near the bottom. Adjust it so the flexible edge just touches the threshold or floor.
- Mark screw holes. Use a pencil to mark through the mounting holes onto the door. Remove the sweep and, if needed, drill small pilot holes to make driving screws easier.
- Attach the sweep. Align the sweep with your marks and drive the screws in, starting at the center and working outward. Check that the sweep stays level.
- Test the door. Open and close the door several times. The sweep should lightly brush the surface without catching or requiring extra force.
If the sweep drags too much, loosen the screws slightly and adjust it upward a small amount, then retighten.
Step-by-Step: Installing Door Weatherstripping
Weatherstripping installation varies by material, but the basic process is similar. Take your time to get smooth, continuous seals without gaps or overlaps.
Preparation
- Clean the door frame with a mild cleaner and let it dry completely.
- Remove any old, loose, or damaged weatherstripping and leftover adhesive.
- Inspect the door for sagging or misalignment and tighten hinge screws if needed.
Installing adhesive-backed weatherstripping
- Measure each side. Measure the vertical sides and top of the door frame separately. Cut pieces of weatherstripping slightly longer than each measurement.
- Start at the top. Peel a short section of backing from the adhesive side and press it into the frame at the top, aligning it so it will press against the door edge when closed.
- Work gradually. Continue peeling backing and pressing the strip into place a few inches at a time to avoid stretching or misalignment.
- Seal the sides. Repeat the process for both sides, running the strips down to meet the threshold or the top of the door sweep.
- Trim and press firmly. Trim any excess and go back over the strips, pressing firmly to ensure good adhesion.
Installing nail-on or screw-on weatherstripping
- Dry fit first. Hold the weatherstripping in place and close the door gently to see how it compresses. Adjust the position until you get a snug but not overly tight seal.
- Mark and pre-drill. Mark fastener locations and drill small pilot holes to prevent splitting the frame.
- Fasten in place. Attach the strips using nails or screws, checking the door operation as you go.
After installation, close the door and repeat the paper test in several spots. You should feel a light grip on the paper without needing to slam the door.
Fine-Tuning for Maximum Comfort
Once your door sweep and weatherstripping are installed, a few small adjustments can help you get the most comfort and efficiency from your upgrade.
Adjusting door alignment
If the door rubs in some spots and has gaps in others, you may need to adjust the hinges or strike plate. Tightening loose screws or slightly shifting the strike plate can improve how the door closes against the new seals.
Balancing seal and ease of use
The goal is a firm seal that still allows the door to open and close smoothly. If the door feels hard to latch or requires extra force, try:
- Moving the weatherstripping slightly away from the door edge
- Choosing a softer or thinner material in trouble spots
- Adjusting the door sweep height so it just makes contact
Maintaining Your Door Seals Over Time
Like any part of your home, door sweeps and weatherstripping need occasional attention. A few minutes of maintenance each season keeps them working effectively.
Seasonal maintenance checklist
- Inspect for cracks, tears, or areas where the material has pulled away.
- Clean dust and dirt from the seals with a damp cloth so they can compress properly.
- Check screws and fasteners on the door sweep and tighten if they have loosened.
- Repeat a quick draft test at the start of heating and cooling seasons.
When to replace
Even good materials eventually wear out. Plan to replace foam or felt weatherstripping more often, and inspect rubber or vinyl seals every few years. If you notice persistent drafts, visible gaps, or damage, it is time for a refresh.
Where This Upgrade Fits in Your Whole-Home Comfort Plan
Sealing your doors is one piece of a larger comfort and efficiency strategy. Once you have addressed obvious leaks, you can look at other areas such as windows, attic insulation, and duct sealing. Together, these improvements create a more balanced home where temperatures are easier to control and energy is used more efficiently.
For more ideas on improving air comfort throughout your home, explore additional resources on air sealing, insulation, and ventilation at this home air comfort hub. Layering simple projects like a door sweep and weatherstripping comfort upgrade with other small improvements can add up to a noticeably more comfortable home year-round.
 What Happens When Furniture Blocks a Return Vent? Troubleshooting Guide
 How Often to Change HVAC Filters With Pets: A Practical Homeowner Checklist
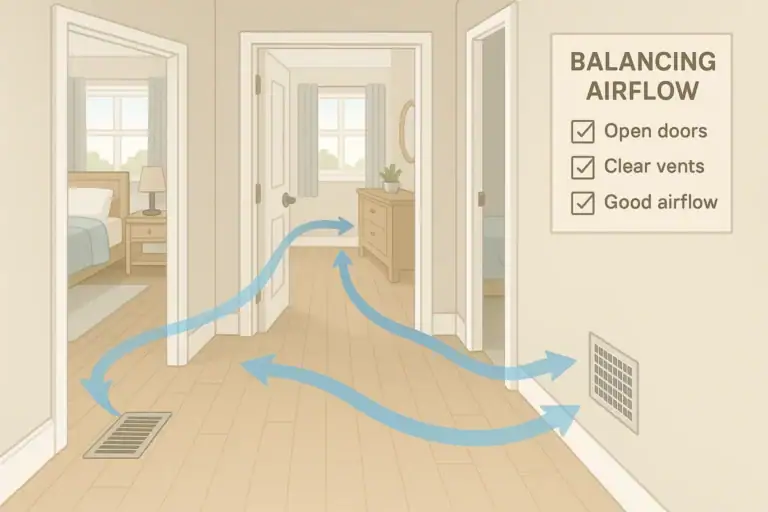 How to Balance Airflow Between Rooms at Home: A Practical Checklist