Why your thermostat reads the wrong temperature
If your thermostat says 78°F but the room feels more like 72°F (or the opposite), the most common causes are:
- Poor thermostat location (drafts, sunlight, or heat sources)
- Incorrect settings or modes
- Dust buildup or age-related sensor drift
- Wiring or power issues
- HVAC airflow or return-duct problems
You can usually narrow this down with a few simple checks at home. If the reading is off by a couple of degrees, that’s often normal. A difference of 5°F or more that doesn’t go away after basic troubleshooting is a sign to call a qualified HVAC technician.
Step 1: Confirm the temperature is actually wrong
Before changing anything, verify the thermostat really is off.
-
Use a separate thermometer.
- Place a basic room thermometer or digital temperature sensor near the thermostat, at the same height.
- Let it sit for at least 15–20 minutes without direct sun or drafts.
-
Compare readings.
- If the thermostat is within about 1–2°F of the thermometer, that’s typically acceptable.
- If it’s off by 3–5°F or more, continue with the steps below.
Step 2: Check thermostat location and surroundings
Thermostats measure the air right around them. If that air is not representative of the whole room, the reading will be misleading even if the device is working correctly.
Look for these common location problems:
- Direct sunlight: A thermostat on a sunny wall can read several degrees warmer than the room.
- Near heat sources: Lamps, TVs, electronics, or a nearby kitchen can warm the air around the thermostat.
- Drafts and vents: Supply vents blowing directly on the thermostat, gaps around doors, or leaky windows can make it read too hot or too cold.
- Exterior walls: In some homes, an exterior wall can be cooler or warmer than the interior, especially in extreme weather.
- Hallway isolation: A thermostat in a closed-off hallway may not match the temperature in main living areas.
What you can do:
- Move lamps or electronics away from the thermostat.
- Adjust supply vent direction so air is not blowing directly on it.
- Seal obvious drafts around doors and windows.
If the thermostat is in a fundamentally bad spot (e.g., in direct sun most of the day), the most reliable fix is to have an HVAC or electrical professional relocate it to an interior wall in a frequently used room, away from vents and heat sources. That can also help your system run more efficiently; the U.S. Department of Energy offers general guidance on thermostat use and placement at the Energy Saver thermostat page.
Step 3: Review thermostat settings and modes
Sometimes the reading seems wrong because of how the thermostat is set up, not because the sensor is bad.
- Check the system mode: Make sure it’s on Heat, Cool, or Auto as needed, not just Off or Fan.
- Look for temperature offsets or calibration settings: Many digital and smart thermostats let you add an offset (for example, “+2°F” or “-2°F”). If someone changed this, the displayed temperature will be shifted.
- Verify schedule settings: A programmed schedule may be raising or lowering the setpoint at times you don’t expect.
- Check for multiple sensors: Some smart thermostats use remote room sensors. The displayed temperature might be coming from a different room than where the thermostat is mounted.
Adjust or reset these settings according to the manufacturer’s instructions. If you’re unsure, many brands provide user manuals on their official websites under “Support” or “Downloads.”
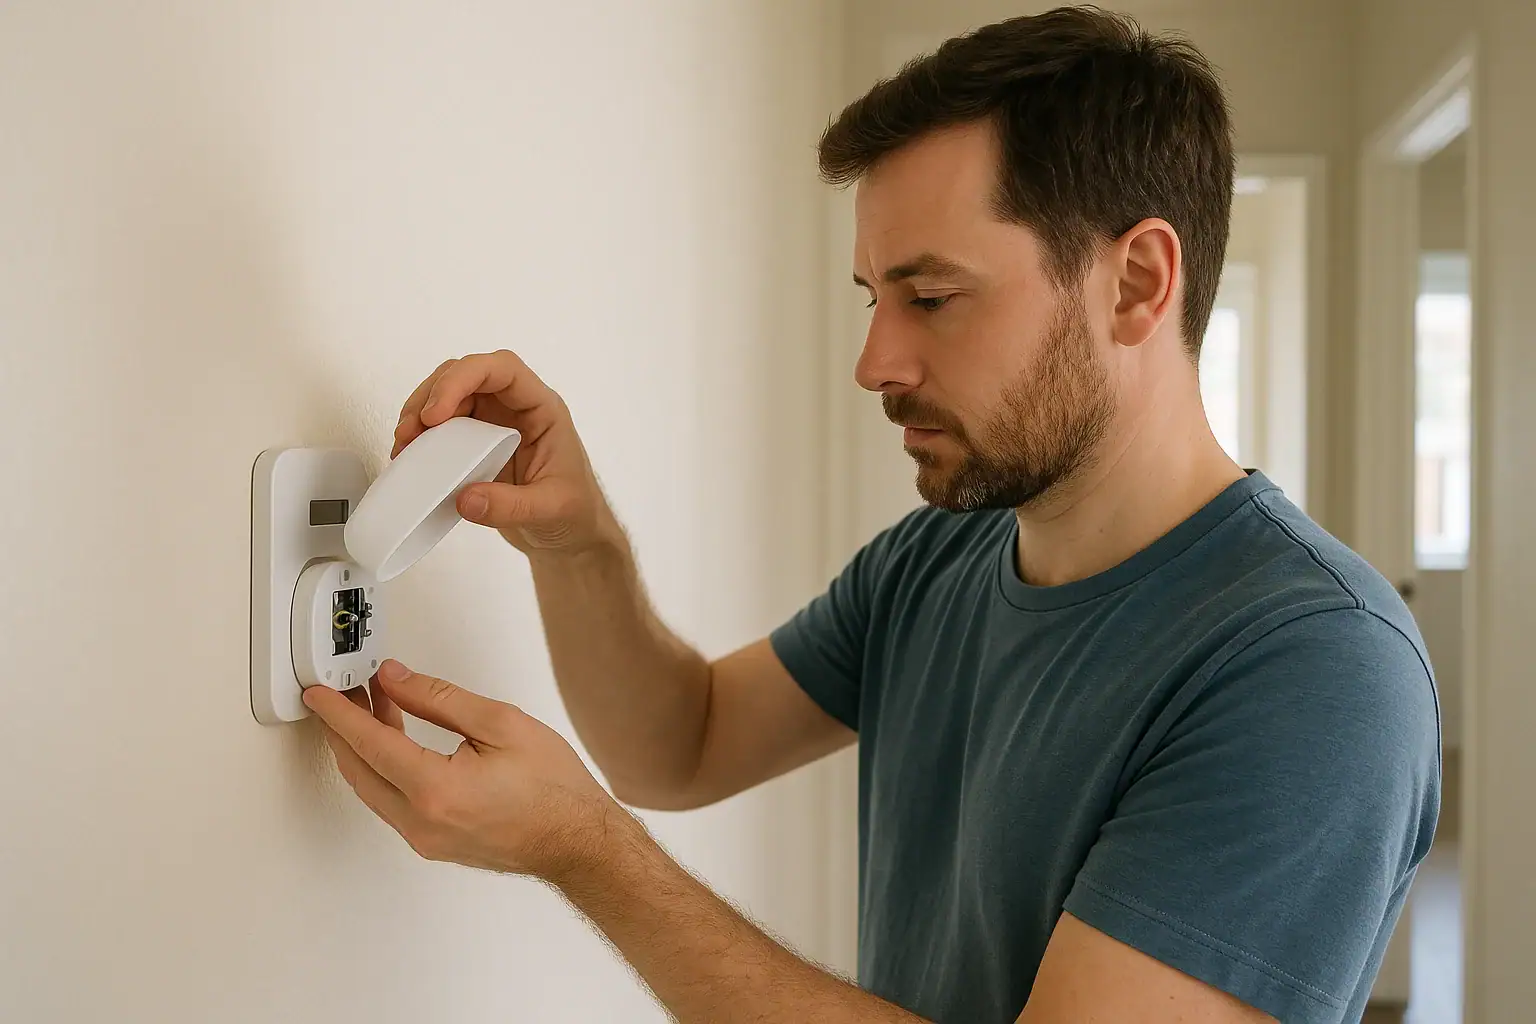
Step 4: Clean and inspect the thermostat
Dust, debris, or age can affect how some thermostats sense temperature.
For a wall-mounted thermostat:
- Turn off power to the HVAC system at the breaker for safety.
- Remove the thermostat cover gently (usually it snaps off or has small screws).
- Use a soft brush or a can of compressed air to remove dust from inside the thermostat, avoiding any rough contact with components.
- Check that the thermostat is firmly attached to the wall and not hanging at an angle, which can affect airflow around the sensor.
- Replace the cover and restore power.
After cleaning, give the thermostat 15–30 minutes and compare the reading again with your separate thermometer.
Step 5: Check batteries and power
Low power can cause erratic readings or display issues.
- Battery-powered thermostats: Replace the batteries with fresh, high-quality ones. Weak batteries can cause the screen to dim, freeze, or behave unpredictably.
- Hardwired or “C-wire” thermostats: If the display flickers, goes blank, or reboots often, there may be a wiring or power issue that needs professional diagnosis.
Step 6: Look for wiring or installation problems
If the thermostat was recently installed or replaced, incorrect wiring or setup can lead to strange behavior, including wrong readings or short cycling.
Warning: Thermostat wiring connects to low-voltage circuits, but improper work can still damage equipment or create unsafe conditions. If you are not comfortable working with electrical components, contact a licensed HVAC or electrical professional.
If you do inspect wiring:
- Turn off power to the furnace/air handler and outdoor unit at the breakers.
- Remove the thermostat cover and verify that each wire is firmly attached to the correct terminal as shown in the manufacturer’s wiring diagram.
- Look for loose, frayed, or corroded wires.
For safety information on home electrical work, you can review guidance from the U.S. Consumer Product Safety Commission at the home electrical safety page.
Step 7: Consider HVAC airflow and return issues
Sometimes the thermostat is fine, but the air reaching it isn’t representative of the rest of the home because of airflow problems.
- Dirty air filter: A clogged filter can restrict airflow and cause uneven temperatures. Replace or clean filters as recommended by the manufacturer. The U.S. Department of Energy offers basic guidance on filters and airflow on its air conditioner maintenance page.
- Closed or blocked vents: Furniture, rugs, or closed registers can create hot or cold spots.
- Return air location: If the main return grille is in a different area than the thermostat, that area may be driving how the system runs, even if the thermostat shows a different temperature.
Addressing airflow problems can help your home feel closer to what the thermostat displays and may improve comfort and efficiency. For more comfort-focused tips, you can explore the Air & Comfort guides at Signature Home Guide.
Step 8: When calibration or replacement makes sense
Older mechanical thermostats and some basic digital models can drift over time. Some allow manual calibration; others do not.
- Mechanical (mercury or bi-metal) thermostats: These may have a small calibration screw or lever inside. Follow the manufacturer’s instructions if available. If the thermostat is very old or you cannot find documentation, replacement is often more practical.
- Digital and smart thermostats: Many have a menu option for “temperature offset” or “calibration.” Use your separate thermometer as a reference and adjust the offset so the displayed temperature matches.
If the thermostat remains more than a few degrees off even after cleaning, checking location, and adjusting any offset, the internal sensor may be failing. At that point, replacing the thermostat is usually the most reliable solution.
When to call a professional
Contact a qualified HVAC technician or electrician if:
- The thermostat reading is off by 5°F or more and does not improve after basic checks.
- The display is blank, flickering, or freezing, even with new batteries and stable power.
- Your system short cycles (turns on and off rapidly) or runs continuously despite the set temperature.
- You suspect wiring issues or need the thermostat relocated.
If one thermostat cannot represent temperatures in distant rooms, see our guide to smart thermostat room sensors and their limits. A sensor can improve control in some layouts, but it will not fix restricted airflow, poor equipment sizing, or a wiring problem.
 Supply Vent vs Return Vent: How to Tell the Difference in Your Home
 Noisy HVAC Vents: Common Causes and Simple Fixes You Can Try Today
 Ceiling Fan Direction for Summer vs Winter: A Clear Homeowner’s Guide