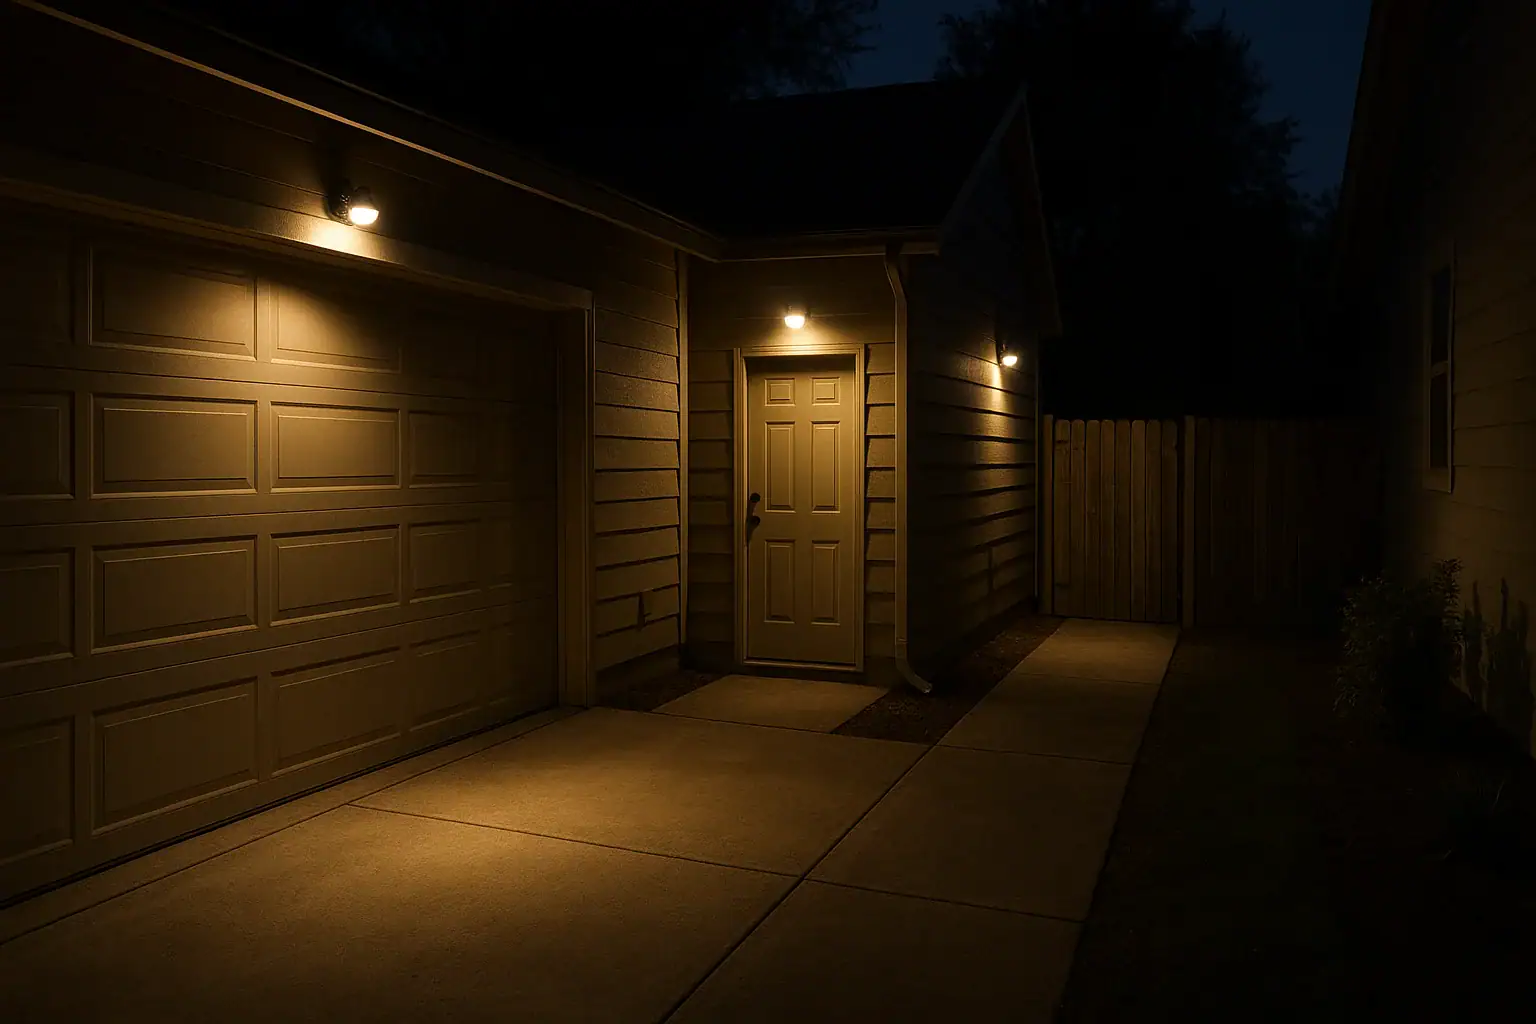
Adding motion sensor lights to your driveway and side yard is one of the simplest ways to boost safety, security, and convenience around your home. But where you place those lights matters just as much as the fixtures you choose. Poor placement can create dark gaps, blinding glare, or constant false alarms every time a branch sways in the wind. Thoughtful placement, on the other hand, gives you clear visibility when you need it, deters unwanted visitors, and makes everyday tasks like unloading groceries or taking out the trash much easier.
This checklist-style guide walks you step by step through planning and positioning motion sensor lights for a typical driveway and side yard. You will learn how to map out coverage, avoid common mistakes, and fine-tune your setup so the lights come on when they should—and stay off when they should not. Use it as a planning tool before you buy, or as a tune‑up checklist if your current lights are not working the way you want.
Step 1: Define Your Goals for Driveway and Side Yard Lighting
Before you start mounting fixtures, decide what you want your motion sensor lights to do. Clear goals will guide where you place lights and how you aim them.
Checklist: What Do You Need Your Lights to Accomplish?
- Safety: Reduce the risk of trips and falls on uneven surfaces, steps, or icy spots.
- Security: Deter prowlers or unwanted visitors by lighting up when someone approaches your home.
- Convenience: Automatically light your way when you pull into the driveway, walk from the garage, or take out trash at night.
- Visibility for cameras: Provide enough light for any outdoor cameras to capture clear footage at night.
Once you know your priorities, you can decide where light is most critical: the driveway entrance, garage door, side gate, walkway, or yard perimeter.
Step 2: Walk the Area at Night and Map Out Dark Spots
Nighttime is the best time to plan motion sensor light placement. You will see exactly where shadows fall and where you feel uncomfortable walking.
Checklist: Night Walk-Through
- Walk your driveway from the street to the garage. Note any dark sections, curves, or obstacles.
- Walk the side yard from front to back, including along fences, side doors, and gates.
- Look for tripping hazards such as steps, uneven pavers, tree roots, or low garden borders.
- Stand at the street and look toward your home. Identify areas that feel hidden or inviting to trespassers.
- Note any existing light sources (porch lights, streetlights, neighboring lights) to avoid over‑lighting or glare.
Use a simple sketch of your property to mark dark spots and high‑priority areas. This becomes your placement map.
Step 3: Understand Motion Sensor Coverage Basics
Motion sensor lights have a limited range and field of view. Knowing how they detect movement helps you place and aim them effectively.
Checklist: Key Motion Sensor Concepts
- Detection range: Many residential motion sensors detect movement from about 20 to 70 feet away. Check your product specs when planning.
- Field of view: Common sensors cover between 90 and 180 degrees. Wider coverage can reduce the number of fixtures you need.
- Best detection direction: Sensors detect motion across their field of view better than motion moving directly toward or away from them.
- Height: Mounting around 6–10 feet high is typical. Too low and they are easy to tamper with; too high and they may miss movement close to the house.
Use these basics to decide how many fixtures you need and where each sensor should be aimed for your driveway and side yard.
Step 4: Plan Motion Sensor Light Placement for the Driveway
Your driveway is often the first approach to your home. Good lighting here improves both safety and security.
Checklist: Driveway Placement Priorities
- Driveway entrance: Place a light so it activates as a vehicle or person enters from the street.
- Garage or carport area: Ensure the area near your garage door or parking spot is well lit when you arrive.
- Walkway from driveway to entry door: Cover the path you use most often to enter your home.
- Blind curves or tight turns: Add lighting where visibility is poor when backing out or pulling in.
Suggested Driveway Light Locations
Depending on your layout, consider these common locations:
- Above or beside the garage door: A motion sensor light here can cover the area where you park and a portion of the driveway.
- On a post or fence near the driveway entrance: Ideal for long or curved driveways where garage‑mounted lights cannot see the street.
- Along the side of the house facing the driveway: Wall‑mounted lights can fill in dark gaps, especially on narrow driveways.
Driveway Placement Checklist
- Can the sensor “see” movement from the street to the garage?
- Is there overlap between fixtures so there are no dark sections where you walk or drive?
- Are lights aimed away from drivers’ eyes to prevent glare when pulling in or backing out?
- Is the driveway edge near landscaping or steps illuminated to prevent trips?
Step 5: Plan Motion Sensor Light Placement for the Side Yard
The side yard is often overlooked, yet it can be a common entry path for both guests and intruders. Smart lighting here improves overall home security.
Checklist: Side Yard Placement Priorities
- Side gates and fences: Illuminate any gate or entrance that leads to the backyard.
- Side doors and utility areas: Cover side entries, basement doors, and areas with meters or HVAC equipment.
- Walkways between front and back yards: Ensure continuous lighting along any path you use regularly.
- Hidden corners: Light up secluded spots where someone could linger unseen.
Suggested Side Yard Light Locations
- Above the side door: Mount a motion sensor fixture to cover the doorway and immediate landing or steps.
- On the house wall facing the side yard: Position fixtures to cover the length of the side yard walkway.
- On fence posts or freestanding poles: Useful when the side yard is wide or the house wall is set back.
Side Yard Placement Checklist
- Is the entire path from front yard to backyard visible when the lights are on?
- Are gates and latches clearly visible at night?
- Do lights avoid shining directly into neighbors’ windows or onto nearby bedrooms?
- Is there a clear view for any outdoor cameras in the side yard when the lights activate?
Step 6: Choose Mounting Height and Angle
Mounting height and angle have a big impact on how well motion sensor lights perform. The goal is to cover the area you care about without creating glare or blind spots.
Checklist: Mounting Height
- Aim for a height of about 6–10 feet above ground for most fixtures.
- On a two‑story home, avoid mounting so high that the sensor cannot detect movement close to the house.
- In narrow side yards, consider slightly lower mounting to keep light focused on walkways rather than upper walls.
Checklist: Aiming the Light and Sensor
- Aim the sensor so movement is detected across its field of view, not straight toward it.
- Angle the light head slightly downward to reduce glare and keep light on the ground and walkways.
- For driveways, angle lights so they do not shine directly into drivers’ eyes or across neighboring properties.
- Test different angles while someone walks the driveway and side yard to confirm coverage.
Step 7: Avoid Common Sources of False Alarms
Frequent false triggers can make motion sensor lights more annoying than helpful. Careful placement minimizes these issues.
Checklist: Things to Avoid in the Sensor’s Field of View
- Tree branches and bushes that move in the wind.
- Busy streets where passing cars or pedestrians constantly cross the sensor’s range.
- Air conditioning units or vents that blow warm air into the sensor’s path.
- Highly reflective surfaces such as large windows or shiny metal that can bounce light and heat.
Placement Tips to Reduce False Alarms
- Mount sensors so they face your property, not the street.
- Keep sensors a reasonable distance from dense shrubs; trim plants regularly.
- Use adjustable sensor zones or covers (if available) to block problem areas.
- Set sensitivity lower at first, then increase only if coverage is too limited.
Step 8: Coordinate With Existing Lighting and Neighbors
Motion sensor lights work best as part of an overall outdoor lighting plan. Consider how they interact with existing fixtures and nearby homes.
Checklist: Integrating With Your Current Setup
- Identify any dusk‑to‑dawn lights you already have and decide whether motion lights should supplement or replace them.
- Ensure motion lights fill gaps rather than duplicating areas that are already well lit.
- Check from the street and property line to see how bright your setup appears to others.
Being Neighbor‑Friendly
- Aim lights so they do not shine into neighboring windows or yards.
- Use shields or hoods if needed to direct light only where it is useful.
- Set reasonable timer durations so lights do not stay on unnecessarily long after every trigger.
Step 9: Fine‑Tune Sensor Settings After Installation
Even with careful planning, you will likely need a few adjustments once your lights are installed. Take a few evenings to test and tweak.
Checklist: Key Settings to Adjust
- Sensitivity: Start on a medium setting. If lights trigger too often, lower it. If they miss movement, raise it slightly.
- Timer duration: Common options range from about 30 seconds to several minutes. For driveways and side yards, 1–5 minutes is usually enough.
- Dusk setting (light level): Adjust so the sensor only activates when it is genuinely dark outside.
Testing Routine
- Have one person walk the driveway from street to garage while another observes when lights activate.
- Repeat for the side yard path, including gates and side doors.
- Note any dark patches or areas where lights come on too late or turn off too quickly.
- Adjust angles and settings, then retest on another night.
Step 10: Safety and Practical Installation Considerations
Safe installation is as important as good placement. If you are not comfortable working with electrical wiring, consider hiring a licensed professional, especially for hardwired fixtures.
Checklist: Safety Basics
- Turn power off at the breaker before working on any existing wiring.
- Use fixtures and boxes rated for outdoor use and appropriate for your climate.
- Seal around fixtures with weather‑resistant caulk to prevent moisture intrusion.
- Secure all wires and connections to avoid exposed conductors.
Practical Tips for Long‑Term Reliability
- Choose locations where fixtures are accessible for maintenance and bulb changes.
- Avoid mounting directly under roof edges without drip protection where water can run onto the fixture.
- Keep a record of which breaker controls each outdoor light for future work.
Step 11: Seasonal Maintenance and Re‑Evaluation
Landscaping grows, weather changes, and your outdoor routines evolve. Revisit your motion sensor light placement at least once a year.
Checklist: Ongoing Maintenance
- Clean lenses and sensors with a soft cloth to remove dust, cobwebs, and pollen.
- Trim plants that may block sensors or cast new shadows.
- Check for loose fixtures or corroded hardware, especially after storms.
- Replace bulbs or rechargeable batteries as needed to maintain brightness and reliability.
Re‑Evaluate Coverage
- Walk the driveway and side yard at night each season.
- Note any new dark spots caused by tree growth or changes in neighboring lights.
- Adjust angles or add an additional fixture if your use of the space has changed.
Putting It All Together
Thoughtful motion sensor light placement for your driveway and side yard can transform how safe and comfortable your home feels after dark. By following this checklist, you will map out your dark spots, prioritize key areas like gates and walkways, and position fixtures at the right height and angle for reliable coverage. A bit of extra planning up front helps you avoid constant false alarms, neighbor complaints, and frustrating blind spots.
Use this guide as a working plan: sketch your layout, mark where each light will go, and test thoroughly after installation. With a few smart choices, your driveway and side yard can be well lit only when needed, supporting both home security and everyday convenience.
 Door and Window Sensor Placement for Sliding Doors: A Practical Checklist
 Smart Motion Sensor Lighting Placement for Safer Entryways and Hallways
 Security Camera Placement Without Blind Spots: A Practical Homeowner’s Guide