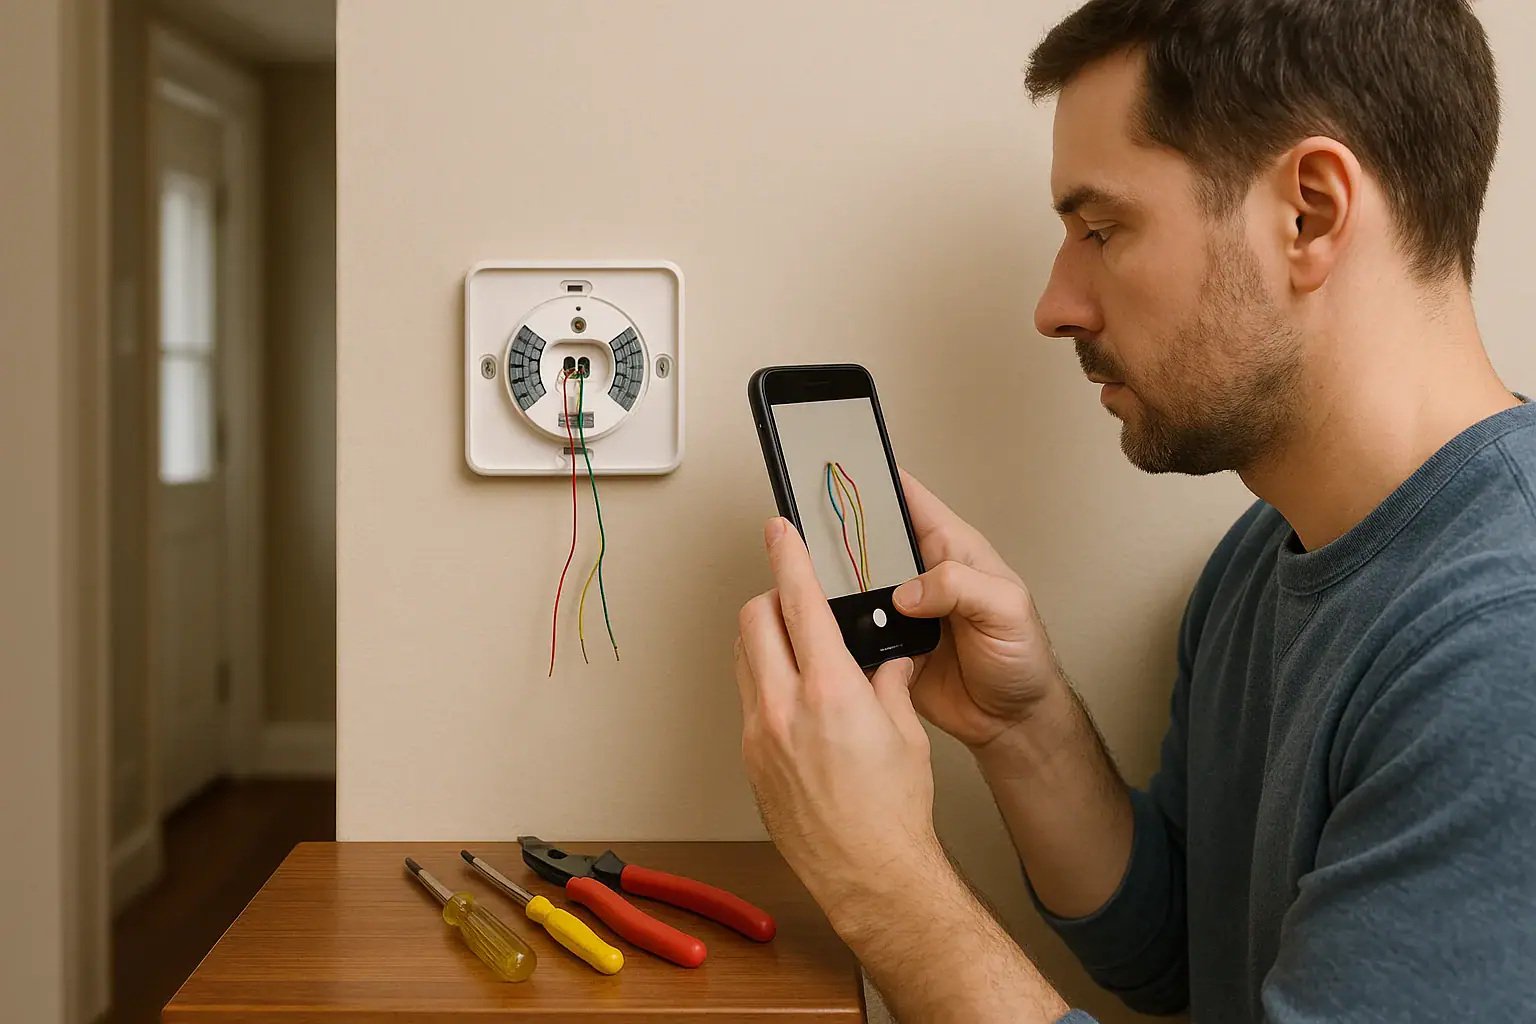
Quick answer: To install a smart thermostat safely, confirm that the exact model supports your HVAC system, then follow its manual or app. Turn off and verify all relevant HVAC power, photograph and label wires by terminal, connect only as directed, restore power, and run the manufacturer’s applicable equipment test.
Before you install a smart thermostat
A smart thermostat is not a universal replacement for every wall control. Compatibility depends on the thermostat model, HVAC equipment, terminal functions, power arrangement, and system configuration. Start with the new thermostat’s official compatibility checker, manual, or setup app before removing a wire.
If you are still deciding whether this type of control suits your system, review how smart thermostats work. Find additional planning guidance in the Smart Home & Safety hub.
Gather information and supplies
Record the make and model of the new thermostat, old thermostat, and indoor HVAC equipment. Have the new thermostat’s manual or app available, along with a phone or camera, wire labels, a suitable screwdriver, and the mounting hardware specified by the manufacturer.
Do not assume wire color identifies function. The terminal where a wire is connected is the useful starting point. ecobee warns that a B terminal can have different meanings depending on the system, so it should not be interpreted from color or a generic wiring diagram alone.
How to install a smart thermostat: compatibility and stop-work checks
| What you find | Whether to proceed | Next step |
|---|---|---|
| The exact model’s checker approves the existing terminal combination | Usually | Use that model’s manual or setup app and its system-specific diagram. |
| Clearly labeled terminals and intact conductors | Usually | Photograph the connections and label every wire by its old terminal. |
| No wire connected to C | Maybe | Check whether that model supports the system without a C wire or specifies an approved adapter. |
| Heat pump, dual-fuel system, two R wires, or multiple transformers | Model-specific | Confirm explicit support and configuration requirements. Seek professional help if the arrangement is uncertain. |
| B, X, proprietary numbers or letters, jumper wires, or unreadable labels | Stop | Do not infer function from color or a generic online diagram. Contact the manufacturer or an HVAC professional. |
| 110/120/220/240V markings, L1/L2 terminals, thick wires, or wire-nut connections | Stop | These are line-voltage warning signs. Do not connect a standard low-voltage smart thermostat. |
| Cracked insulation, corrosion, burned terminals, loose splices, or conductors too short to connect | Stop | Have a qualified HVAC technician or electrician assess the wiring. |
| You cannot identify every HVAC power source or verify shutdown | Stop | Leave the wiring undisturbed and obtain professional help. |
| Permit or licensing requirements are unclear | Pause | Ask the local building department or authority having jurisdiction before starting. |
Safe installation checklist
1. Confirm system type and power needs
Enter the old terminal labels into the exact thermostat model’s compatibility checker. Confirm the supported system type and number of heating and cooling stages using equipment documentation and the thermostat instructions.
ENERGY STAR notes that most, but not all, smart thermostats use a C wire for continuous power. A missing C wire does not automatically prevent installation, but any alternative arrangement must be approved for the thermostat and HVAC system involved.
2. Check the old system first
Before changing wiring, note whether the existing thermostat can operate the modes your system has. This can help distinguish a pre-existing HVAC issue from an installation issue. If the old system is already behaving unexpectedly, pause the replacement and address that issue first.
3. Shut off and verify HVAC power
Turn off every breaker or service switch identified in the model-specific instructions as supplying the heating and cooling equipment. HVAC equipment may have more than one power source. Follow the thermostat manufacturer’s shutdown-verification procedure before exposing conductors.
For supported Nest installations, Google warns that there may be multiple HVAC breakers and directs users to complete a functional shutdown check. If the equipment still responds, breakers are mislabeled, or you cannot confidently isolate power, stop and call a professional.
4. Photograph and label the existing terminals
Remove only the old thermostat’s front cover at first. Take a clear photo showing terminal letters, connected wires, and any jumpers. Apply a label to each wire based on the terminal it occupies, not its color. Remove and label one wire at a time.
Amazon’s smart-thermostat instructions also direct users to photograph terminal labels and remove wires one at a time. Keep the cable and conductors from slipping into the wall. Do not splice, extend, trim, or strip wires unless the model-specific instructions call for it.
5. Mount the new base
After the conductors are labeled and secured, remove the old wall plate. Feed the wires through the new base without pinching them. Position and fasten the base with the hardware and method specified by the manufacturer.
6. Connect wires only from the model-specific diagram
Connect each labeled conductor to the terminal shown in the diagram generated for your thermostat and system. Do not make a generic letter-for-letter substitution when the manual gives different instructions. Some models handle Rc/Rh jumpers internally, while others have specific requirements.
Insert conductors as directed by the manufacturer and check that each wire is retained. If a terminal will not hold a conductor or the diagram does not account for every old connection, stop rather than experimenting.
7. Reassemble and restore power
Attach the thermostat display or face as directed. If the manufacturer-approved process involved opening HVAC equipment, reinstall any access panel as instructed before restoring power. Restore power only after the thermostat is fully reassembled.
If a breaker trips after restoration, leave it off and seek qualified help rather than repeatedly resetting it.
8. Complete configuration
Follow the app or on-screen setup for equipment type, fuel, heating and cooling stages, fan control, and heat-pump reversing-valve setting when applicable. Do not guess at O/B operation, dual-fuel settings, or fan-control choices. Consult the HVAC documentation, thermostat manufacturer, or a qualified technician if those details are unclear.
9. Run the applicable equipment test
Use the thermostat’s built-in equipment test or the procedure in its manual. Check only the functions your system has, such as fan, heating, cooling, or auxiliary heat. Follow the manufacturer’s sequence and allow each directed test to finish.
Stop and turn off HVAC power if the wrong mode starts, heating and cooling appear to run together, or a breaker trips. Recheck the saved terminal map and contact manufacturer support or an HVAC professional instead of moving wires experimentally.
Keep an installation record
Save these details with your home records:
- Before-and-after wiring photos
- The old-terminal-to-new-terminal map
- Thermostat model and serial number
- Indoor and outdoor HVAC model numbers, if available
- Selected equipment, fuel, staging, and O/B settings
- Compatibility-checker result and relevant support notes
- The installation date and the name of any professional who worked on it
This record can make later troubleshooting more direct and reduces the temptation to identify wires from memory or color.
When professional installation is the safer choice
Call a qualified HVAC technician or electrician when the control is line voltage, terminal functions remain uncertain, insulation or terminals are damaged, an adapter requires equipment-side work beyond your ability, or the system has multiple transformers, dual fuel, or unsupported proprietary controls. Professional help is also appropriate whenever you cannot verify that all relevant power is off.
Permit and licensing rules cannot be assumed nationally. The International Code Council explains that model codes take effect through local adoption and amendments. Ask your local building department or authority having jurisdiction what applies to your home and project.
Frequently asked questions
Can I install a smart thermostat without a C wire?
Possibly. Requirements vary by thermostat and HVAC system. Use the exact model’s compatibility checker to determine whether it can operate without a C wire or whether it supports a particular adapter. Do not substitute an unapproved generic wiring arrangement.
Can I match thermostat wires by color?
No. Colors are not a reliable statement of terminal function. Photograph the original connections and label each conductor according to its old terminal. If labels are missing or ambiguous, have the wiring identified rather than guessing.
Do I need a permit to replace a thermostat?
That depends on locally adopted codes, amendments, project scope, and licensing rules. Contact the local building department or authority having jurisdiction instead of assuming that a permit is or is not required.
 What Is a Smart Thermostat and How Does It Work?
 Smart Thermostat Blank After Power Outage: What To Check
 How to Test a Smoke Alarm Safely: Simple Checklist