Home Safety & Smart Home Guide
Thoughtful motion sensor lighting can quietly transform how safe your home feels, especially in entryways and hallways. These are the paths you and your family use most often in the dark: coming home with arms full of groceries, walking to check a noise at night, or guiding kids to the bathroom. When lights turn on automatically in the right spots, you reduce trips and falls, discourage unwanted visitors, and make your home easier to navigate without fumbling for switches.
This guide explains how to plan and place motion sensor lights for safer entryways and hallways inside and outside your home. You will learn how motion sensors work, where to install them for the best coverage, what height and angles to use, and how to fine-tune settings like sensitivity and timer length. Use these ideas as a checklist before you buy or install anything so you can avoid dark corners, blind spots, and annoying false triggers.
Why Motion Sensor Lighting Matters for Home Safety
Before deciding where to place motion sensor lights, it helps to understand why they make such a difference in entryways and hallways.
Key safety benefits
- Reduces trips and falls: Automatic lighting helps you see steps, thresholds, rugs, and clutter without hunting for a switch.
- Deters intruders: Sudden light near doors and dark hallways can discourage someone from approaching or lingering.
- Supports all ages: Children, older adults, and guests can move around safely at night without memorizing switch locations.
- Saves energy: Lights turn off automatically when no motion is detected, so they are not left on all night.
- Improves convenience: Hands-free lighting is especially helpful when carrying bags, laundry, or a sleeping child.
How motion sensors detect movement
Most residential motion sensor lights use passive infrared (PIR) technology. These sensors detect changes in heat as people move across their field of view. Placement matters because PIR sensors work best when someone moves across their coverage area, not directly toward or away from them.
When planning placement, think about how people naturally walk through a space. Aim to position sensors so that people cross in front of them rather than walking straight toward them from a long distance.
Planning Your Motion Sensor Lighting Layout
Good placement starts with a simple plan. Take a few minutes to map out your typical routes through the house and around entrances.
Step 1: Identify your high-risk paths
Focus first on the areas where a lack of light could cause a fall or hide a potential intruder. Common high-risk paths include:
- Front walkway and front door area
- Side or back doors and steps
- Garage entry door and path to the interior door
- Main hallway from bedrooms to bathroom
- Hallway from bedrooms to kitchen or living room
- Top and bottom of staircases connected to hallways
Step 2: Note existing light fixtures and outlets
Walk through these paths at night and note where you already have ceiling lights, wall sconces, or outlets. This will help you decide whether to:
- Replace an existing fixture with a motion-sensing one
- Add a motion sensor switch to control existing lights
- Add plug-in or battery-powered motion lights in dark spots
Step 3: Consider who uses each space
Think about the people who use each hallway or entryway:
- Children: Lower-level night lights and softer brightness can prevent harsh wake-ups.
- Older adults: Brighter, more even lighting reduces the risk of falls on steps and thresholds.
- Guests: Motion lighting near guest rooms and bathrooms helps visitors navigate unfamiliar hallways.
Best Motion Sensor Placement for Exterior Entryways
Exterior entryways are your first line of defense. Properly placed motion sensor lights here improve both safety and security.
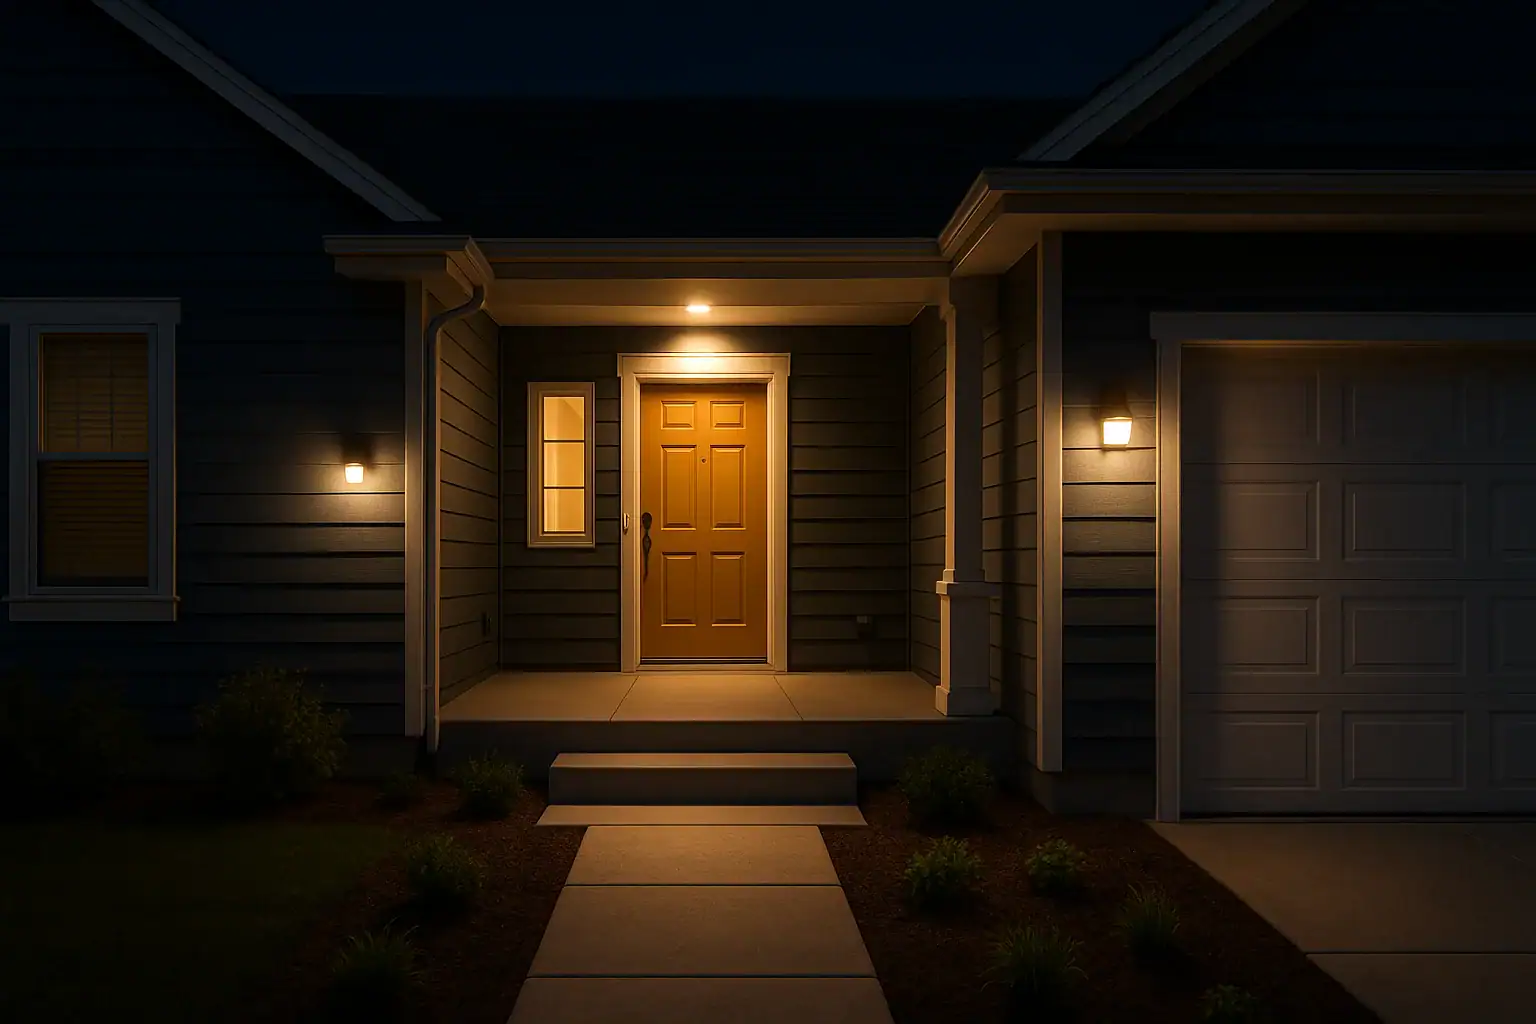
Front door and porch area
The front door should be well lit whenever someone approaches. For most homes, this means at least one motion-activated light near the main entrance.
- Ideal height: Mount wall fixtures about 6.5 to 8 feet above the ground so the sensor can see across the approach area.
- Positioning: Place the sensor so it faces the walkway and driveway, not directly at the street, to avoid constant triggers from passing cars.
- Angle: Aim the sensor slightly downward and across the path to capture side-to-side movement as someone walks up.
- Coverage goal: Make sure the light turns on before someone reaches the first step or porch landing.
Walkways and paths leading to doors
Longer walkways often need more than one sensor light to avoid dark gaps.
- Spacing: For typical residential fixtures, place lights 10 to 20 feet apart along the path, depending on the sensor’s range.
- Overlap: Allow coverage areas to overlap slightly so there are no dark zones between lights.
- Direction: Aim sensors to detect movement from both directions, especially if people may approach from the driveway or sidewalk.
Side and back doors
Side and back entries are frequent access points and common targets for intruders. Treat them with the same care as the front door.
- Install at least one motion-activated light at each secondary door.
- Ensure the light covers steps, landings, and the area where you stand to unlock the door.
- If there is a gate or fence leading to the door, consider a separate motion light at the gate.
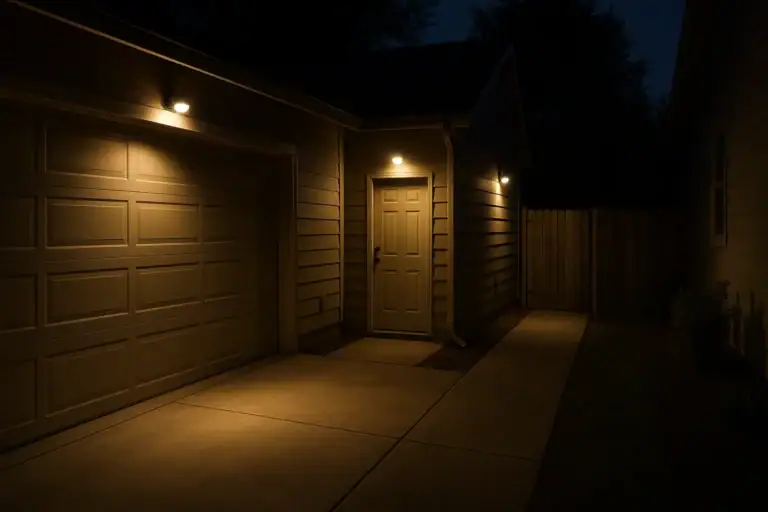
Garage entries and driveway
Garage areas often combine vehicle and foot traffic, so lighting should support both.
- Overhead garage lights: Aim sensors to detect a car pulling in as well as someone walking from the driveway to the door.
- Door from garage to house: A motion sensor light just inside the door or in the connecting hallway helps when your hands are full.
- Side of garage: If there is a side door, treat it like any other entry with its own motion lighting.
Best Motion Sensor Placement for Interior Hallways
Inside the home, motion sensor lighting in hallways should create a safe, gentle path without waking everyone up at night.
Main hallway from bedrooms to bathroom
This is one of the most important paths to light. People use it half-awake, often without glasses, and sometimes in a hurry.
- Ceiling or wall fixtures: Convert existing hallway lights to motion control or add a motion sensor switch.
- Night-level brightness: Consider lower brightness at night or separate low-level lights to prevent glare.
- Sensor placement: Place sensors near bedroom doors and at the bathroom end so motion is detected as soon as someone steps into the hall.
Hallways connecting living areas and kitchen
These hallways see frequent daytime and evening use. Motion sensor lighting here is about convenience as well as safety.
- Use motion switches that control existing ceiling lights for a clean look.
- Set a slightly longer timer so lights stay on during short tasks, like grabbing a drink or checking the front door.
- Place sensors where normal walking paths cross, not hidden behind doors or large furniture.
Top and bottom of stair-adjacent hallways
Any hallway that leads directly to stairs deserves special attention because a missed step can cause serious injury.
- Top of stairs: Install a motion sensor light that comes on before you reach the first step.
- Bottom of stairs: Add another light at the bottom landing so the entire staircase is visible.
- Side lighting: If possible, use wall or step-level lights along the staircase that activate with motion.
Guest room hallways
Guests may not know where light switches are located. Motion lighting makes nighttime trips safer and more comfortable.
- Install small motion night lights at outlet level along the baseboard.
- Place at least one light near the guest room door and one near the bathroom entrance.
- Choose warm, low-intensity light to avoid startling anyone awake.
Height, Angle, and Coverage: Getting the Details Right
Even a good location can perform poorly if the sensor’s height and angle are off. A few simple adjustments can dramatically improve reliability.
Recommended mounting heights
- Exterior wall lights: About 6.5 to 8 feet above ground for typical entry doors and porches.
- Interior wall sensors: Around 4 to 5 feet above the floor, similar to a light switch height.
- Ceiling-mounted sensors: Follow the manufacturer’s recommended range, often 8 to 10 feet for standard ceilings.
Setting the right angle
Most motion sensors allow you to tilt and swivel the detection head. Use this flexibility to focus on actual walking paths.
- Aim sensors so people move across the field of view, not straight toward it.
- Angle exterior sensors slightly downward to avoid detecting distant traffic or tree movement.
- Adjust indoor sensors away from windows where sunlight or moving curtains can cause false triggers.
Avoiding blind spots and over-coverage
Walk the area after installation to check for dark corners or over-sensitive zones.
- Look for corners where someone could stand without triggering the light and adjust the sensor accordingly.
- If a sensor covers too wide an area, use built-in masking panels or reposition it to narrow the field.
- In long hallways, use more than one sensor or fixture so light follows you along the path.
Fine-Tuning Motion Sensor Settings for Safety
Placement is only half the equation. Correct settings help your lights respond when needed without becoming a nuisance.
Sensitivity adjustments
Sensitivity controls how easily the sensor reacts to motion.
- Start high, then reduce: Begin with higher sensitivity to confirm coverage, then dial it back to reduce false triggers.
- Consider pets: In interior hallways, lower sensitivity or adjust angle to avoid constant activation from small pets.
- Outdoor factors: Reduce sensitivity if wind-blown branches or passing cars trigger the light.
Timer duration
The timer determines how long the light stays on after motion stops.
- Entry doors: Set 1 to 5 minutes so you have time to unlock and enter without the light turning off.
- Hallways: Around 1 to 3 minutes is usually enough for nighttime trips.
- Long paths or driveways: Use a slightly longer timer to cover the full walk from vehicle to door.
Dusk-to-dawn and ambient light controls
Many motion lights include a light level or dusk-to-dawn setting so they only activate when it is dark.
- Set exterior lights to activate only at dusk and turn off at dawn to save energy.
- For interior hallways, choose a setting that keeps lights off during bright daytime conditions.
- Test at night and early morning to ensure the lights are active when you need them most.
Common Placement Mistakes to Avoid
A few frequent mistakes can make motion sensor lighting frustrating instead of helpful. Watch for these issues as you install or adjust your lights.
Pointing sensors directly at windows or busy streets
Bright sunlight, reflections, and constant movement outside can cause false triggers. Aim sensors slightly away from windows and high-traffic roads.
Mounting sensors too high or too low
Sensors mounted too high may miss motion close to the house, while sensors mounted too low may be blocked by furniture or railings. Stay close to recommended heights and adjust based on your specific space.
Ignoring obstacles
Doors, tall plants, columns, and furniture can block the sensor’s view. After installation, open and close doors, walk different paths, and confirm that the light responds from all intended directions.
Creating glare or harsh shadows
Lights that are too bright or poorly aimed can cause glare, making it harder to see steps or objects. Soften lighting in interior hallways and angle exterior fixtures to illuminate the ground and door area evenly.
Simple Safety Checklist for Your Home
Use this quick checklist to review your motion sensor lighting placement for entryways and hallways:
- Every exterior door has at least one motion-activated light.
- Walkways and steps are fully lit with no dark gaps.
- Main bedroom-to-bathroom hallway has automatic lighting at night.
- Stair-adjacent hallways have motion lighting at both top and bottom.
- Guest areas include motion night lights near doors and bathrooms.
- Sensors are mounted at appropriate heights and aimed across walking paths.
- Sensitivity and timers are adjusted to minimize false triggers and dark intervals.
- Lights activate only when needed in low light, saving energy.
Putting It All Together
Thoughtful motion sensor lighting placement for entryways and hallways is one of the simplest upgrades you can make for home safety. By focusing on the routes you use most, mounting sensors at the right height and angle, and fine-tuning their settings, you can create a home that quietly lights the way whenever you need it.
Start with your most frequently used entry door and main hallway, then expand to side doors, stair-adjacent hallways, and guest areas. With a clear plan and a few careful adjustments, motion sensor lighting can help prevent falls, discourage intruders, and make every late-night walk through your home safer and more comfortable.
 Motion Sensor Light Placement for Driveway and Side Yard: A Practical Checklist
 Door and Window Sensor Placement for Sliding Doors: A Practical Checklist
 Smoke Detector Placement Guide for Bedrooms, Hallways, and Kitchens