Tap water in many homes contains chlorine, minerals that cause hardness, and other contaminants that can leave your skin dry, your hair dull, and your shower surfaces coated in scale. A shower filter can help, but the options and claims can be confusing. Understanding what you actually need to filter, how different technologies work, and which features matter most will help you choose a shower filter that truly improves your daily routine.
On this page(click to collapse)
- Why a Shower Filter Matters for Skin and Hair
- Step 1: Understand Your Water Quality
- Step 2: Know the Main Types of Shower Filters
- Step 3: Compare Filtration Media and What They Do
- Step 4: Balance Filtration Performance with Water Pressure
- Step 5: Consider Skin Comfort and Sensitivities
- Step 6: Evaluate Cartridge Life and Ongoing Costs
- Step 7: Check Installation and Compatibility
- Step 8: Read Labels and Certifications Carefully
- Step 9: Maintain Your Shower Filter for Lasting Results
- Putting It All Together: Choosing the Right Shower Filter
- Related guides
This guide walks through the basics of chlorine and hard water, explains the main types of shower filters, and shows you how to match a filter to your water quality, budget, and comfort goals. By the end, you will know exactly what to look for on the box, what performance claims really mean, and how to install and maintain your filter for long‑term results.
Why a Shower Filter Matters for Skin and Hair
Many people focus on drinking water quality and forget that shower water contacts skin and hair every single day. Even if your tap water is considered safe to drink, it can still be harsh on your body and your bathroom surfaces.
Chlorine and chloramine in shower water
Municipal water systems commonly use chlorine or chloramine to disinfect water. These chemicals help control harmful microbes, but they can be irritating when they reach your shower.
Potential effects of chlorine and chloramine in shower water include:
- Dry, tight, or itchy skin after showering
- Increased irritation for sensitive skin or existing conditions
- Dry, brittle, or frizzy hair that feels rough or looks dull
- Faded hair color over time
- Strong pool-like odor in hot showers
Hard water and mineral buildup
Hard water contains higher levels of calcium and magnesium. These minerals are not usually a health concern, but they affect how water behaves in your home.
Common signs of hard water include:
- Soap scum on shower walls and doors
- White or chalky spots on fixtures and glass
- Rough-feeling towels and clothes after washing
- Hair that feels coated, heavy, or hard to rinse
- Dry skin that does not feel clean even after showering
While a small shower filter cannot fully soften very hard water the way a whole-house system can, the right filter can reduce some mineral effects, improve how soap rinses, and make water feel gentler on skin.
Step 1: Understand Your Water Quality
Before choosing a shower filter, it helps to know what is actually in your water. Different filters target different contaminants. A filter that is perfect for chlorine reduction may not be the best choice for very hard water, and vice versa.
Check your local water report
If you are on a public water system, your provider publishes an annual water quality report. You can usually find it on the provider’s website or by searching online for your city name plus “water quality report.” Look for:
- Disinfectant used: chlorine or chloramine
- Hardness level: often listed in grains per gallon (gpg) or milligrams per liter (mg/L)
- Any notes on taste, odor, or mineral content
Use simple at‑home tests
If you cannot find a report or want more detail, consider:
- Test strips for hardness: These can show whether your water is soft, moderately hard, or very hard.
- Chlorine test strips: These indicate how much free chlorine is present at the tap.
- Observation: Note soap scum, scale on fixtures, strong chlorine smell, or how your skin feels after showering.
Match your filter to your main concerns
Once you understand your water, you can prioritize:
- High chlorine, normal hardness: Focus on a filter that specializes in chlorine and chloramine reduction.
- Very hard water, mild chlorine: Look for filters that address scale and mineral effects, often using media that alter how minerals behave.
- Both chlorine and hardness: Choose a multi‑stage filter that targets disinfectants and helps with scale and soap scum.
Step 2: Know the Main Types of Shower Filters
Shower filters come in several designs and use different filtration media. Understanding the basics will help you read product labels with more confidence.
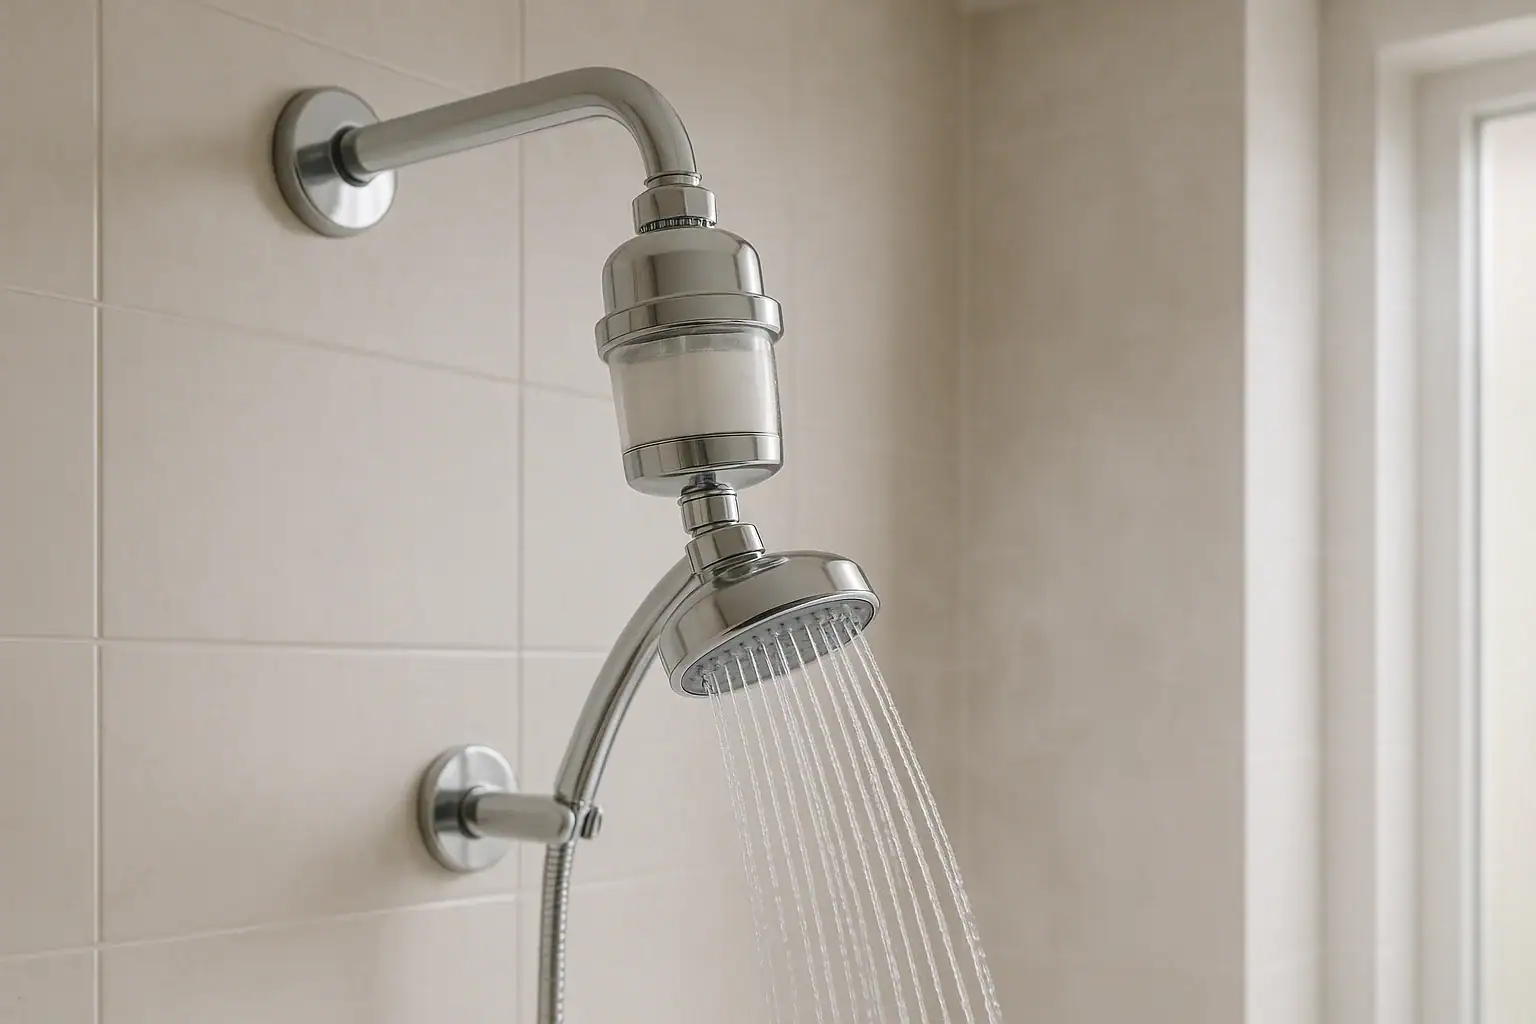
Inline shower filters
Inline filters install between the shower arm coming from the wall and your existing showerhead.
Pros:
- Let you keep your current showerhead
- Usually simple to install with basic tools
- Available with multi‑stage cartridges for broad filtration
Cons:
- Add length and weight to the shower arm
- May slightly reduce water pressure, depending on design
Filtered showerheads
These units combine the filter and showerhead in one piece.
Pros:
- Clean, integrated look
- Often offer multiple spray settings
- Designed to balance filtration with water flow
Cons:
- You cannot use your existing showerhead
- Replacement cartridges must match that specific model
Handheld filtered showerheads
These combine a filter with a handheld wand and hose.
Pros:
- Flexible for rinsing hair, children, and pets
- Helpful for those with limited mobility
- Often use similar cartridges to other filtered heads
Cons:
- More parts to install and maintain
- Can be heavier than standard handhelds
Overhead and rainfall filtered systems
Some rainfall or overhead shower systems include built‑in filtration. These prioritize a spa‑like experience while still reducing certain contaminants.
Pros:
- Luxurious feel with wide water coverage
- Integrated design can look streamlined
Cons:
- Often more expensive
- May require more complex installation
Step 3: Compare Filtration Media and What They Do
The heart of any shower filter is the media inside the cartridge. Different materials target different issues. Many filters use a combination of media for broader protection.
Kinetic degradation fluxion (KDF)
KDF is a copper‑zinc alloy used in many shower filters. It works through a redox (reduction‑oxidation) process.
Typical benefits:
- Reduces chlorine in hot water
- Helps inhibit scale buildup on fixtures
- Resists bacterial growth inside the filter
- Performs well at higher water temperatures
KDF is a strong choice if chlorine and scale are your main concerns and you take hot showers.
Activated carbon
Activated carbon is a porous material that adsorbs certain chemicals and odors.
Typical benefits:
- Reduces chlorine and improves odor
- Helps with some organic compounds that affect smell or feel
Carbon is very effective in cooler water. In very hot showers, performance can decline, so it is often paired with other media.
Vitamin C media
Some shower filters use vitamin C media to neutralize chlorine and, in some cases, chloramine.
Typical benefits:
- Targets chlorine and sometimes chloramine
- Can improve the feel and smell of water
Vitamin C filters are often favored by people with sensitive skin or color‑treated hair, especially in areas that use chloramine.
Media for hardness and scale
No small shower filter can fully soften very hard water, but certain media can reduce scale and improve how water behaves.
Look for descriptions such as:
- Scale control or anti‑scale media
- Polyphosphate or similar additives that help keep minerals in suspension
- Ceramic or other beads designed to alter mineral behavior
These media can help reduce spotting and soap scum and may make water feel smoother, even though the hardness number does not change dramatically.
Multi‑stage cartridges
Many shower filters combine several media layers in one cartridge. A typical multi‑stage design may include:
- A sediment layer to catch sand and rust
- KDF or similar media for chlorine and scale
- Activated carbon for odor and taste
- Ceramic or mineral beads to adjust feel and pH
If you want broad protection and are not sure which single media to choose, a multi‑stage cartridge is often a practical option.
Step 4: Balance Filtration Performance with Water Pressure
One common concern is losing water pressure after installing a shower filter. All filters create some resistance, but design and quality make a big difference.
Check flow rate and pressure ratings
When comparing products, look for:
- Flow rate (gallons per minute): Many showerheads are rated around 2.0 to 2.5 gallons per minute. Filters designed for this range should maintain comfortable flow.
- Pressure range: Some filters list a minimum and maximum operating pressure. If your home has low pressure, choose a filter designed for low‑pressure systems.
Choose designs that protect flow
To keep showers comfortable while still improving water quality:
- Look for filters that advertise “high flow” or “maintains pressure” along with their filtration claims.
- Avoid stacking multiple filters on the same line, which can restrict flow.
- Clean or replace cartridges on schedule; clogged media reduce pressure over time.
Step 5: Consider Skin Comfort and Sensitivities
If your main goal is comfort for sensitive or dry skin, prioritize features that directly affect how the water feels and what it leaves behind.
For dry or itchy skin
Focus on filters that:
- Clearly state chlorine reduction in hot water
- Use media that help with scale and soap scum
- Include multi‑stage filtration for a smoother feel
For sensitive skin or scalp
Consider:
- Filters that target both chlorine and chloramine if your water report lists chloramine
- Cartridges rated to remove fine sediment that can irritate skin
- Gentle spray settings that are less harsh on delicate skin
For hair and color protection
If you color your hair or struggle with dryness and frizz, look for:
- Strong chlorine reduction claims
- Filters that mention benefits for hair feel or manageability
- Handheld options that make it easier to rinse thoroughly with filtered water
Step 6: Evaluate Cartridge Life and Ongoing Costs
A shower filter is not a one‑time purchase. Cartridges need to be replaced regularly to stay effective. When comparing options, consider both performance and long‑term expense.
Understand cartridge life claims
Manufacturers often list cartridge life in gallons or months. Real‑world life depends on:
- How many people use the shower
- How long and how often you shower
- Your water quality and level of contaminants
As a rough guide, many households replace shower filter cartridges every 3 to 6 months, but heavy use or very hard water may require more frequent changes.
Compare cost per month, not just purchase price
To understand the true cost of a filter:
- Note the price of replacement cartridges and how many months they are expected to last.
- Divide the cartridge price by the expected number of months to get an approximate monthly cost.
- Compare that monthly cost across different filter options.
Sometimes a slightly higher upfront cost with longer‑lasting cartridges ends up being more economical over time.
Step 7: Check Installation and Compatibility
Most shower filters are designed for do‑it‑yourself installation, but it is still important to confirm compatibility with your existing setup.
Standard connections
In many homes, the shower arm coming out of the wall uses a standard threaded connection. Most shower filters and showerheads are designed to screw directly onto this fitting.
Before buying, check that:
- Your shower arm is in good condition and not heavily corroded
- You have enough space between the wall and ceiling for an inline filter or filtered head
- The filter is compatible with handheld or fixed heads, depending on your preference
Basic installation steps
Exact instructions vary, but installation usually follows this pattern:
- Turn off the shower and let the fixtures cool if recently used.
- Unscrew the existing showerhead from the shower arm.
- Clean the threads on the shower arm and remove old tape or debris.
- Wrap plumber’s tape around the threads if recommended.
- Screw the filter onto the shower arm by hand, tightening gently.
- Attach the showerhead or handheld hose to the outlet side of the filter.
- Run water for a few minutes to flush the new cartridge until the water runs clear.
When to consider professional help
You may want a professional installer if:
- Your shower arm is damaged or leaking
- You are adding a more complex overhead or rainfall system
- You are uncomfortable working with plumbing connections
Step 8: Read Labels and Certifications Carefully
Product packaging and online listings often highlight impressive claims. To make a confident choice, focus on clear, measurable information.
Look for specific contaminant claims
Instead of vague phrases, look for details such as:
- Percentage of chlorine reduction
- Whether chloramine is addressed
- Statements about scale reduction or anti‑scale performance
- Any mention of sediment removal size (for example, down to a certain micron level)
Check for independent testing
Some filters are tested by independent laboratories to verify performance claims. If a product mentions third‑party testing or compliance with established standards, that can add confidence that it will perform as described.
Step 9: Maintain Your Shower Filter for Lasting Results
Even the best shower filter will lose effectiveness if you do not maintain it. A simple routine can keep your water feeling fresh and comfortable.
Watch for signs that the cartridge needs replacing
Replace the cartridge sooner than the maximum recommended interval if you notice:
- Water pressure dropping noticeably
- Chlorine odor returning in hot showers
- Skin or hair feeling dry again after a period of improvement
- Visible discoloration or buildup inside the filter housing
Set a reminder schedule
To avoid forgetting:
- Write the installation date on the cartridge or housing with a permanent marker.
- Set a calendar reminder on your phone a few months ahead.
- Keep at least one replacement cartridge on hand so you can change it promptly.
Putting It All Together: Choosing the Right Shower Filter
Choosing a shower filter becomes much easier when you break it down into clear steps. Here is a quick summary to guide your decision:
- Identify your main concerns: chlorine odor, hard water scale, dry skin, dull hair, or all of the above.
- Check your water report or use simple tests to confirm chlorine levels and hardness.
- Decide on a style: inline filter, filtered showerhead, handheld, or rainfall system.
- Choose filtration media that match your needs, such as KDF for hot water chlorine, activated carbon for odor, or multi‑stage cartridges for broad coverage.
- Balance filtration with flow by checking flow rate and pressure ratings.
- Compare cartridge life and replacement costs to understand long‑term value.
- Confirm installation compatibility with your current shower setup.
With a little research and a clear understanding of your water, you can select a shower filter that reduces chlorine, manages the effects of hardness, and makes your daily shower noticeably more comfortable for your skin and hair.
If you want to explore more ways to improve water quality and comfort throughout your home, you can continue with related water and kitchen resources at this hub.
Recommended next:
Related posts
Browse this topic →
How to Clean an Induction Cooktop Without Scratches: Step-by-Step Guide
How to Tame Kitchen Countertop Clutter Zones for Coffee Prep and Drop Areas

Fridge Door Seal Test Checklist for Better Energy Use and Food Safety
Under Sink Cabinet Water Damage: What To Check Before It Gets Worse

How to Store Flour, Rice, and Pasta to Prevent Pests at Home

Dishwasher Rinse Aid Basics: What It Does and When It Actually Helps
Keep reading
About this site
Signature Home Guide publishes practical, independent home guides. We aim to be clear, helpful, and transparent.
Affiliate disclosure
As an Amazon Associate, we earn from qualifying purchases. Some links on this site may be affiliate links. If you buy through these links, we may earn a small commission at no extra cost to you. This helps support our content. Learn more.