
Ductless mini-split systems are known for efficient heating and cooling, but they also play a bigger role in your home than just comfort. The way you select, clean, and maintain your mini-split filters has a direct impact on indoor air quality, allergy symptoms, and even energy bills. Many homeowners install a ductless system and then forget about it, not realizing that neglected filters can circulate dust and pollutants instead of capturing them.
On this page(click to collapse)
- How Ductless Mini-Splits Affect Indoor Air Quality
- Common Filter Types in Ductless Mini-Split Systems
- Why Filter Maintenance Matters for Indoor Air Quality
- How Often to Clean or Replace Ductless Mini-Split Filters
- Step-by-Step: Cleaning Ductless Mini-Split Filters
- Additional Maintenance for Healthier Indoor Air
- Improving Indoor Air Quality Beyond the Mini-Split
- Setting Up a Simple Maintenance Routine
- Key Takeaways: Cleaner Air with Your Ductless Mini-Split
- Related guides
This guide explains how ductless mini-splits affect indoor air quality, what the different filter options do, and how to set up a simple maintenance routine. You will learn how often to clean or replace filters, what signs to watch for, and how to keep your system running efficiently while helping your family breathe cleaner air. Whether you are new to ductless systems or looking to improve the one you already have, these practical steps will help you get more comfort and healthier air from the same equipment.
How Ductless Mini-Splits Affect Indoor Air Quality
Ductless mini-splits do more than condition the air; they constantly pull room air across filters, then return it to the space. This repeated circulation can either improve or degrade indoor air quality depending on how clean the system is and which filters you use.
Air circulation and filtration
Every indoor mini-split unit contains at least one primary filter. As the unit runs, it:
- Draws in room air through an intake grille
- Passes the air across filters that trap dust and other particles
- Moves the filtered air across the coil to heat or cool it
- Blows the conditioned air back into the room
Because the same air cycles through the unit many times per day, even a basic filter can capture a surprising amount of dust and debris. Over time, this helps reduce airborne particles that would otherwise keep circulating in your home.
Benefits for homes without ductwork
In a traditional ducted system, dust and allergens can build up inside long duct runs and then blow into living spaces. Ductless systems avoid this by moving air through short paths inside each indoor unit. With fewer surfaces for dust to collect and no large duct network, there is less opportunity for hidden buildup that can affect indoor air quality.
Limits of mini-split filtration
While ductless mini-splits can support better indoor air quality, they are not full air purification systems. Standard filters are designed mainly to protect the equipment, not to remove every fine particle from the air. For people with asthma, allergies, or other respiratory concerns, improving filtration and keeping up with maintenance are especially important.
Common Filter Types in Ductless Mini-Split Systems
Understanding the types of filters used in ductless systems helps you choose the right setup for your home and health needs. Most indoor units use a combination of filters that slide or clip into place behind the front panel.
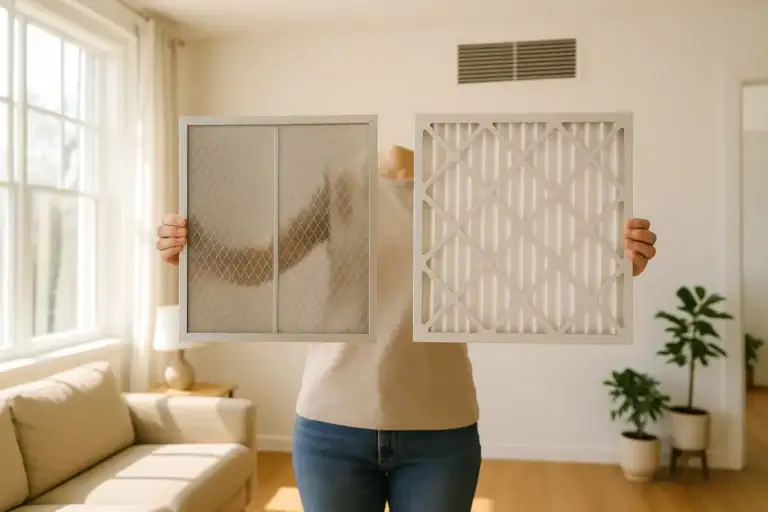
Primary washable mesh filters
Every ductless mini-split includes a primary filter, usually a plastic frame with a fine mesh screen. Its main job is to capture larger particles, such as:
- Household dust
- Lint and fibers
- Pet hair and dander clumps
- Insects and visible debris
These filters are typically washable and reusable. When clean, they allow good airflow and help keep the indoor coil from becoming coated with dust. When neglected, they clog quickly and reduce both air quality and system performance.
Fine or electrostatic filters
Some mini-split units include additional fine filters or electrostatic elements. These are designed to capture smaller particles than the primary mesh filter. Depending on the design, they may help reduce:
- Smaller dust particles
- Certain pollen grains
- Some types of smoke or fine debris
These filters may be washable or replaceable. Always follow the unit’s instructions for cleaning frequency and replacement intervals so they continue to work as intended.
Deodorizing and odor-reducing filters
Optional filters are sometimes used to help with odors in kitchens, living rooms, or areas with pets. These may include:
- Carbon or charcoal-based inserts designed to absorb odors
- Special coatings intended to reduce certain volatile compounds
Odor-reducing filters do not remove all gases or chemicals from the air, and they have a limited lifespan. They must be replaced when saturated, or they will stop working and may even begin to release trapped odors back into the room.
What about high-efficiency filters?
Some homeowners look for high-efficiency filters similar to those used in whole-house systems. With ductless mini-splits, it is important not to restrict airflow. Filters that are too dense can strain the fan, reduce comfort, and increase energy use. If you want to upgrade filtration, consider:
- Using manufacturer-approved accessory filters only
- Pairing your mini-split with a separate portable air cleaner for sensitive rooms
- Focusing on consistent cleaning of existing filters to maximize performance
Why Filter Maintenance Matters for Indoor Air Quality
Filter maintenance is the single most important step you can control when it comes to indoor air quality and ductless mini-splits. Clean filters help the system capture more particles and move air efficiently. Dirty filters do the opposite.
Effects of dirty filters on your air
When filters are clogged or neglected, you may notice:
- More dust settling on surfaces shortly after cleaning
- Musty or stale odors when the unit starts up
- Visible dust buildup on the intake grille
- Increased sneezing or irritation for sensitive family members
In extreme cases, dust can bypass the filter and collect on the indoor coil and fan, becoming harder to remove and potentially harboring moisture and contaminants.
Energy efficiency and comfort
Indoor air quality is not the only concern. Dirty filters also:
- Reduce airflow, making rooms feel less evenly heated or cooled
- Force the fan and compressor to work harder, using more electricity
- Increase wear on components, which can shorten system life
By keeping filters clean, you support both healthier air and better comfort while helping control utility costs.
How Often to Clean or Replace Ductless Mini-Split Filters
The right schedule depends on how you use your system and what is in your home’s air. As a starting point, most manufacturers recommend checking filters about once a month during heavy use.
General timelines
- Primary washable filters: Inspect every month; clean every 1–3 months, or more often if visibly dirty.
- Fine or electrostatic filters: Follow the manual; often cleaned every 3–6 months if washable.
- Odor-reducing inserts: Typically replaced every 3–12 months, depending on usage and household odors.
Factors that require more frequent cleaning
You may need to shorten your schedule if you have:
- Multiple pets that shed
- Smokers in the home or frequent cooking fumes
- High outdoor dust or pollen levels
- Construction or remodeling work nearby
- Family members with asthma, allergies, or respiratory conditions
In these cases, checking filters every few weeks during peak seasons can help you stay ahead of buildup.
Step-by-Step: Cleaning Ductless Mini-Split Filters
Cleaning your mini-split filters is usually a simple do-it-yourself task. Always consult your user manual for model-specific instructions, but the general process is similar across most systems.
1. Turn off the system and let it stop
Before opening the indoor unit, switch the system off using the remote or wall control. Wait for the fan to stop completely. For added safety, some homeowners also turn off the power at the disconnect or breaker, especially if they will be working near electrical components.
2. Open the front panel
Most wall-mounted units have a front panel that lifts up from the bottom. Gently:
- Locate the small indents or tabs along the bottom edge
- Lift the panel upward until it clicks or stays open on its own
- Avoid forcing anything; if it feels stuck, check your manual
3. Remove the filters
The primary filters typically slide or swing out from just inside the panel. To remove them:
- Note how the filters are positioned so you can reinstall them correctly
- Gently pull the tab or handle to release each filter
- Set them on a towel or in a sink to avoid spreading dust
If your unit has additional fine or odor filters, they may be clipped to the primary filters or installed in separate slots. Remove them carefully according to the instructions.
4. Vacuum loose dust
Use a vacuum with a soft brush attachment to remove loose dust from both sides of the filter. Hold the filter securely to avoid bending or tearing it. This step keeps most of the dust out of your sink or tub.
5. Wash with mild soap and water
For washable filters:
- Rinse the filter under lukewarm running water, flowing from the clean side to the dirty side when possible
- Use a small amount of mild dish soap if there is greasy or stubborn dirt
- Avoid hot water, harsh cleaners, or scrubbing that could damage the mesh
Do not wash filters that are labeled as replace-only. If you are not sure, check the manual before getting them wet.
6. Dry completely before reinstalling
Shake off excess water and allow filters to air-dry fully before putting them back into the unit. Placing wet filters in the system can encourage mold growth and restrict airflow. To speed up drying:
- Lean filters against a wall or rack in a well-ventilated area
- Avoid direct sunlight or high heat that could warp plastic frames
7. Reinstall the filters and close the panel
Once dry, slide or clip the filters back into their original positions. Make sure:
- Any arrows or markings face the correct direction
- Additional fine or odor filters are attached as instructed
- The front panel closes smoothly and latches fully
Turn the power back on and restart the system. You should notice stronger airflow and often quieter operation after a thorough cleaning.
Additional Maintenance for Healthier Indoor Air
Filter cleaning is the foundation, but a few extra habits can further support indoor air quality and system health.
Keep the indoor unit clean
Dust and dirt on the outside of the unit can eventually find their way inside. To minimize buildup:
- Wipe the exterior casing and intake grille with a soft, slightly damp cloth
- Avoid spraying cleaners directly into the unit
- Keep furniture, curtains, and shelves from blocking airflow
Control humidity and condensation
Ductless mini-splits remove moisture from the air while cooling. If the drain line clogs or the unit is not draining properly, excess moisture can harm indoor air quality. Watch for:
- Water dripping from the indoor unit
- Stains or damp spots on the wall below the unit
- Persistent musty odors near the system
If you notice these signs, schedule a professional inspection to clear the drain line and check for hidden moisture issues.
Schedule professional service
Even with good filter habits, ductless mini-splits benefit from regular professional maintenance. A qualified technician can:
- Deep-clean indoor coils and blower wheels
- Check refrigerant levels and system performance
- Inspect electrical connections and safety controls
- Verify that the system is draining and dehumidifying properly
Annual or semiannual service helps maintain both efficiency and air quality, especially in homes where the system runs most of the year.
Improving Indoor Air Quality Beyond the Mini-Split
Your ductless system is one part of a larger indoor air quality strategy. To get the best results, combine good filter maintenance with other simple steps around your home.
Reduce sources of indoor pollution
Cleaner air starts with fewer pollutants entering your living space. Consider:
- Using exhaust fans when cooking or showering
- Storing paints, solvents, and chemicals in well-ventilated areas
- Choosing low-emission cleaning products when possible
- Not smoking indoors
Vacuum and dust regularly
Dust that settles on floors and furniture can easily be stirred back into the air. To reduce this:
- Vacuum carpets and rugs with a vacuum that has effective filtration
- Dust surfaces with a damp cloth or microfiber duster
- Wash bedding and curtains regularly to remove trapped particles
Consider supplemental air cleaning
If someone in your home has strong sensitivities, you may want to add a dedicated air cleaner in bedrooms or other key spaces. A portable unit with an efficient filter can work alongside your ductless mini-split to capture smaller particles that the mini-split’s filters are not designed to remove.
Setting Up a Simple Maintenance Routine
The easiest way to protect indoor air quality with a ductless mini-split is to make filter care a habit rather than an occasional project. A simple routine might include:
- Monthly: Check filters, vacuum if lightly dusty, wash if visibly dirty.
- Seasonally: Deep-clean washable filters, wipe the unit exterior, confirm good airflow.
- Yearly: Schedule professional service before the peak heating or cooling season.
Set reminders on your phone or calendar, or tie filter checks to other household tasks such as changing smoke detector batteries or paying quarterly bills. Consistency matters more than perfection.
Key Takeaways: Cleaner Air with Your Ductless Mini-Split
When used and maintained correctly, ductless mini-splits can support a comfortable home with cleaner air and better efficiency. Remember these core points:
- Filters are your first line of defense for indoor air quality in ductless systems.
- Primary washable filters capture larger particles and must be cleaned regularly.
- Additional filters can help with finer particles or odors but need timely replacement.
- Dirty filters reduce air quality, comfort, and energy efficiency.
- Regular cleaning and occasional professional service keep the system performing well.
By taking a few minutes each month to care for your ductless mini-split filters, you help protect your family’s comfort, your indoor air, and the long-term health of your equipment.
Recommended next:
Related posts
Browse this topic →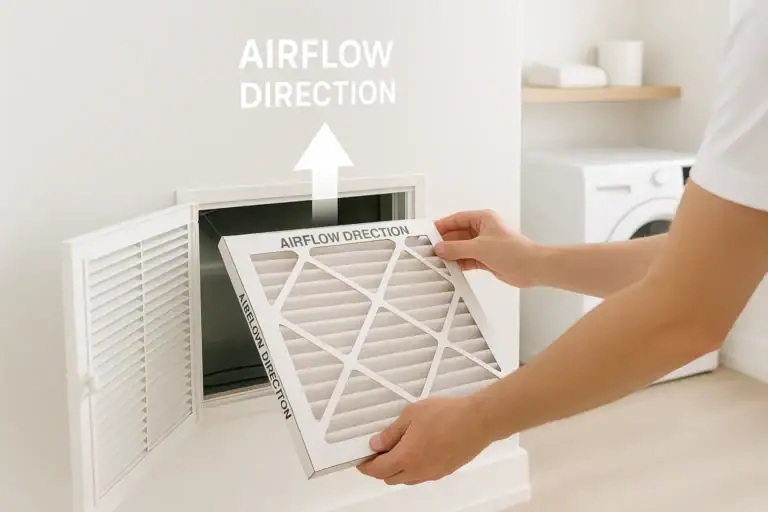
HVAC Filter Arrow Direction: Common Installation Mistakes and How to Fix Them

How to Reduce Heat From Sunny Windows Without Blocking Natural Light
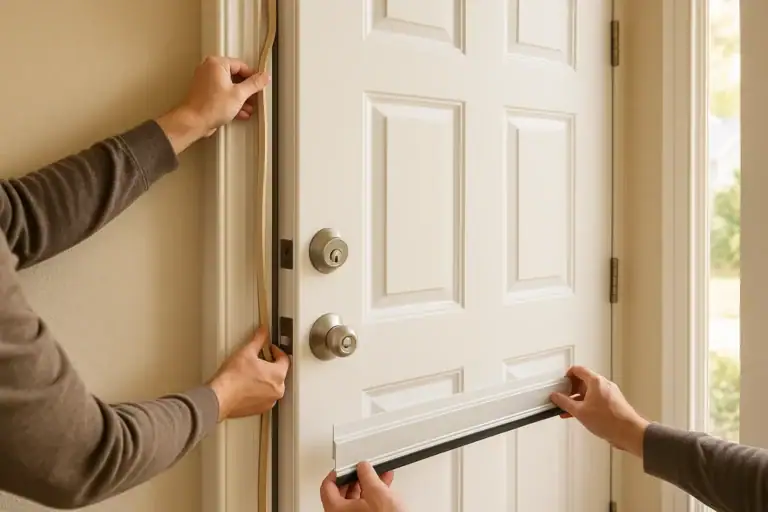
Door Sweep and Weatherstripping Comfort Upgrade Guide
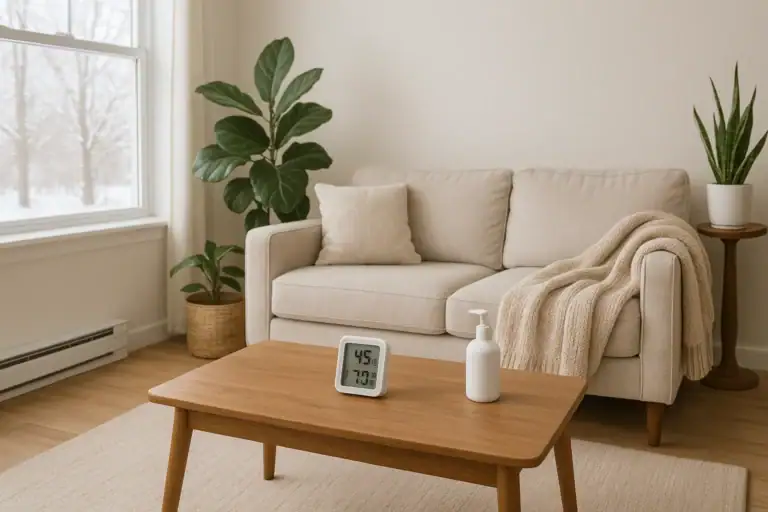
Why Your Home Feels Dry Even When Humidity Is Normal
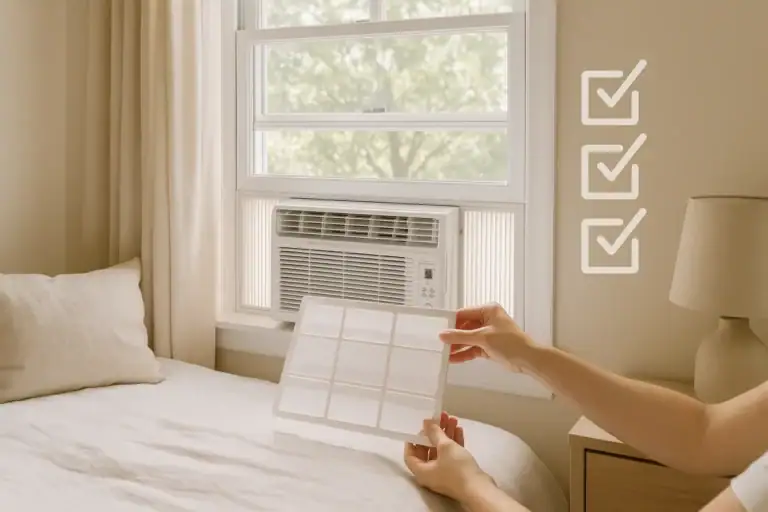
Window AC Maintenance Checklist Before Summer Heat Arrives
Washable vs Disposable HVAC Filters: Which Is Best for Your Home?
Keep reading

About this site
Signature Home Guide publishes practical, independent home guides. We aim to be clear, helpful, and transparent.
Affiliate disclosure
As an Amazon Associate, we earn from qualifying purchases. Some links on this site may be affiliate links. If you buy through these links, we may earn a small commission at no extra cost to you. This helps support our content. Learn more.