On this page(click to collapse)
- Why Countertop Filters Work Well for Renters
- Types of Countertop Filters Renters Can Choose
- What Countertop Filters Can and Cannot Do
- Choosing a Countertop Filter That Fits Your Rental
- Step-by-Step Setup for Faucet-Connected Countertop Filters
- Setup Tips for Gravity-Fed Countertop Filters
- Daily Use and Care in a Rental Kitchen
- How to Avoid Landlord Issues
- Signs Your Countertop Filter Is Not Working Properly
- When a Countertop Filter Is Not Enough
- Making the Most of Your Countertop Filter as a Renter
- Related guides
Living in a rental can make it tricky to improve your tap water. You may not be allowed to change plumbing, drill into cabinets, or install a system under the sink. That is where countertop water filters become a practical option. They sit on your counter, connect to a faucet or use a gravity-fed design, and can usually move with you when your lease ends. For many renters, they are the most realistic way to get better-tasting water without risking a security deposit.
This guide walks through how countertop filters work, how to set one up in a rental without upsetting your landlord, and how to care for it so it actually improves your water. You will also see what these systems can and cannot do, so your expectations stay grounded in reality. By the end, you will know how to choose the right style, avoid common mistakes, and keep your water safe and pleasant to drink.
Why Countertop Filters Work Well for Renters
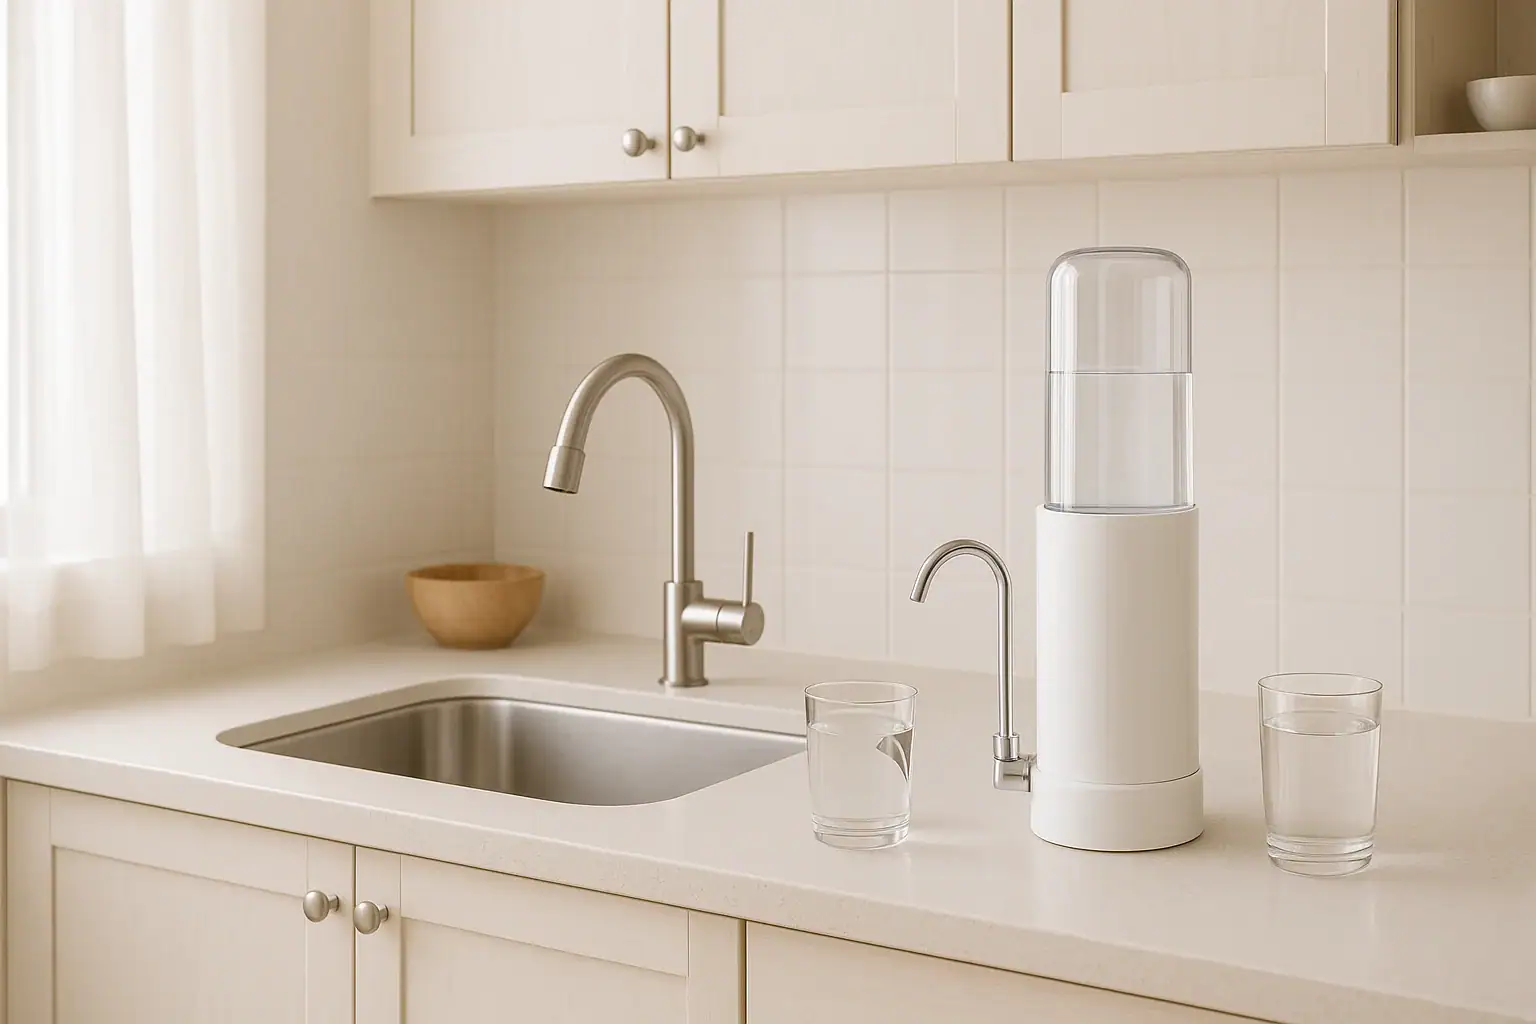
Countertop filters are popular with renters because they are simple, portable, and usually do not require permanent changes to the kitchen. They sit on the counter and either connect to the faucet with a small diverter or use a fill-and-pour design.
Key benefits for rental living
- No permanent plumbing changes: Most countertop units attach to the existing faucet or stand alone, so you avoid calling a plumber or asking for landlord approval.
- Portable: When you move, you can disconnect the unit, pack it, and reinstall it in your next place.
- Faster setup: Many systems can be installed in under 30 minutes with basic tools or no tools at all.
- Better taste and odor: Even basic filters can reduce chlorine taste, odors, and visible sediment, which makes it easier to drink more water and cut back on bottled water.
- Budget-friendly: Upfront costs are usually lower than whole-house or under-sink systems, and you only maintain one small unit.
Types of Countertop Filters Renters Can Choose
Not all countertop filters work the same way. Understanding the main types helps you pick one that fits your faucet, counter space, and water quality concerns.
Faucet-connected countertop filters
These systems sit on the counter and connect directly to your kitchen faucet with a small hose and diverter valve.
How they work: You turn on the cold water, flip a small switch on the diverter, and water is routed through the filter and out a separate spout.
Pros:
- Instant filtered water on demand
- No need to refill a reservoir
- Good option for families who use a lot of drinking and cooking water
Cons:
- Requires a compatible faucet and access to the aerator threads
- Hose and unit take up counter space and can clutter the sink area
- Not ideal if your landlord installed a specialty or pull-down sprayer faucet that does not accept adapters
Gravity-fed countertop filters
Gravity-fed units sit on the counter and use an upper reservoir you fill manually. Water moves downward through filter media into a lower chamber.
Pros:
- No faucet connection required, good for unusual or incompatible faucets
- Can be placed away from the sink if you have a sturdy surface
- Useful during short water shutoffs if you prefill the reservoir
Cons:
- You must remember to refill the top chamber
- Flow rate is slower than faucet-connected options
- Taller units may not fit under low cabinets
Pitcher-style filters as a countertop option
Pitcher filters are not traditional countertop units, but many renters use them similarly. They sit on the counter or in the fridge and are filled from the tap.
Pros: Very portable, no installation, and easy to store when not in use.
Cons: Limited capacity and slower filtration, which can be frustrating for households that drink a lot of water or cook often.
What Countertop Filters Can and Cannot Do
Setting realistic expectations is crucial. Countertop filters can improve your water, but they are not magic. Their performance depends on the filter media, your local water quality, and how well you maintain the system.
Common improvements you can expect
- Better taste and smell: Many filters are designed to reduce chlorine and related compounds that cause a pool-like taste or odor.
- Reduction of visible particles: Sediment, rust, and dirt can be reduced, so your water looks clearer.
- Basic contaminant reduction: Depending on the filter, you may see reduced levels of certain metals, organic chemicals, and disinfection byproducts.
- Less plastic waste: If you are replacing bottled water with filtered tap water, you can cut down on plastic bottles.
Limitations to keep in mind
- Not always a full solution for serious contamination: If your water has high levels of specific contaminants, you may need a more advanced system or additional treatment steps.
- Flow rate is limited: Countertop units filter slower than unfiltered tap water. Large pots and multiple water bottles will take longer to fill.
- Filter media has a lifespan: Once the filter is saturated, it stops working effectively and may even release captured contaminants back into the water.
- Does not fix plumbing issues: Old pipes, lead service lines, or severe corrosion problems require professional attention beyond a countertop unit.
Choosing a Countertop Filter That Fits Your Rental
Before buying a countertop filter, look closely at your kitchen setup and your water quality. A little planning prevents frustration and returns.
Check your faucet style
For faucet-connected units, the faucet is the most important factor.
- Standard threaded faucet: Usually compatible with diverter valves and adapters.
- Pull-down or pull-out sprayer: Often incompatible with direct connection. In this case, a gravity-fed unit or pitcher is usually better.
- Designer or special faucets: May have non-standard threads or shapes that do not accept adapters. Take a clear photo and compare to the product information before buying.
Measure your counter and cabinet clearance
Countertop units vary in height and footprint. Measure:
- The distance from your counter to the bottom of your upper cabinets
- The depth of your counter from the wall to the front edge
- Available space next to the sink, including room for hoses
Make sure you can open any lids or reservoirs fully without hitting cabinets or shelves.
Understand your water source
Knowing whether you have city water or well water helps you choose the right filter type.
- City water: Typically already disinfected but may contain chlorine, disinfection byproducts, and trace contaminants. Many countertop filters are designed with this in mind.
- Well water: Can contain sediment, minerals, and microbes. In this case, regular testing is important, and you may need a filter specifically rated for your well conditions.
Step-by-Step Setup for Faucet-Connected Countertop Filters
Installation details vary by model, but most faucet-connected countertop filters follow a similar process. Always read the manual for your specific unit, but use these steps as a general guide.
1. Prepare the area
- Clear a section of counter next to the sink.
- Wipe the surface so the unit sits flat and stable.
- Lay a towel in the sink to catch any small parts that might fall.
2. Remove the faucet aerator
- Unscrew the small tip at the end of your faucet (the aerator).
- Use a cloth or tape on pliers if it is stuck, so you do not scratch the finish.
- Set aside any washers or parts in a small bowl so you can reinstall them when you move out.
3. Choose the right adapter
- Most filters come with several adapters and washers.
- Test each adapter gently to see which one threads smoothly onto your faucet.
- Do not force threads. If it will not screw on by hand, it is probably the wrong adapter.
4. Attach the diverter valve
- Screw the diverter valve (the piece that connects to the filter hose) onto the faucet or adapter.
- Hand-tighten firmly; avoid using tools unless the instructions say otherwise.
- Connect the hose from the diverter to the countertop unit, making sure it clicks or tightens securely.
5. Position the filter unit
- Place the filter housing on the counter where the hose can reach without bending sharply.
- Ensure the unit is level so internal filters seat properly.
- Leave enough space to remove the housing or lid for future filter changes.
6. Flush the filter
- Turn on the cold water slowly.
- Flip the diverter switch to send water through the filter.
- Let water run for the time listed in the manual, often several minutes, to flush out air and loose carbon particles.
- Discard this initial water; it is just for flushing.
7. Check for leaks
- Inspect connections at the faucet, diverter, and housing.
- If you see drips, turn off the water and reseat washers or tighten connections by hand.
- Once dry, your system is ready for daily use.
Setup Tips for Gravity-Fed Countertop Filters
Gravity-fed units do not connect to the faucet, but they still need careful setup for safe operation.
- Rinse components: Wash reservoirs, lids, and spigots with mild dish soap and rinse thoroughly before first use.
- Prime filter elements: Some filters need to be soaked or flushed before installation. Follow the included instructions closely.
- Sturdy surface: Place the unit on a flat, stable counter that can support the full weight when filled with water.
- Access to the spigot: Make sure you can place a glass or pitcher under the spout without moving the unit each time.
Daily Use and Care in a Rental Kitchen
Once your filter is installed, consistent habits keep it working well and help you avoid mold, odors, and clogs.
Smart daily habits
- Use cold water only: Hot water can damage filter media or release contaminants faster. Run cold water through the unit as directed.
- Let water run briefly: Before switching the diverter to filter mode, run the tap a few seconds to clear standing water in the faucet.
- Do not leave standing water for days: If you will be away for more than a couple of days, flush the system when you return before drinking.
Routine cleaning
- Exterior wipe-down: Wipe the outside of the housing and hoses with a damp cloth weekly to prevent dust and grease buildup.
- Spigot cleaning: For gravity-fed units, clean around the spigot regularly, as this area can collect residue.
- Reservoir washing: For units with reservoirs, wash them with mild dish soap and rinse thoroughly every few weeks.
Filter replacement schedule
Filter cartridges do not last forever. Two main factors determine when to change them:
- Time: Many filters are rated for a certain number of months of typical use.
- Volume: Some are rated for a specific number of gallons. If you cook a lot or have several people in the household, you may reach this limit faster.
Mark the installation date on a small piece of tape on the unit or set a reminder in your phone. If you notice a strong taste, smell, or a slower flow rate before the scheduled change, it may be time to replace the filter sooner.
How to Avoid Landlord Issues
One reason renters hesitate to install anything in the kitchen is concern about their lease and security deposit. Countertop filters can usually be installed and removed cleanly if you keep a few guidelines in mind.
Keep original faucet parts
- Store the original aerator and washers in a labeled bag in a safe place.
- When you move out, remove the diverter and adapters and reinstall the original aerator.
- Wipe away any mineral buildup on the faucet threads so it looks clean and undamaged.
Avoid drilling or permanent changes
- Do not drill holes in counters, cabinets, or sinks for hoses or brackets.
- If a unit suggests a screw-mounted bracket, look for a non-drill alternative like adhesive hooks or simply position the unit securely on the counter.
Protect surfaces
- Place a thin mat or tray under the unit to catch drips and protect wood or laminate from moisture.
- Wipe up spills promptly to prevent swelling or staining on rental countertops.
Signs Your Countertop Filter Is Not Working Properly
Even with good maintenance, filters can clog, wear out, or develop problems. Pay attention to these warning signs.
- Sudden change in taste or odor: If your water suddenly tastes or smells off, stop using the filter until you inspect or replace the cartridge.
- Very slow flow: A gradual slowdown is normal as the filter fills, but a sudden drop can indicate clogging or trapped air.
- Visible particles after filtration: If you see new sediment or black specks, you may need to flush the system or replace the filter.
- Leaks at connections: Persistent drips can waste water and damage surfaces. Check washers and tighten connections by hand.
When a Countertop Filter Is Not Enough
Countertop filters are a good fit for many renters, but there are situations where they may not provide the level of protection you need.
- Serious contamination issues: If local notices warn of specific contaminants, or if tests show high levels of certain substances, you may need more advanced treatment or bottled water until the issue is resolved.
- Private wells without recent testing: If you rely on a well and have not tested the water recently, consider a professional test before relying solely on a countertop filter.
- Health conditions requiring extra caution: People with weakened immune systems, infants, or pregnant individuals may need additional safeguards based on medical guidance.
If you suspect your water has serious issues, look up your local water quality report, consider independent testing, and discuss options with a professional. A countertop filter can still play a role, but it should not replace necessary safety measures.
Making the Most of Your Countertop Filter as a Renter
For many renters, a countertop filter is the most practical balance between better water and lease-friendly installation. By choosing a style that fits your faucet and counter space, installing it carefully, and keeping up with cleaning and filter changes, you can noticeably improve the taste and clarity of your tap water.
Remember that these systems have limits. They are best viewed as a helpful layer of protection and comfort, not a cure-all for every water problem. Pay attention to how your water looks, smells, and tastes, and do not ignore warning signs that something is off.
With realistic expectations and a little routine care, a countertop filter can make your rental kitchen feel more like home, support healthier hydration habits, and follow you easily from one lease to the next.
Recommended next:
Related posts
Browse this topic →
How to Clean an Induction Cooktop Without Scratches: Step-by-Step Guide
How to Tame Kitchen Countertop Clutter Zones for Coffee Prep and Drop Areas
Fridge Door Seal Test Checklist for Better Energy Use and Food Safety
Under Sink Cabinet Water Damage: What To Check Before It Gets Worse
How to Store Flour, Rice, and Pasta to Prevent Pests at Home
Dishwasher Rinse Aid Basics: What It Does and When It Actually Helps
Keep reading
About this site
Signature Home Guide publishes practical, independent home guides. We aim to be clear, helpful, and transparent.
Affiliate disclosure
As an Amazon Associate, we earn from qualifying purchases. Some links on this site may be affiliate links. If you buy through these links, we may earn a small commission at no extra cost to you. This helps support our content. Learn more.