Few things make a kitchen feel more chaotic than a cabinet stuffed with food storage containers and a pile of mystery lids that never seem to match anything. If you are tired of digging through noisy stacks, hunting for missing tops, or having containers fall out every time you open the door, it is time to create a simple, reliable system. You do not need fancy organizers or a complete kitchen remodel. With a bit of planning and a few practical habits, you can set up a storage system that keeps containers and lids together, easy to reach, and ready for everyday cooking and meal prep.
On this page(click to collapse)
- Step 1: Empty Everything and Start Fresh
- Step 2: Match Containers and Lids
- Step 3: Decide How Many Containers You Really Need
- Step 4: Choose the Best Storage Zone
- Step 5: Decide on a Lid Storage Strategy
- Step 6: Nest Containers to Save Space
- Step 7: Use Simple Organizers (Only If They Help)
- Step 8: Label and Create Simple Rules
- Step 9: Maintain Your System With Quick Check-Ins
- Extra Tips for Different Kitchen Setups
- Bringing It All Together
- Related guides
This guide walks you step by step through decluttering, sorting, and storing food storage containers in a way that actually works in a busy household. You will learn how to choose what to keep, how to store lids so they stop disappearing, and how to maintain your new system with minimal effort. Whether you have a tiny apartment kitchen or a large pantry, you can adapt these ideas to your space and finally put an end to the container chaos.
Step 1: Empty Everything and Start Fresh
To organize food storage containers effectively, you need a clean slate. That means pulling every single container and lid out of your cabinets, drawers, and pantry.
Clear the Space
- Choose a large, flat surface such as a table or countertop.
- Lay down a clean towel if you are working on a delicate surface.
- Remove all containers, lids, and any organizers from the cabinet or drawer where they live.
Once the space is empty, quickly wipe down shelves, drawer bottoms, and cabinet walls. Crumbs and sticky spots make it harder to keep things neat over time.
Gather Strays From Around the Kitchen
Look for containers and lids that might be hiding in other places:
- Refrigerator and freezer
- Dishwasher and drying rack
- Lunch bags and work totes
- Pantry shelves and countertops
Bring everything to the same workspace so you can see exactly what you own.
Step 2: Match Containers and Lids
The fastest way to stop losing lids is to remove any pieces that do not have a partner. Matching sets are easier to store and use.
Sort by Shape and Size
Begin by grouping containers by shape:
- Round containers together
- Square containers together
- Rectangular containers together
Within each shape, sort by size. Line them up from smallest to largest. This makes it easier to see duplicates and mismatched sets.
Match Lids to Containers
Next, match each container to a lid:
- Place containers in rows and try lids one by one until you find the correct fit.
- Check that lids seal properly and are not warped or cracked.
- Set aside any lids that do not fit a container and any containers that do not have a lid.
Once you are done, you should have three groups: complete sets, extra lids, and lidless containers.
Decide What to Do With Orphans
Orphan pieces are a major source of clutter. Use these guidelines:
- Keep one or two lidless containers only if they are perfect for washing produce or holding small items in drawers.
- Recycle or discard cracked, stained, or warped pieces that no longer seal well.
- Donate usable, complete sets you never reach for, especially if you have many duplicates.
Be honest about what you actually use. Fewer, better pieces are easier to organize and maintain.
Step 3: Decide How Many Containers You Really Need
Even if every container has a lid, too many pieces will overwhelm your space. Right-sizing your collection is key to keeping lids from getting lost again.
Consider Your Household and Habits
Ask yourself:
- How many people live in your home?
- How often do you cook and save leftovers?
- Do you pack lunches or snacks most days?
- How often do you freeze meals or ingredients?
For many households, a practical starting point is:
- 4 to 6 small containers for dips, dressings, and snacks
- 4 to 6 medium containers for single portions or sides
- 4 to 6 large containers for family-size leftovers or meal prep
Adjust up or down based on your routine and storage space.
Choose a Core Set and Let Go of the Rest
Pick your favorite containers based on how they stack, how well they seal, and how often you use them. Aim for a simple, repeatable set of shapes and sizes. Then:
- Keep multiples of the sizes you reach for daily.
- Limit specialty shapes that do not stack well.
- Let go of odd pieces that never seem to fit your meals.
The more consistent your collection, the easier it is to store and match lids quickly.
Step 4: Choose the Best Storage Zone
Where you store containers matters just as much as how you store them. The right location makes it easier to put things away correctly every time.
Pick a Convenient Spot
Ideal locations for food storage containers include:
- A lower cabinet near the dishwasher for easy unloading
- A deep drawer close to the sink and prep area
- A pantry shelf at waist or chest height
Try to avoid very high shelves that require a step stool. Containers are used daily, and you are more likely to maintain your system when it is easy to reach.
Match the System to the Space
Different spaces work better with different organizing methods:
- Deep lower cabinets: Use bins, baskets, or a pull-out organizer to prevent a jumbled pile.
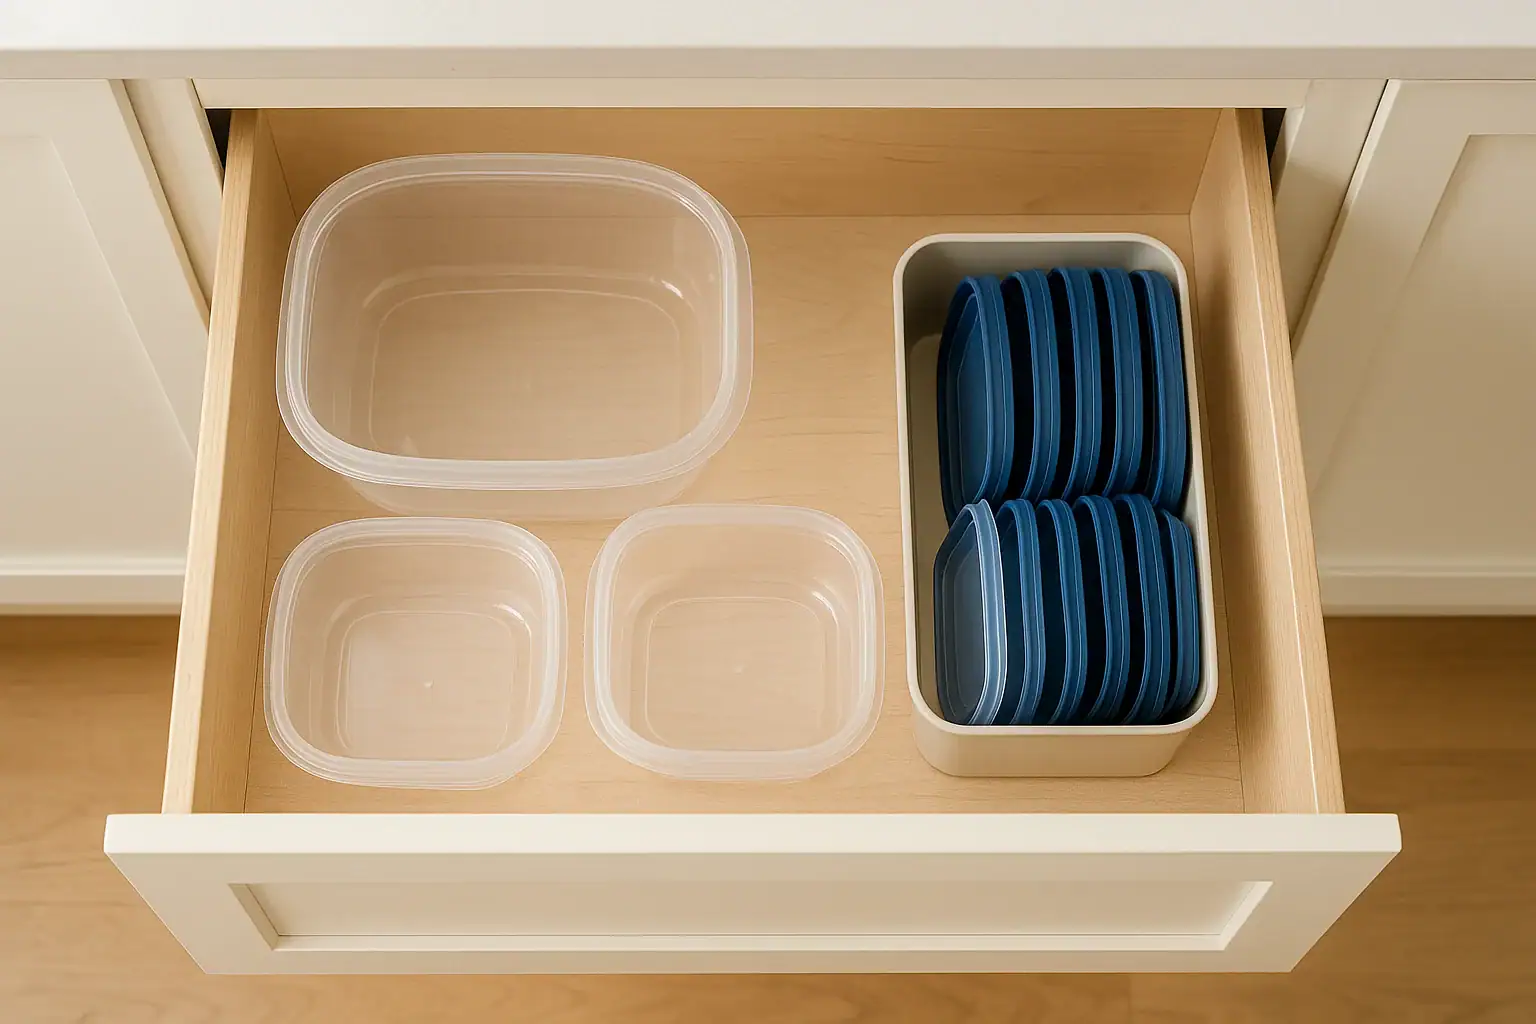
- Drawers: Stand lids upright and nest containers for a clear top view.
- Shallow shelves: Store containers in short stacks and keep lids in a low tray or file-style organizer.
Measure the height, width, and depth of your space before choosing any organizers so they fit well and do not waste space.
Step 5: Decide on a Lid Storage Strategy
The key to stopping lost lids is giving them a dedicated, consistent home. Choose one system and stick with it so everyone in the household knows where lids go.
Option 1: Store Lids Vertically
Vertical storage keeps lids visible and easy to grab. You can:
- Use a small bin or basket to hold lids upright like files.
- Place a rack or divider inside a drawer or cabinet to separate lid sizes.
- Sort lids by shape and then by size within each section.
Vertical storage works especially well in drawers and on pantry shelves.
Option 2: Store Lids Horizontally in Stacks
If your space is short and wide, stacking lids can be effective:
- Stack same-size lids together to keep piles stable.
- Use a shallow tray or baking pan to contain the stacks.
- Label the tray sections by size or use to make it easy to put lids back.
This method is simple and does not require special organizers, but be sure stacks are not too tall or they will topple.
Option 3: Attach Lids to Containers
Some people prefer to store containers with lids snapped on. This can be helpful if you have a small collection and plenty of cabinet space.
To make this work:
- Limit how many containers you own so they do not take over the cabinet.
- Stack same-size containers with lids on to save space.
- Use this method mainly for the sizes you reach for daily.
This approach nearly eliminates lost lids but can use more space than storing lids separately.
Step 6: Nest Containers to Save Space
Nesting containers is one of the most efficient ways to use cabinet or drawer space. Done well, it also makes it obvious where each piece belongs.
Group by Shape and Size
To nest containers effectively:
- Keep round containers together, square together, and rectangular together.
- Nest from largest at the bottom to smallest at the top.
- Avoid mixing shapes in the same stack, which creates wobbling piles.
Place each nested group in its own section of the cabinet or drawer so stacks stay stable.
Limit Stack Height
Very tall stacks are more likely to tip over and cause chaos. Aim for:
- Shorter stacks of 4 to 6 containers per size group.
- Two smaller stacks instead of one tall one if you have extra space.
- Heavier containers at the bottom and lighter ones at the top.
If you find yourself fighting a leaning tower every time you put something away, remove a few pieces or split the stack.
Step 7: Use Simple Organizers (Only If They Help)
You do not need complicated products to keep lids from getting lost, but a few simple tools can make a big difference, especially in deep or awkward cabinets.
Helpful Low-Cost Organizers
Consider using:
- Small bins or baskets: Great for corralling lids, snack-size containers, or kids’ lunch containers.
- File-style racks: Useful for standing lids upright in a drawer or on a shelf.
- Shallow trays: Keep stacked lids from sliding around and make it easy to pull out the whole group.
- Drawer dividers: Separate different sizes and shapes so they do not mix together.
Before buying anything, measure your space and sketch a quick layout. The best organizers are the ones that fit your exact cabinet or drawer.
Repurpose What You Already Have
You can often organize containers without buying anything new. Try:
- Using a loaf pan or baking dish as a lid tray.
- Repurposing a small basket or bin from another room.
- Standing lids between sturdy cutting boards or pans.
The goal is not to create a picture-perfect cabinet, but a system that is easy to maintain in real life.
Step 8: Label and Create Simple Rules
Labels and clear rules help everyone in the household understand how to put containers away correctly. This prevents your system from slowly falling apart.
Label by Size, Shape, or Use
Use removable labels, masking tape, or a label maker to mark:
- Sections for small, medium, and large containers
- Bins for round versus rectangular lids
- Zones for meal prep containers, leftovers, or kids’ lunch containers
Labels do not have to be fancy. Even simple handwritten labels can make a big difference in keeping everyone on the same page.
Set a Few Easy Rules
Share a few simple guidelines with your household, such as:
- Always match a container and lid before putting leftovers in the fridge.
- Return clean lids to the designated bin or rack right after washing.
- Do not add new containers without letting go of older ones.
- Keep only complete sets in the main container zone.
Post these rules inside the cabinet door if you like, especially while everyone is getting used to the new system.
Step 9: Maintain Your System With Quick Check-Ins
Even the best organizing system needs small tune-ups. The good news is that once you have decluttered and set up a clear structure, maintenance can be very quick.
Weekly One-Minute Reset
Once a week, take a minute to:
- Stand up any lids that have fallen over.
- Restack containers that are out of order.
- Pull out any damaged pieces that need to be recycled or tossed.
This small habit keeps clutter from building up and makes your system feel effortless.
Monthly Mini Declutter
Once a month or so, do a slightly deeper check:
- Match all lids and containers to confirm you still have complete sets.
- Remove any pieces that are stained, cracked, or rarely used.
- Revisit your collection if you notice stacks getting too tall or bins overflowing.
Treat your container zone like any other high-use area of your kitchen. Regular small efforts are easier than a big overhaul later.
Extra Tips for Different Kitchen Setups
Every kitchen is different, so it helps to adapt these ideas to your specific layout and lifestyle.
If You Have a Small Kitchen
- Limit yourself to one main type of container that nests tightly.
- Store rarely used sizes in a separate, higher cabinet.
- Use the inside of cabinet doors for slim lid racks if space allows.
If You Meal Prep Often
- Dedicate one bin or drawer section just for meal prep containers.
- Keep meal prep lids together and separate from everyday leftovers.
- Store frequently used sizes at the front and less-used ones in the back.
If You Have Young Kids
- Keep kid-friendly containers and lids on a low shelf they can reach.
- Use sturdy bins so kids can toss items in without ruining your system.
- Choose a few simple sizes and avoid too many options.
Bringing It All Together
Organizing food storage containers so lids stop getting lost is less about perfection and more about creating a simple, repeatable routine. By clearing everything out, matching sets, trimming down your collection, and giving lids a reliable home, you make it easy for everyone in your household to put things away the right way.
Choose a storage zone that fits your kitchen, nest containers by shape and size, and use basic bins or dividers to keep lids in order. Add a few labels and simple rules, and then maintain your system with quick weekly and monthly check-ins. Over time, you will spend less time hunting for lids and more time enjoying a calm, efficient kitchen that supports your daily cooking and meal prep.
If you want to take your kitchen organization even further, explore more ideas for streamlining cabinets, drawers, and pantry storage so every part of your space works just as smoothly as your newly organized container zone.
Recommended next:
Related posts
Browse this topic →
How to Clean an Induction Cooktop Without Scratches: Step-by-Step Guide
How to Tame Kitchen Countertop Clutter Zones for Coffee Prep and Drop Areas
Fridge Door Seal Test Checklist for Better Energy Use and Food Safety
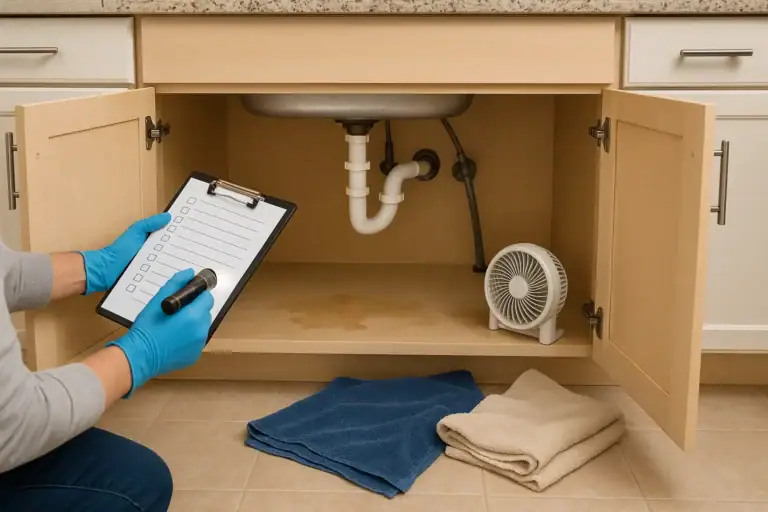
Under Sink Cabinet Water Damage: What To Check Before It Gets Worse
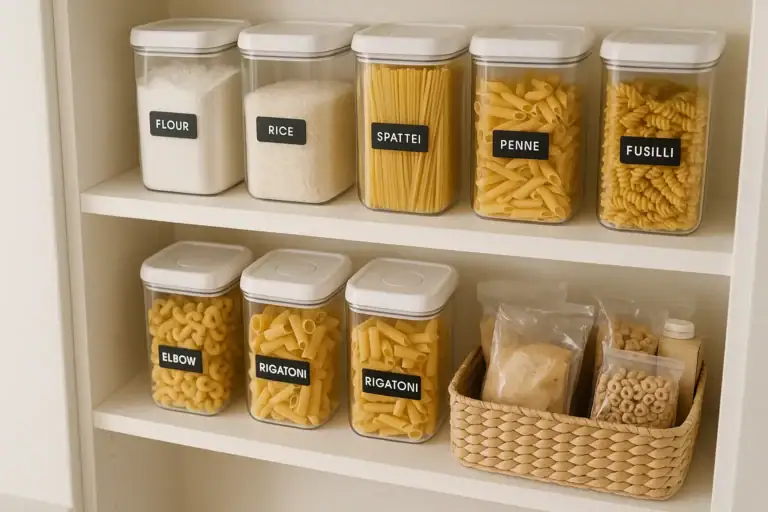
How to Store Flour, Rice, and Pasta to Prevent Pests at Home
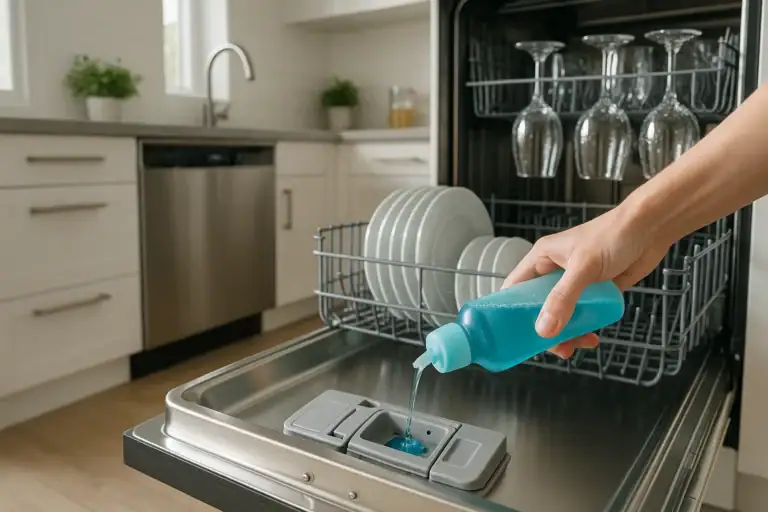
Dishwasher Rinse Aid Basics: What It Does and When It Actually Helps
Keep reading
About this site
Signature Home Guide publishes practical, independent home guides. We aim to be clear, helpful, and transparent.
Affiliate disclosure
As an Amazon Associate, we earn from qualifying purchases. Some links on this site may be affiliate links. If you buy through these links, we may earn a small commission at no extra cost to you. This helps support our content. Learn more.